Understanding Floor Sanding Costs: Key Factors and Pricing Insights
When considering floor sanding services, many clients hope for a straightforward answer, like £35 per square meter. However, determining the cost of floor sanding isn’t that simple due to several influencing factors, including project duration, material costs, and overall investment. Our general pricing policy carefully takes all these aspects into account, especially when it comes to wood floor sanding.
What’s Your Vision?
It’s essential to start with a clear idea of the desired outcome for your floor. Whether it’s a specific finish you’ve seen on Instagram or a style admired in a neighbour’s home, the variety of available finishes and products can be overwhelming. If you’re uncertain about what you want, that’s perfectly okay too. We will guide you through what’s available and, after a detailed discussion, provide bespoke advice tailored to your preferences and needs. Knowing what you want helps in guiding the decision-making process.
Balancing Durability and Aesthetics
Our objective might seem ambitious, but we aim for you to spend as little as possible while enjoying a durable and attractive floor. We prioritise quality and maintenance ease, primarily using Pallmann products—top-tier wood care and finishing products. These aren’t the cheapest options, but they’re worthwhile for those seeking beauty and longevity. If your budget is tight, we may not be the best fit. However, if you’re after a beautiful, high-quality finish, we should definitely talk. Our method statement for floor sanding outlines various finishing options, from basic clear coats to custom stains, highlighting why a simple per-square-meter pricing model doesn’t fit all scenarios. Just to help you get an idea, our full-service floor sanding starts at around £42 per m2.
Proudly Showcased on Social Media
We take pride in our work, eager to showcase completed floors on our social media platforms. More than just visually appealing, we focus on building long-term trust in our services and the quality brands we use. We ensure your flooring withstands the demands of a busy household—be it pets or kids—by setting you up with DIY maintenance reminders tailored to your chosen finish. This approach not only extends the life of your floors but also eliminates the need for further significant investments. Remember, regular maintenance is crucial for lasting beauty and durability.
Oil or Lacquer – Which Floor Finish Suits You Best?
In the world of floor finishes, the choice often boils down to oil-based versus water-based lacquer. Both options come with unique benefits, tailored to different preferences and needs. This blog explores these differences, guiding you to the ideal choice for your floor.
The Aesthetic Factor: A Personal Decision
The look of your floor is a personal statement. While oil-based finishes offer a deep, natural charm, enhancing the wood’s grain and character, water-based lacquers provide a modern, sleek appearance. It’s not about labelling one as better than the other; it’s about what resonates with you.
Performance: Quality Matters
When it comes to performance, the brand and quality of the finish play a crucial role. High-quality brands like Pallmann ensure that whichever finish you choose, you’re picking a winner.
Water-Based Lacquers: Balancing Performance and Aesthetics
Water-based lacquers are evolving in the world of floor finishes, offering a delicate balance between durability and aesthetic appeal. Unlike the older alcohol-based lacquers, modern water-based options have significantly improved in both performance and appearance.
Application Process: Precision and Patience
The application of water-based lacquers requires attention to detail and time. Typically, it involves a coat of primer followed by two coats of lacquer. This process demands patience, especially in occupied spaces, as each coat needs sufficient drying time. It’s not just about applying the finish; it’s about allowing each layer to properly settle and cure for optimal results.
Misconceptions and Realities
There’s a common misconception that water-based lacquers dry quickly and leave a plastic sheen. However, this isn’t the case with newer formulations. These lacquers have been refined to provide a finish that’s both hardy and visually appealing. The key is in the application – too many layers or overly thick coats can lead to an undesired plastic-like appearance.
The Hardness-Elasticity Spectrum
In the realm of lacquers, it’s not just about achieving maximum hardness. What’s crucial is finding the perfect harmony between hardness and elasticity. Imagine a glass floor – incredibly hard but prone to shattering. On the other hand, a cartoon-like material might never break but will dent with ease. Water-based lacquers aim to hit that sweet spot: resilient enough to resist dents and scratches, yet flexible enough to absorb impacts without cracking.
The Verdict on Water-Based Lacquers
In conclusion, water-based lacquers are a testament to the advancements in flooring technology, offering a solution that is both durable and elegant. Their application might require more time and care, but the end result is a floor finish that strikes a beautiful balance between toughness and visual appeal. When applied correctly, they provide a finish that enhances the natural beauty of the wood without the drawbacks of older lacquer formulations. Aftercare is crucial to increase the life span of your lacquer floor.
Oil Finishes: Enhancing Wood’s Natural Beauty with Precision
Oil finishing is more than just a floor treatment; it’s an art that accentuates the natural allure of wood. Recognized as a premium service, it demands exceptional sanding quality, as the oil not only enhances the wood’s beauty but also magnifies any imperfections in the sanding process.
The Mastery of Application
At the heart of our approach is the use of two-component oils, ensuring a finish that is not just visually stunning but also remarkably durable. The philosophy behind oil finishes is longevity; with proper maintenance, it’s conceivable that your floors may never need sanding again. This aspect makes oil finishing an attractive choice, even more so for smaller projects.
The Efficiency in Smaller Jobs
In contrast to lacquer finishes that require idle time between coats, oil application is more streamlined. This efficiency is particularly advantageous in smaller jobs, where the entire floor can be saturated with oil in a single, continuous process. The lack of downtime between applications significantly speeds up the completion.
Essential Steps for Flawless Finish
Before applying the oil, the floor must undergo a water-popping process. This crucial step ensures even absorption across the entire surface. The first coat of oil is allowed to rest on the wood for approximately 15 minutes, promoting deep penetration. A subsequent coat ensures the wood is fully saturated. Any surplus oil is then meticulously wiped off, leaving a perfectly even finish.
Flexibility and Adaptability
One of the unique advantages of an oil finish is its adaptability. Should your style preferences change over time, transforming an oiled floor to a lacquered one is achievable with the use of a specialized bonding agent. However, it’s important to note that the reverse—from lacquer to oil—is not as straightforward and typically requires full sanding.
Embracing the Essence of Wood
Opting for an oil finish is not just choosing a flooring treatment; it’s embracing the essence of the wood itself. It’s a commitment to preserving and enhancing the natural character of your floors, ensuring they remain a timeless and cherished feature of your home.
Environmental Considerations
The shift towards environmentally friendly products is evident in the flooring industry. Water-based lacquers, especially low-VOC options like Pall-X Zero, are leading this change, offering sustainable beauty without compromising quality.
Oil or Lacquer: The Verdict
The decision boils down to personal preference and lifestyle. If a natural, warm look is what you seek, oil finishes are your ally. For a sleek look, water-based lacquer is the way to go. Professional application is key to achieving the best results regardless of your choice.
From Our Experience
As Parkettprofi contractors, we believe in the timeless beauty of oiled floors. They age gracefully, telling stories of the life lived upon them. It’s an eco-friendly choice, minimizing the need for new wood and embracing imperfections as part of the floor’s character.
Final Thoughts
Choosing the right floor finish is more than just a functional decision; it reflects your style and values. Whether it’s the natural elegance of oil or the practical beauty of lacquer, the best choice is the one that makes you feel at home.
Contact us at 0203 8076 330 or visit our website to explore how we can transform your floors. Let us help you make a choice that you’ll cherish for years to come.
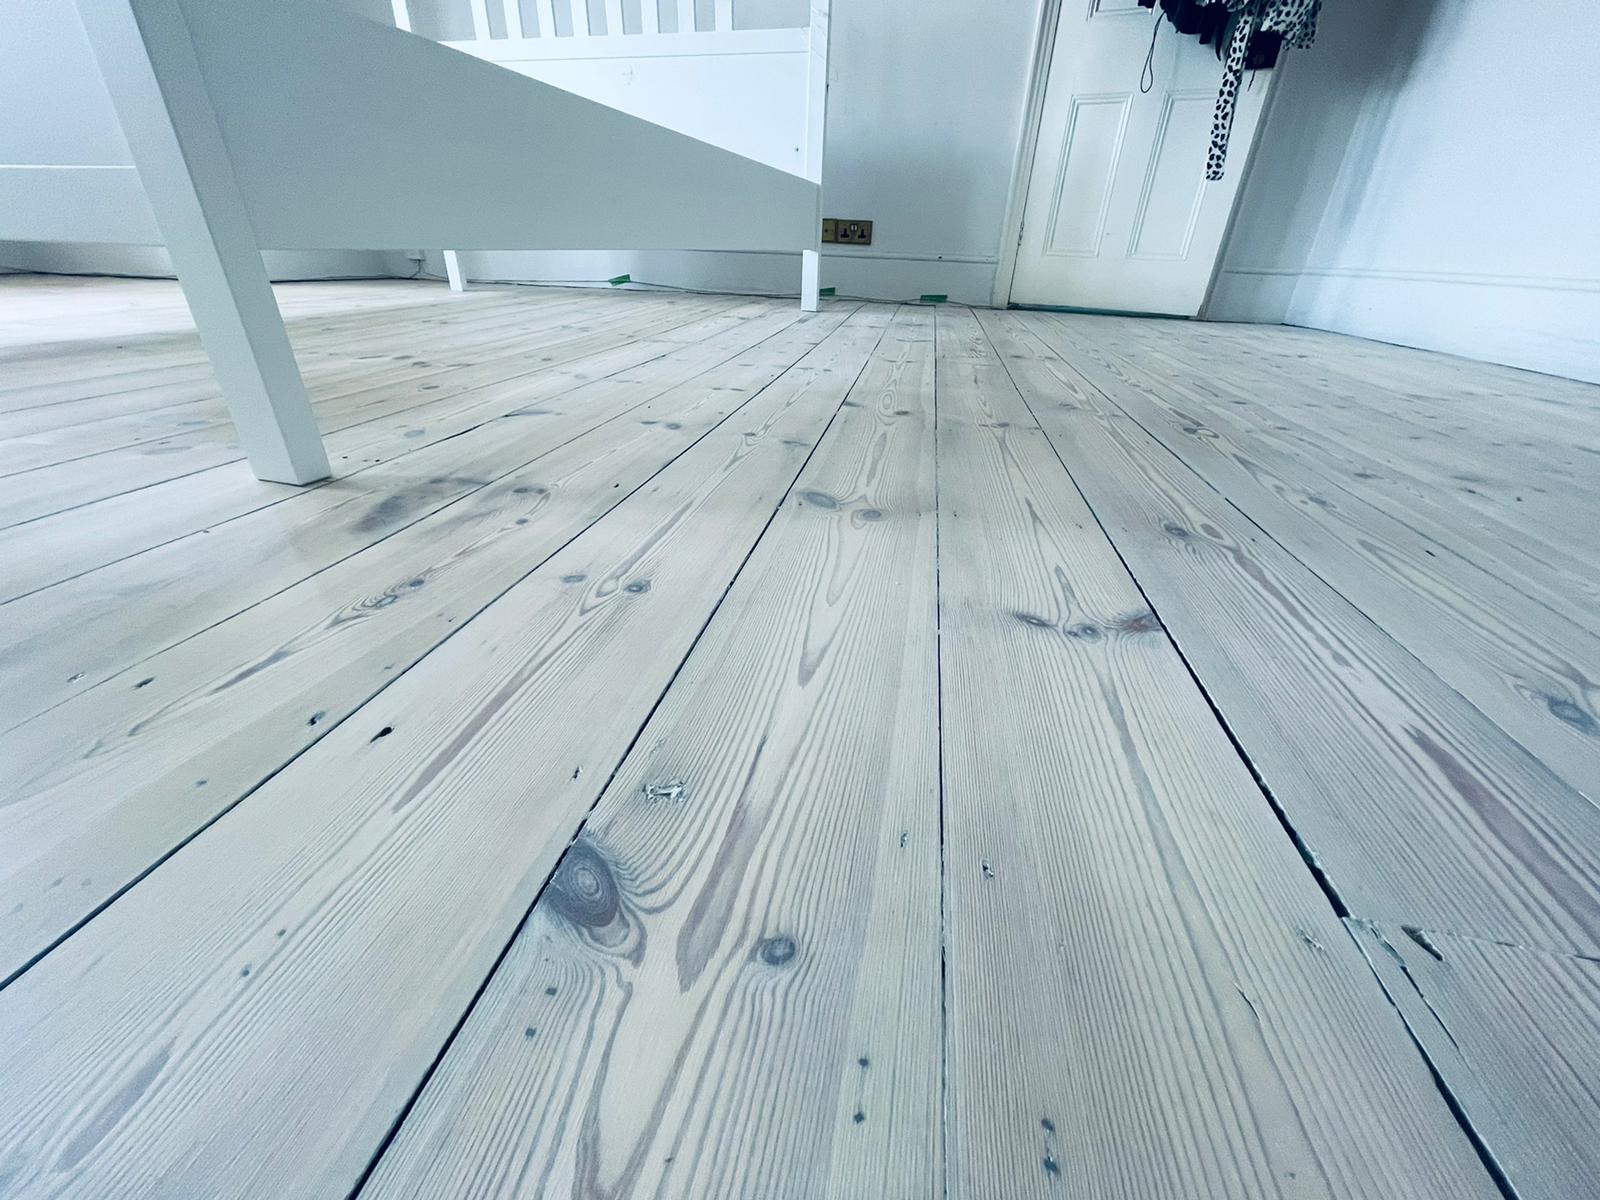
Whitewashed wood floor – how to achieve a Scandinavian look?
There is a certain charm to whitewashed Scandinavian wood floors that have been capturing the hearts of homeowners for centuries. While the look is timeless, achieving it can be a little tricky. In this blog post, we will discuss the difference between the traditional Scandinavian whitewash technique and more modern methods. We will also talk about how to maintain your wood floor once you have achieved the desired look, and whether soap or sealant is the best option.
What is the Scandinavian look?
If you are considering whitewashing your wood floor, it is important to understand the difference between the traditional Scandinavian method and more modern techniques. The original approach uses a mixture of lime and water, which is applied to the floor with a brush. This method is not as durable as more modern approaches, and it will require more frequent maintenance. Do expect to re-soap your floors every 2 weeks.
Modern approach for white wash effect
Nowadays, there are many different products on the market that can be used to whitewash your wood floor. Pallmann offers a wide range of high-quality sealants that can be used to achieve the desired look. When choosing a product, it is important to consider how often you will need to refresh your floor. For example, if you have a busy household, you may need to re-oil your floor more often than if you live alone.
How to protect your whitewashed wood floor – Oil or Lacquer?
My personal opinion and the best advice to keep a whitewashed wood floor is to lock white pigment under 2 coats of 2k lacquer with additional white pigment built-in. Maintaining the white finish with this option is so much easier. You could decide on 2k white or pure oil which should be all right for light traffic areas like bedrooms.
Once you have chosen the right product for your needs, it is important to follow the instructions carefully. After the full sanding process of your floor, applying too much sealant or soap can damage your wood floor, so it is important to apply the product evenly and in thin layers. Once you have achieved the desired look, it is important to maintain your wood floor properly. Regular sweeping and mopping will help to remove dirt and debris, and Pallmann offers a wide range of cleaning products specifically designed for use on sealed floors.
Conclusion
So, there you have it! Whitewashing your wood floor is a great way to achieve the sought-after Scandinavian look. With a little bit of planning and the right products, you can achieve a beautiful finish that will last for years to come. Thanks for reading!
Do you have any questions about whitewashing your wood floor? Get in touch with us and we will be happy to help!
If you enjoyed this blog post, be sure to check out our other posts on home improvement and decorating ideas! We are always updating our blog with new content, so be sure to check back often! Thanks for reading!
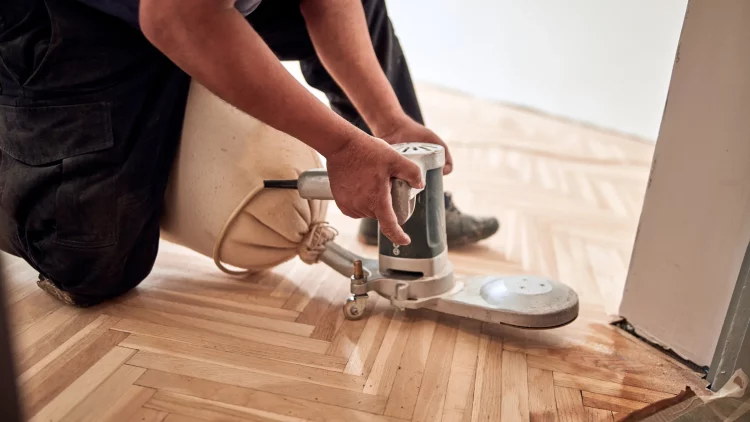
Dust-free floor sanding stands for its name. Floor sanding is not dusty anymore! It used to be years ago. The development in equipment and Health & Safety Laws evolved and as a result, it formed dust-free floor sanding procedures.
Skill & Knowledge
Knowledge is the key to everything. If unskilled technicians work with good equipment the results are going to be average, which we assume is not what you are looking for. We use state of the art equipment which minimises the amount of dust protecting you, your family and the technicians. Along with high-quality equipment, we have vacuums with HEPA filters connected to the equipment to minimise the amount of dust in the air. All of your floor sanding technicians are Pallmann Parkettprofi approved and have completed at least one Ultimate Floor Sanding Company Training.
Wood dust can hurt your lungs
Wood dust particles can be very fine and due to that fact, they may stay airborne for a very long time. You might have experienced a similar situation when you had some building work at your home. The building dust can stay airborne for even a month if not longer. You don’t want that dust to be in your lungs and your loved ones, do you?
You may think that you will be just fine with so little exposure and you might be actually wrong. Devil is in the details! It is a one-time exposure for you. Our technicians do it every day and in the long run for them, it may be critical. So, please protect yourself and others by choosing a dust-free system and make sure the technicians involved in the job are well trained and educated in this matter.
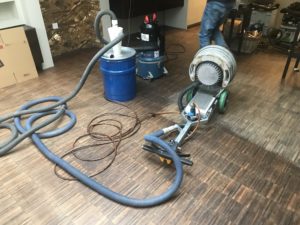
Our dust-free floor sanding equipment
Is it 100% Dust Free Sanding?
Although we do our best to prevent any dust in the air, it is not possible yet to remove all of it. Especially when working on the edges and stairs. Our floor sanding system is good enough to work in the commercial environment without any additional protection. We have done some work in high-end shops with the shoes on the shelves. Time limitations and deadlines didn’t really allow us to protect everything, as it was not necessary at all.
We are simply honest with you. We do not try to oversell the greatness of our system and promise you something which is not achievable. Please expect that some of the cleaning work might have to be done after the project, but it is not a massive amount. It can easily fit into your general cleaning schedule and doesn’t require any extra amount of specialised work. If you prefer, we can put you in touch with some cleaning companies in the area as we have a good network with local businesses.
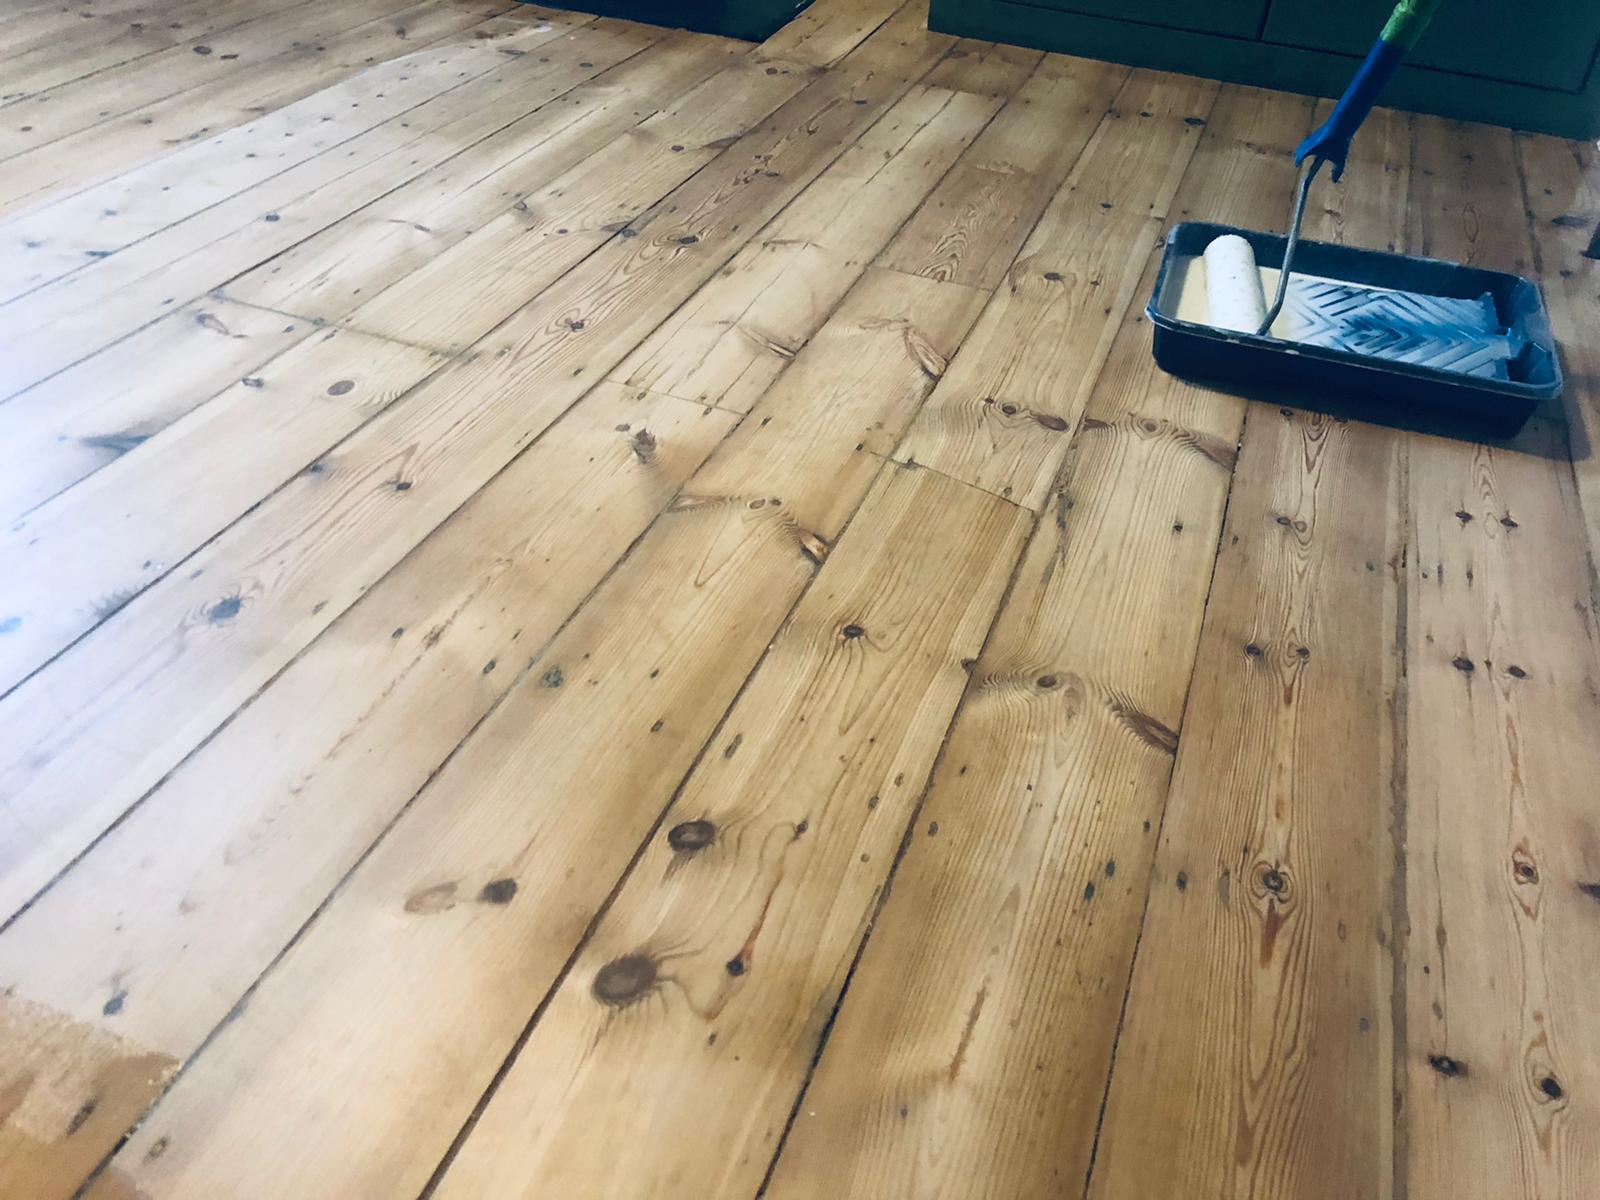
Floorboard sanding has gained significant attention in households across the UK in recent times. Intrigued by this trend, I’ve delved into the intricacies of this transformative process.
The charm of wooden floors graces numerous residences throughout the UK. Often hidden beneath carpets or other coverings, these floors harbor untapped potential waiting to be uncovered.
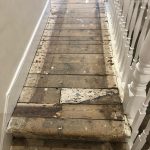
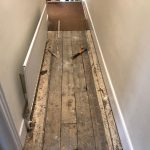
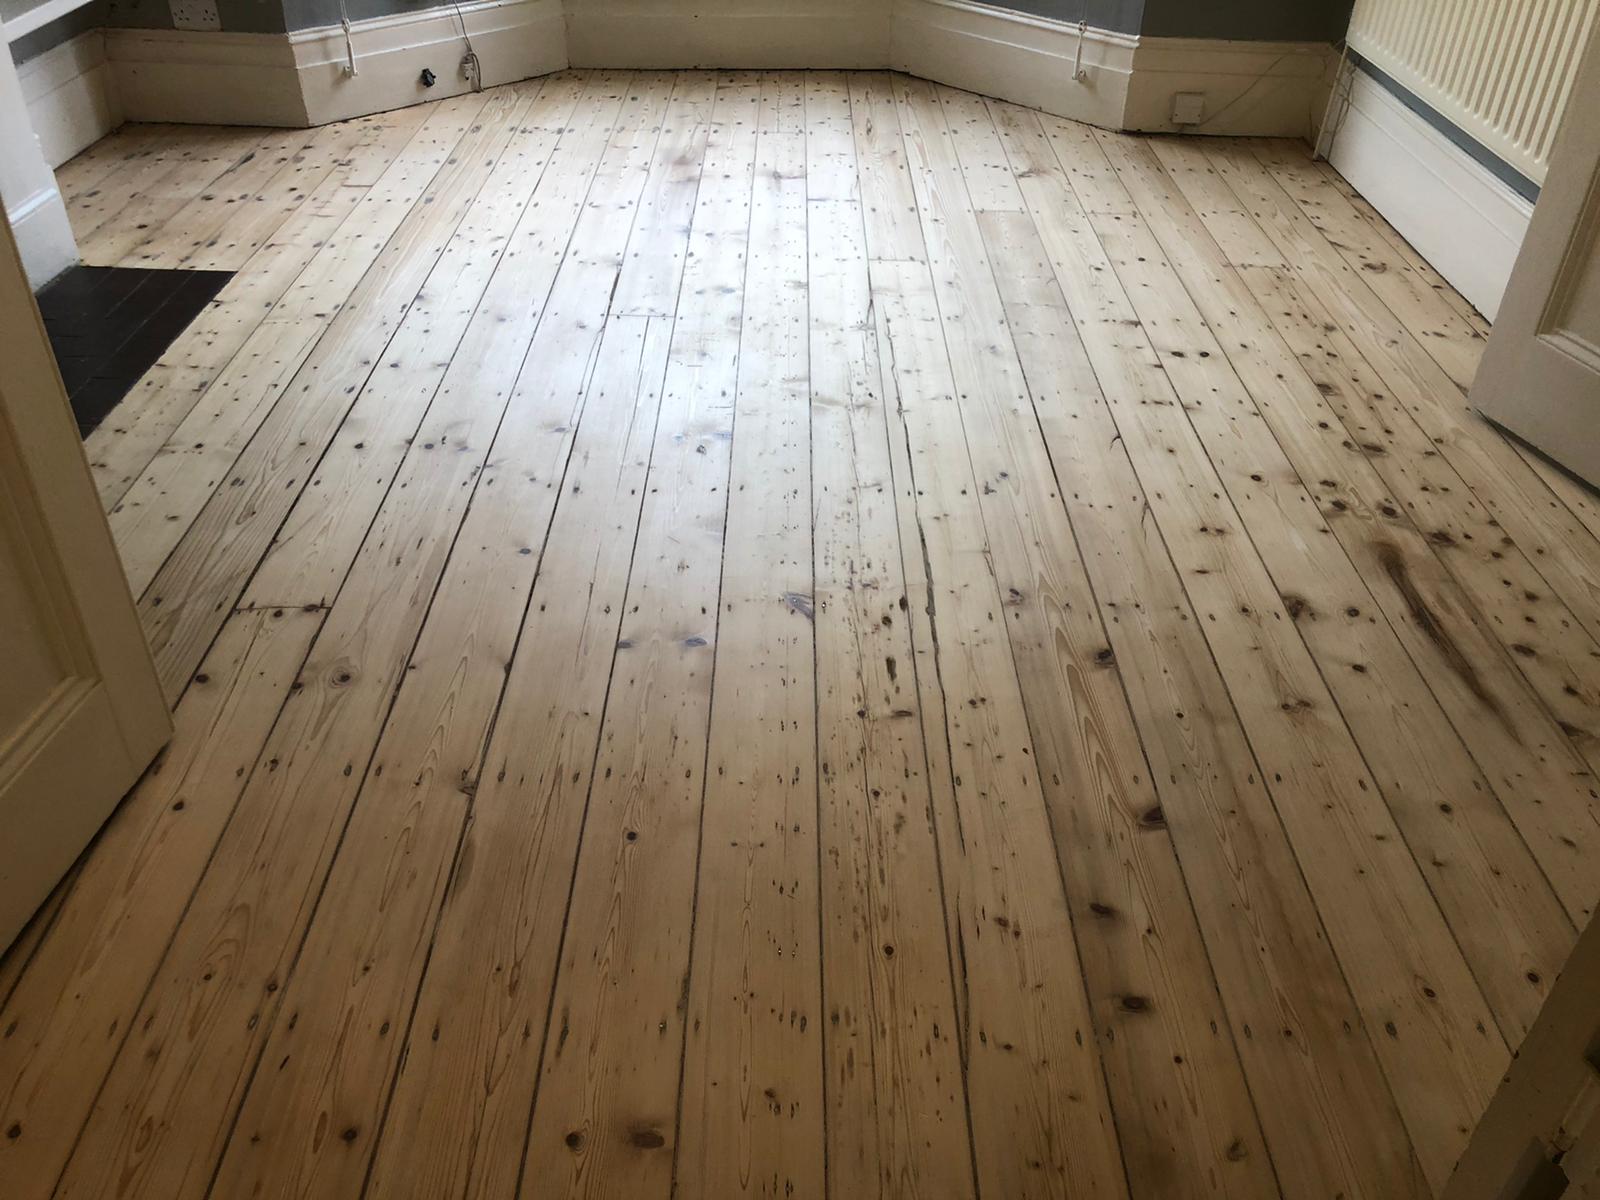
When carpets are lifted, the typical appearance of a floor is as follows:
Floorboards sanding difficulties
Uneven floorboard covered in residue.
Sanding pine floorboards presents a challenging task. These surfaces often feature adhesives, nails, screws, staples, and more. Additionally, they can be uneven and marred by various factors like woodworms, plumbers, and electricians. The initial step in floorboard sanding involves levelling the floor and streamlining subsequent sanding phases for improved results. This phase can demand significant time and material resources.
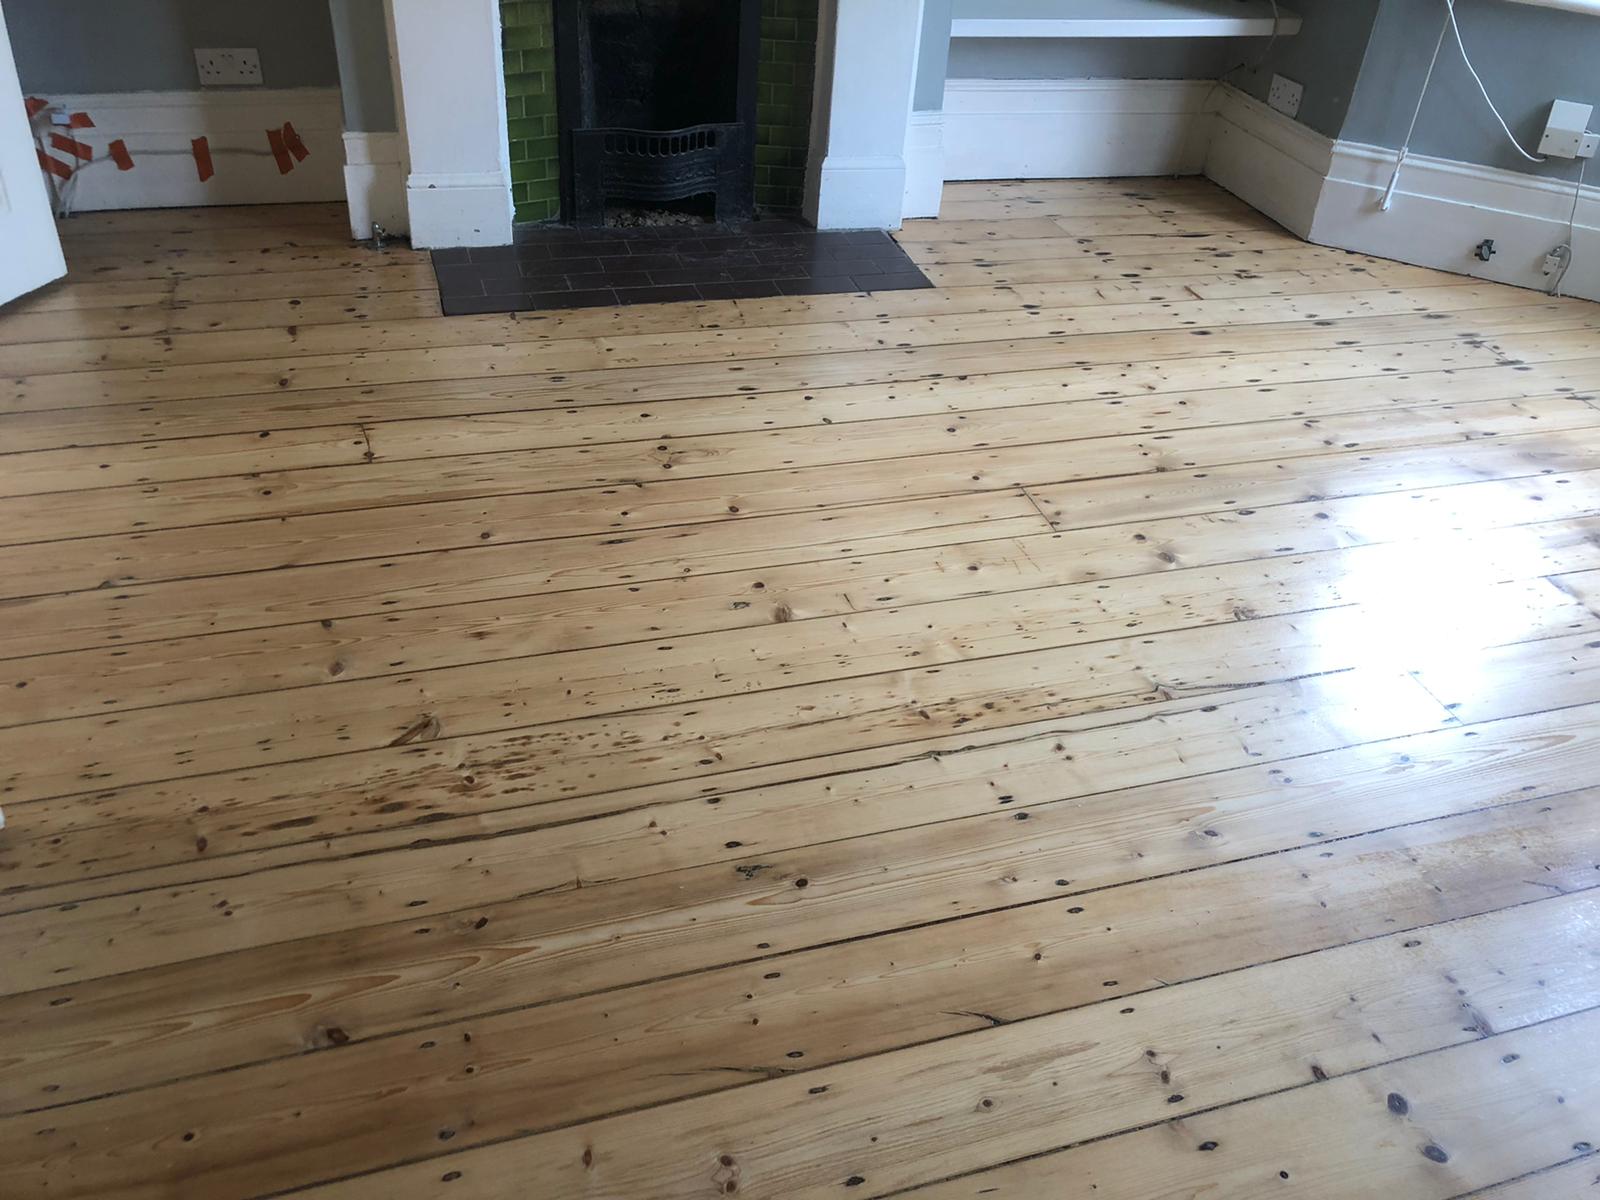
The floorboards are softwood.
As a softwood, pine necessitates a higher quantity of sanding paper compared to hardwoods like oak. Its softer nature leads to quicker paper clogging. Consequently, attaining a refined, smooth finish during the sanding and finishing stages is more challenging, resulting in a lengthier project completion timeframe.
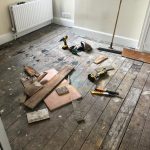
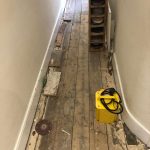
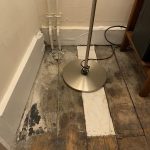
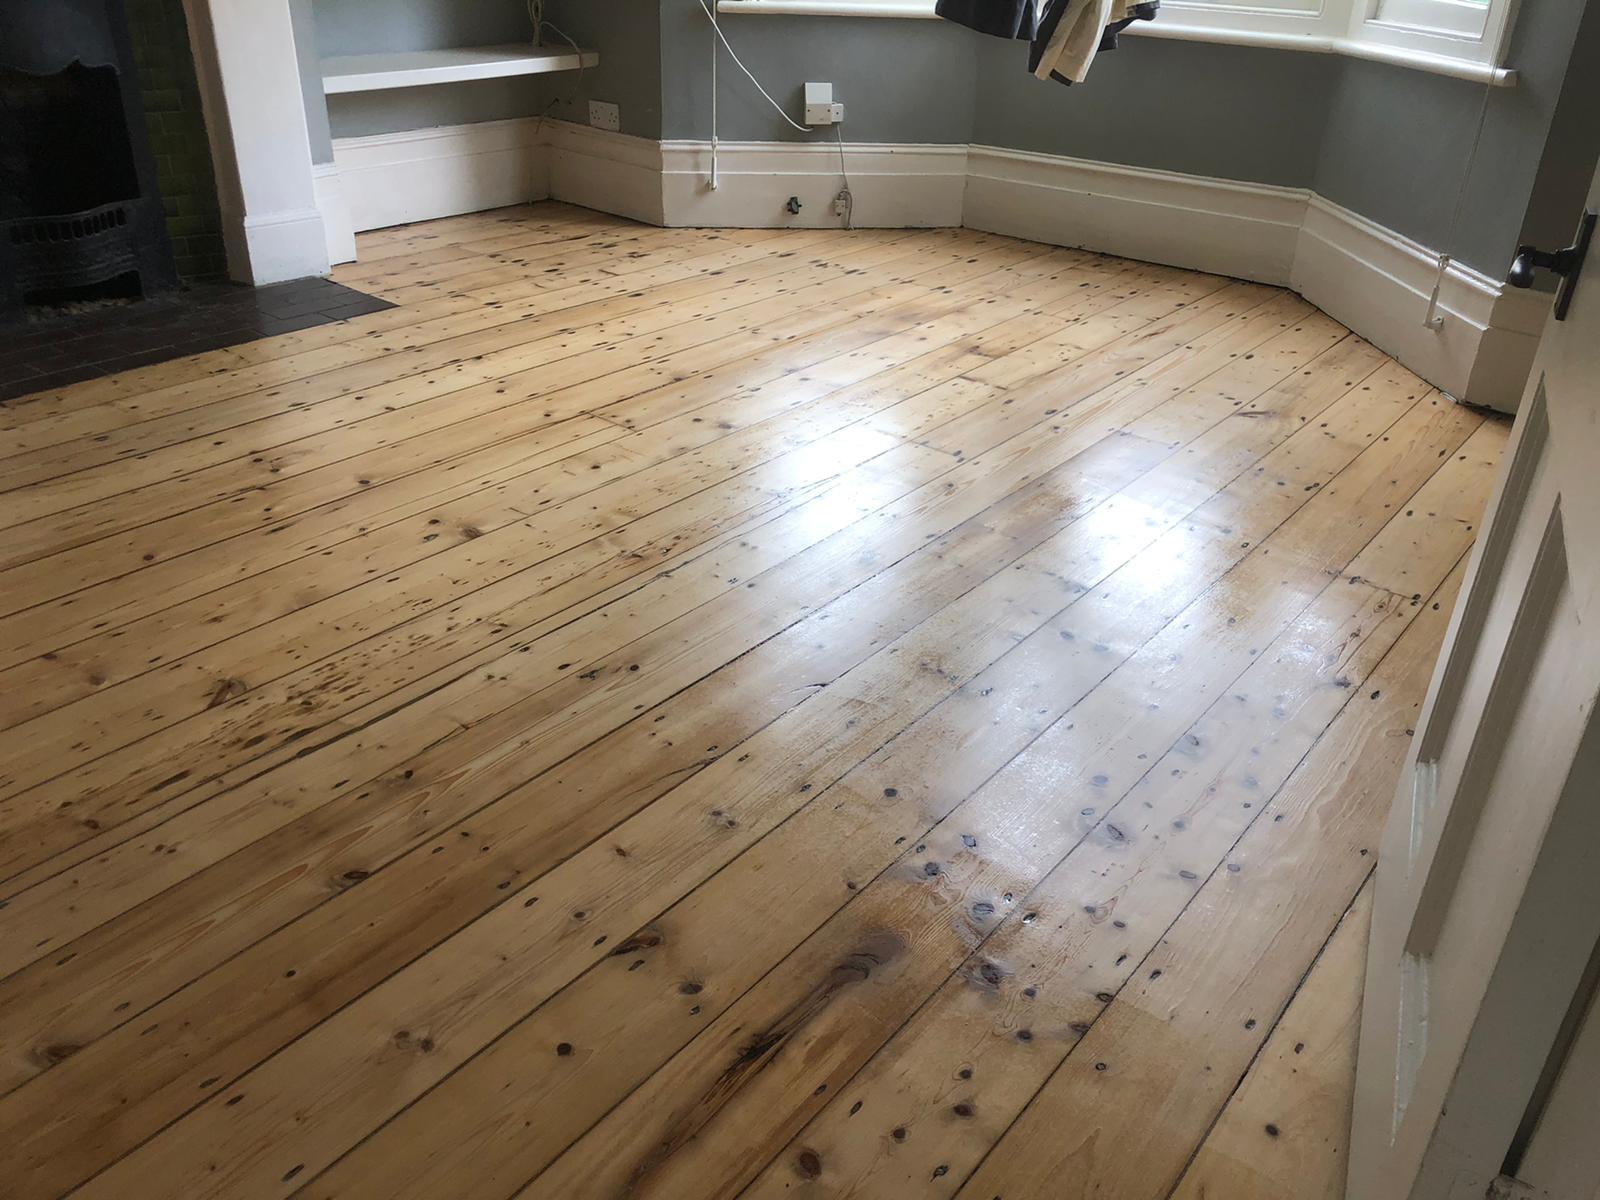
Repairing the floorboards.
Frequently, floorboard sanding projects entail necessary repairs. The challenge lies in the fact that acquiring new pine boards would result in a noticeable disparity when compared to your century-old planks. Instead, opting for reclaimed pine timber of similar age, thickness, and width is crucial. While sources for such timber exist, their availability can be elusive, demanding a dose of patience – perhaps even some yoga or meditation :).
Repair work might encompass board replacement, hole filling, and joist building or replacement. Numerous concealed issues may remain undisclosed during the initial quote visit, often surfacing after repairs commence or heavy machinery is applied to the floor. Restoring old pine floors demands a degree of tolerance. In essence, they were never intended to serve as final flooring but rather subfloors. Even after meticulous repair work, new issues may manifest over time. It’s vital to recognize that these aren’t shortcomings of the repair process, but rather a consequence of the floor’s unknown history and what lies beneath.
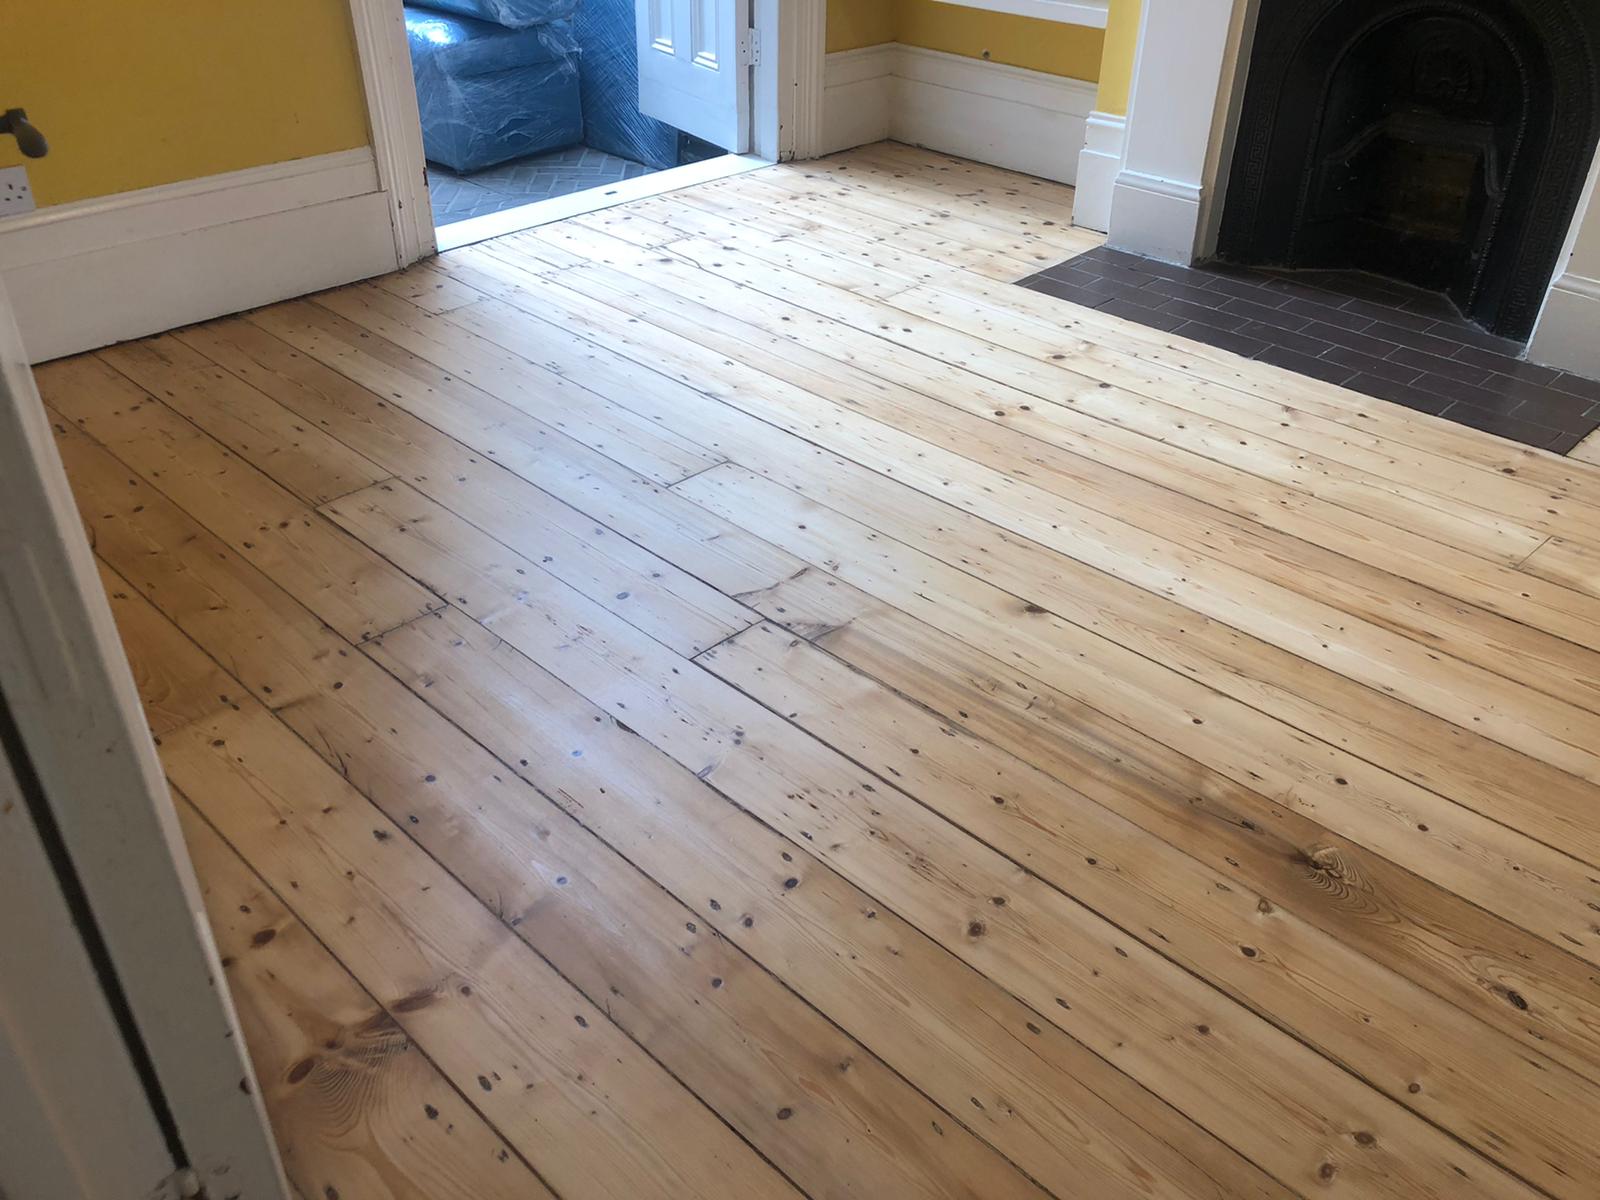
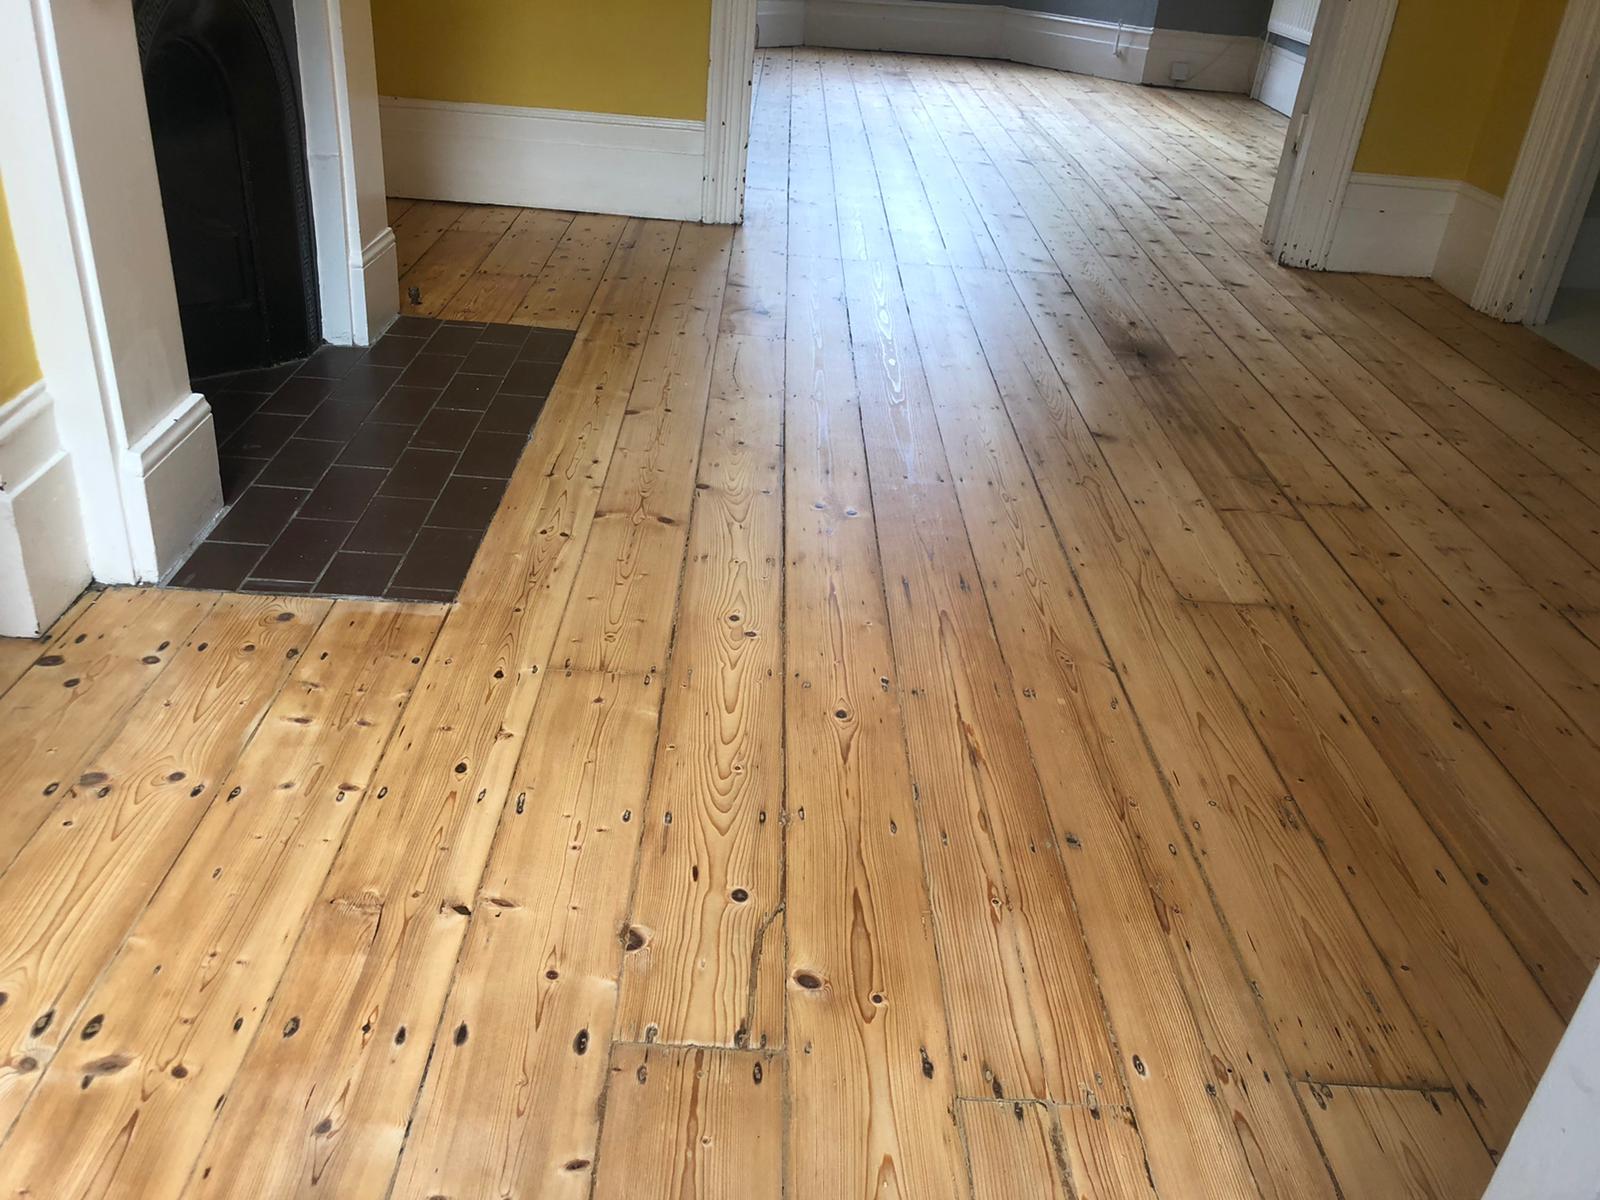
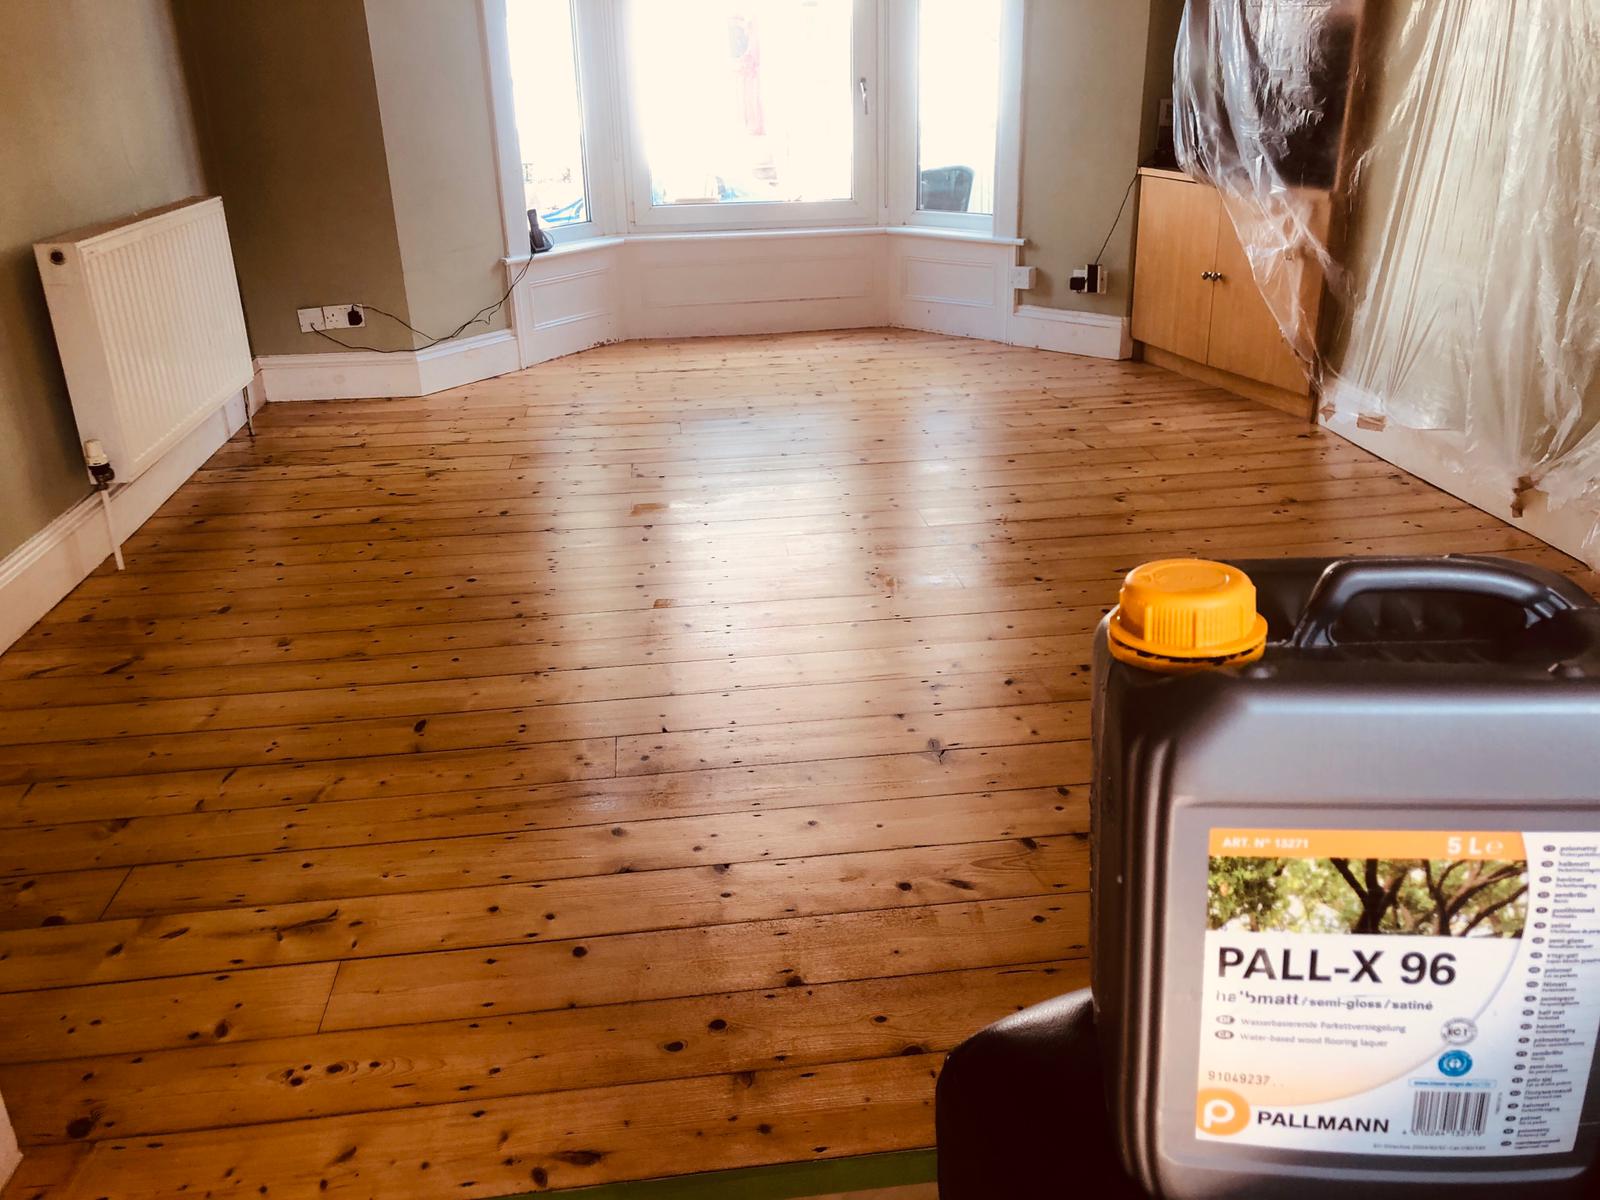
The most common finish of the pine floor is just a natural look, however, if you like it stained, I personally think that the reactive stains from Ciranova look best on pine. Have a look at the Ciranova range here-click, and scroll down to reactive stains. It can be finished with either oil or lacquer. Although the easiest and the cheapest to work with are solvent-based stains like Morrells. You can also use an oil-based stain like Pall-X 333 range if there aren’t too many imperfections on the floor and the gaps are filled.
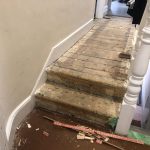
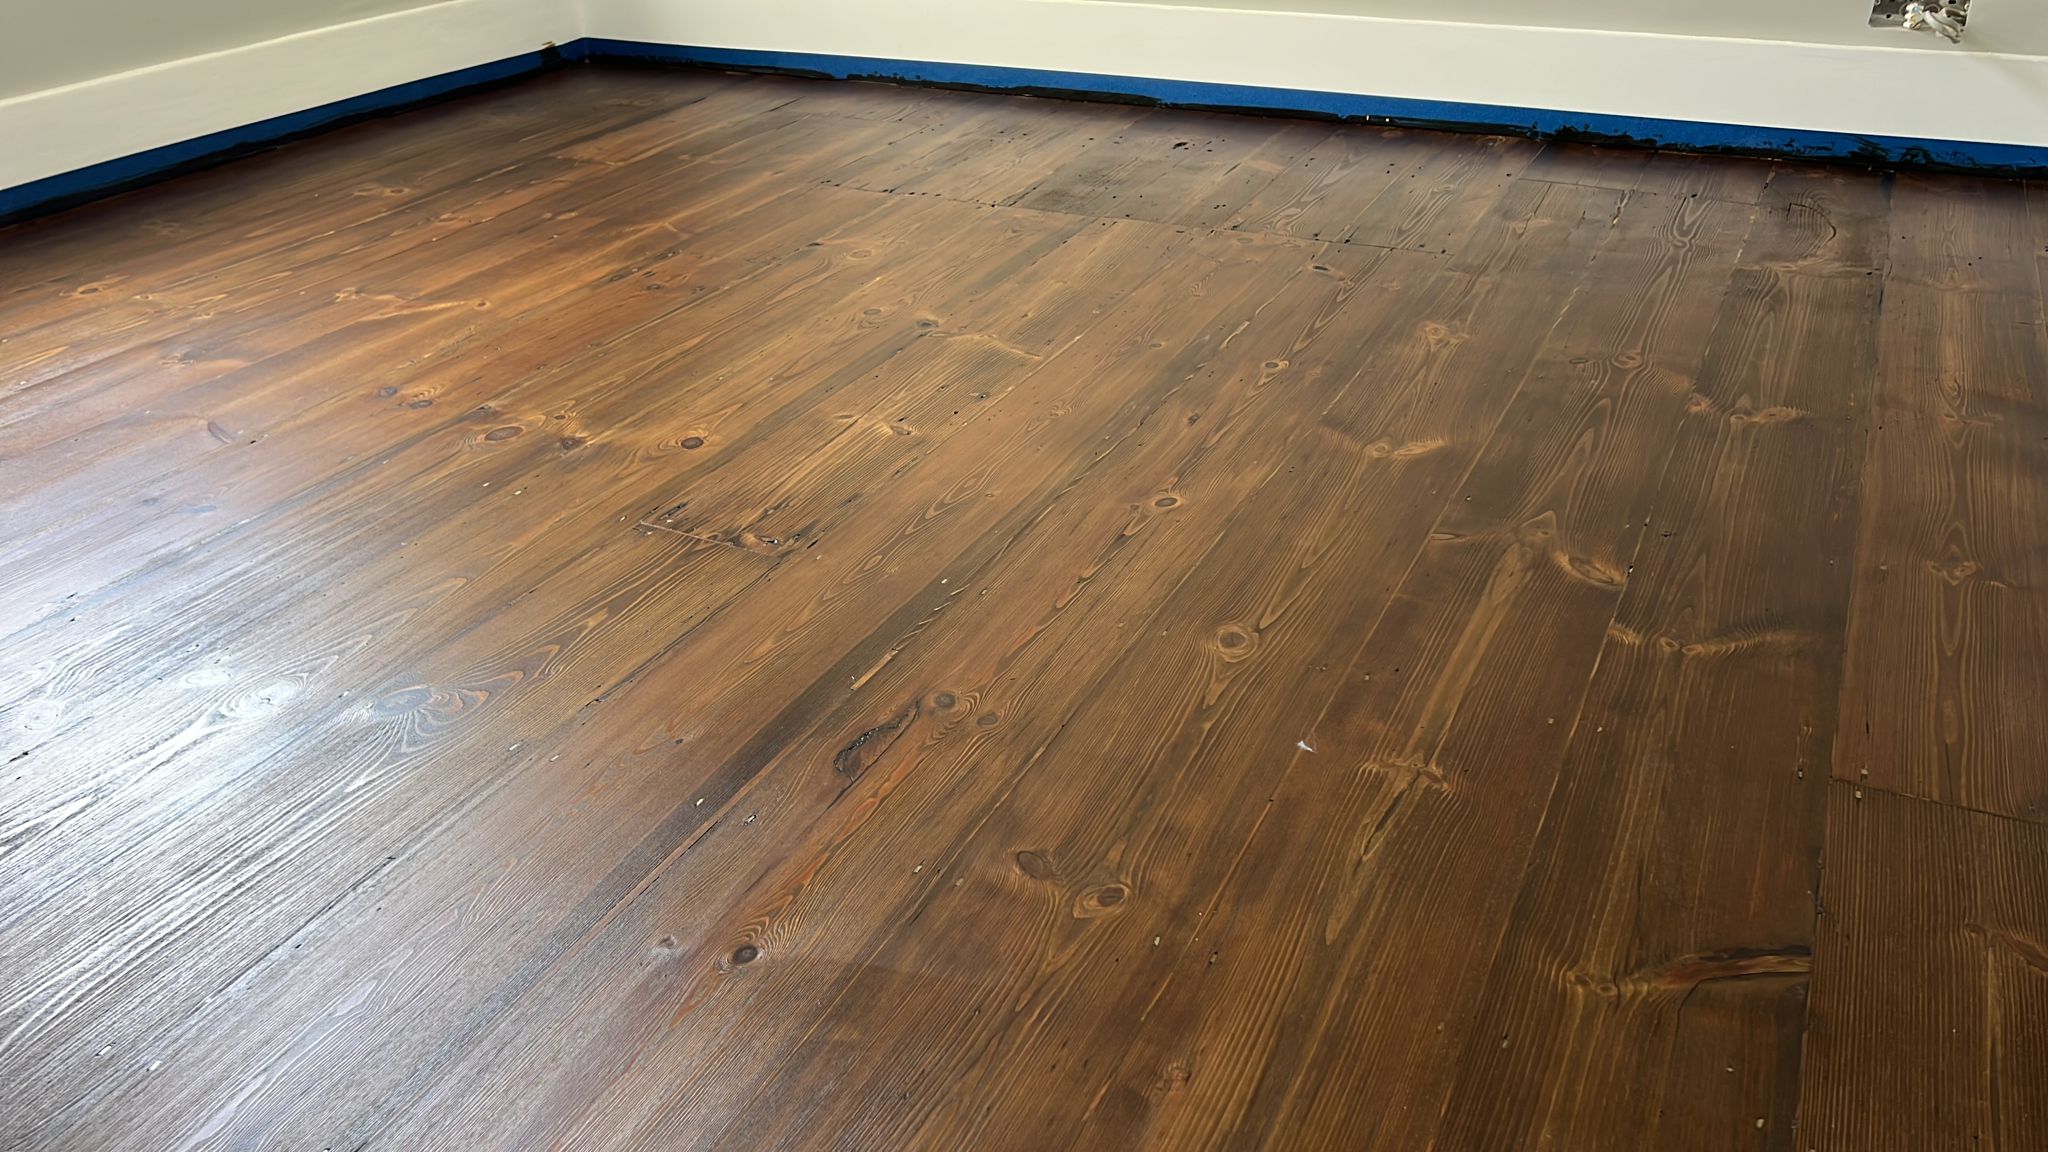
Some examples of our work
Pricing floorboard sanding work
Clearly, this task isn’t a simple endeavour, making it challenging to predict every potential obstacle during the floorboard restoration process. Frequently, the floor is concealed beneath carpets, rendering the underlying condition invisible. While carpets are in place, we can provide a preliminary assessment, but please note that we won’t account for floorboard repairs at this stage.
Upon carpet removal, we can thoroughly evaluate the scope of work required and then furnish you with a more accurate quote for your wooden floor’s rejuvenation. Our preference for completing the project involves utilizing top-tier products from Pallmann to achieve a high-quality finish.
Taking care of your oiled floors is a breeze. Magic Oil, suitable for both residential and commercial environments, brings out the natural beauty of your floor while providing protection against spills and stains. Unlike lacquered floors, scratches on oiled floors add character, and patch repairs are possible. Here’s how to maintain your oiled floor:
Act promptly: Clean up spills and stains immediately to prevent long-term damage. Even the toughest finishes have limits.
Regular cleaning: Use a neutral floor cleaner recommended by the manufacturer to clean your floors regularly. Follow the instructions provided in the datasheets.
Extra protection: Periodically, apply magic oil care for an additional layer of protection. Note that spills should still be cleaned up promptly.
Cleaning process: Start by removing dry soil by vacuuming or sweeping. Then, use a high-quality microfiber mop to apply the diluted product and mop the floor. Allow the floor to dry, which should take no longer than 10 minutes.
Why oil in the first place?
Is lacquer better than oil? In the long run, the answer is no. While lacquer may offer slightly better protection initially, it requires full restoration when worn and doesn’t age gracefully. Oiled floors, on the other hand, develop character with scratches. The choice between lacquer and oil also depends on the desired sheen, with lacquer offering a shinier appearance.
It reveals the natural beauty of your floor & brings the grains up and makes your floor look more natural
It also seals the floor & protects it from spills and stains
Scratches on oiled floors add character and become less obvious with maintenance while on lacquered it makes the floor look ugly
A damaged oil floor can be patch repaired while lacquered has to be fully sanded off and redone
It’s worth noting that oil is not suitable for every type of wood, such as bamboo timber.
In terms of health, magic oil is one of the most natural and healthiest products available. It’s a step above having no finish at all, which is not as durable.
How to look after your oiled floor?
While there is no foolproof finish for your floors, it’s important to clean up spills and stains promptly. Just like bulletproof vests are not 100% bulletproof, no floor finish is completely impervious. Regular cleaning with a neutral floor cleaner is recommended, following the manufacturer’s instructions provided in the datasheets.
For added protection, you can use magic oil care periodically. This thin film finish provides an extra layer of defence for your floor. However, it’s crucial to remember that spills should still be cleaned up as soon as possible, regardless of the additional protection.
The frequency of using magic oil care depends on factors like traffic, daily/weekly usage, and maintenance. Areas with higher footfall, such as the kitchen, may require more attention compared to less frequented spaces like the bedroom. Assess the condition of your floor and adjust the usage of magic oil care accordingly.
By practising regular maintenance and attending to spills promptly, you can keep your oiled floors in great shape and ensure their longevity.
How do I clean my oiled floor?
First, remove the dry soil. Either by vacuuming or sweeping.
We recommend that you use a flat, microfibre, good-quality mop.
Spray some diluted Neutral cleaner like Pallmann Clean Neutral on the floor and then mop it, leaving the floor to dry.
Drying times should not take longer than 10 minutes.
You may use Magic Oil Care undiluted or diluted 1:2 with water for extra protection
Leave 1h before walking
You can purchase all the needed products recommended by us.
Just click on the links below and add them to the cart.
In terms of health, Magic Oil is one of the most natural and healthiest products available. It’s a step above having no finish at all, which is not as durable.
I hope this gives you all the information you need to look after your floor. If you have any other concerns please do not hesitate to ask the question. Just send us an email at . We may not know the answer, but we are very keen on educating ourselves all the time.
Where does it come from and what is the use of it?
Teak floor sanding – getting some information is a great place to start. Little about teak wood first. Teak is a tropical hardwood with very distinct fragrant compared to other timbers. Although, it is very dangerous to work with as dust from sanding may cause a heart attack. If your heart is not in great condition. Due to this fact masks are advisable for those with weak hearts.
Durability and water-resistant is the biggest value of this timber so it is used for boat building, outside construction, outdoor furniture and of course floor coverings. East and south-east Asia create a great environment for the teak forest, so these are native regions for this timber, mainly India. Teak trees grow up to 40m high. Heartwood is much darker than sapwood so it can give us big variations on colour.
This is the largest leaving Teak tree which is 47m in height.
Plan vs reality
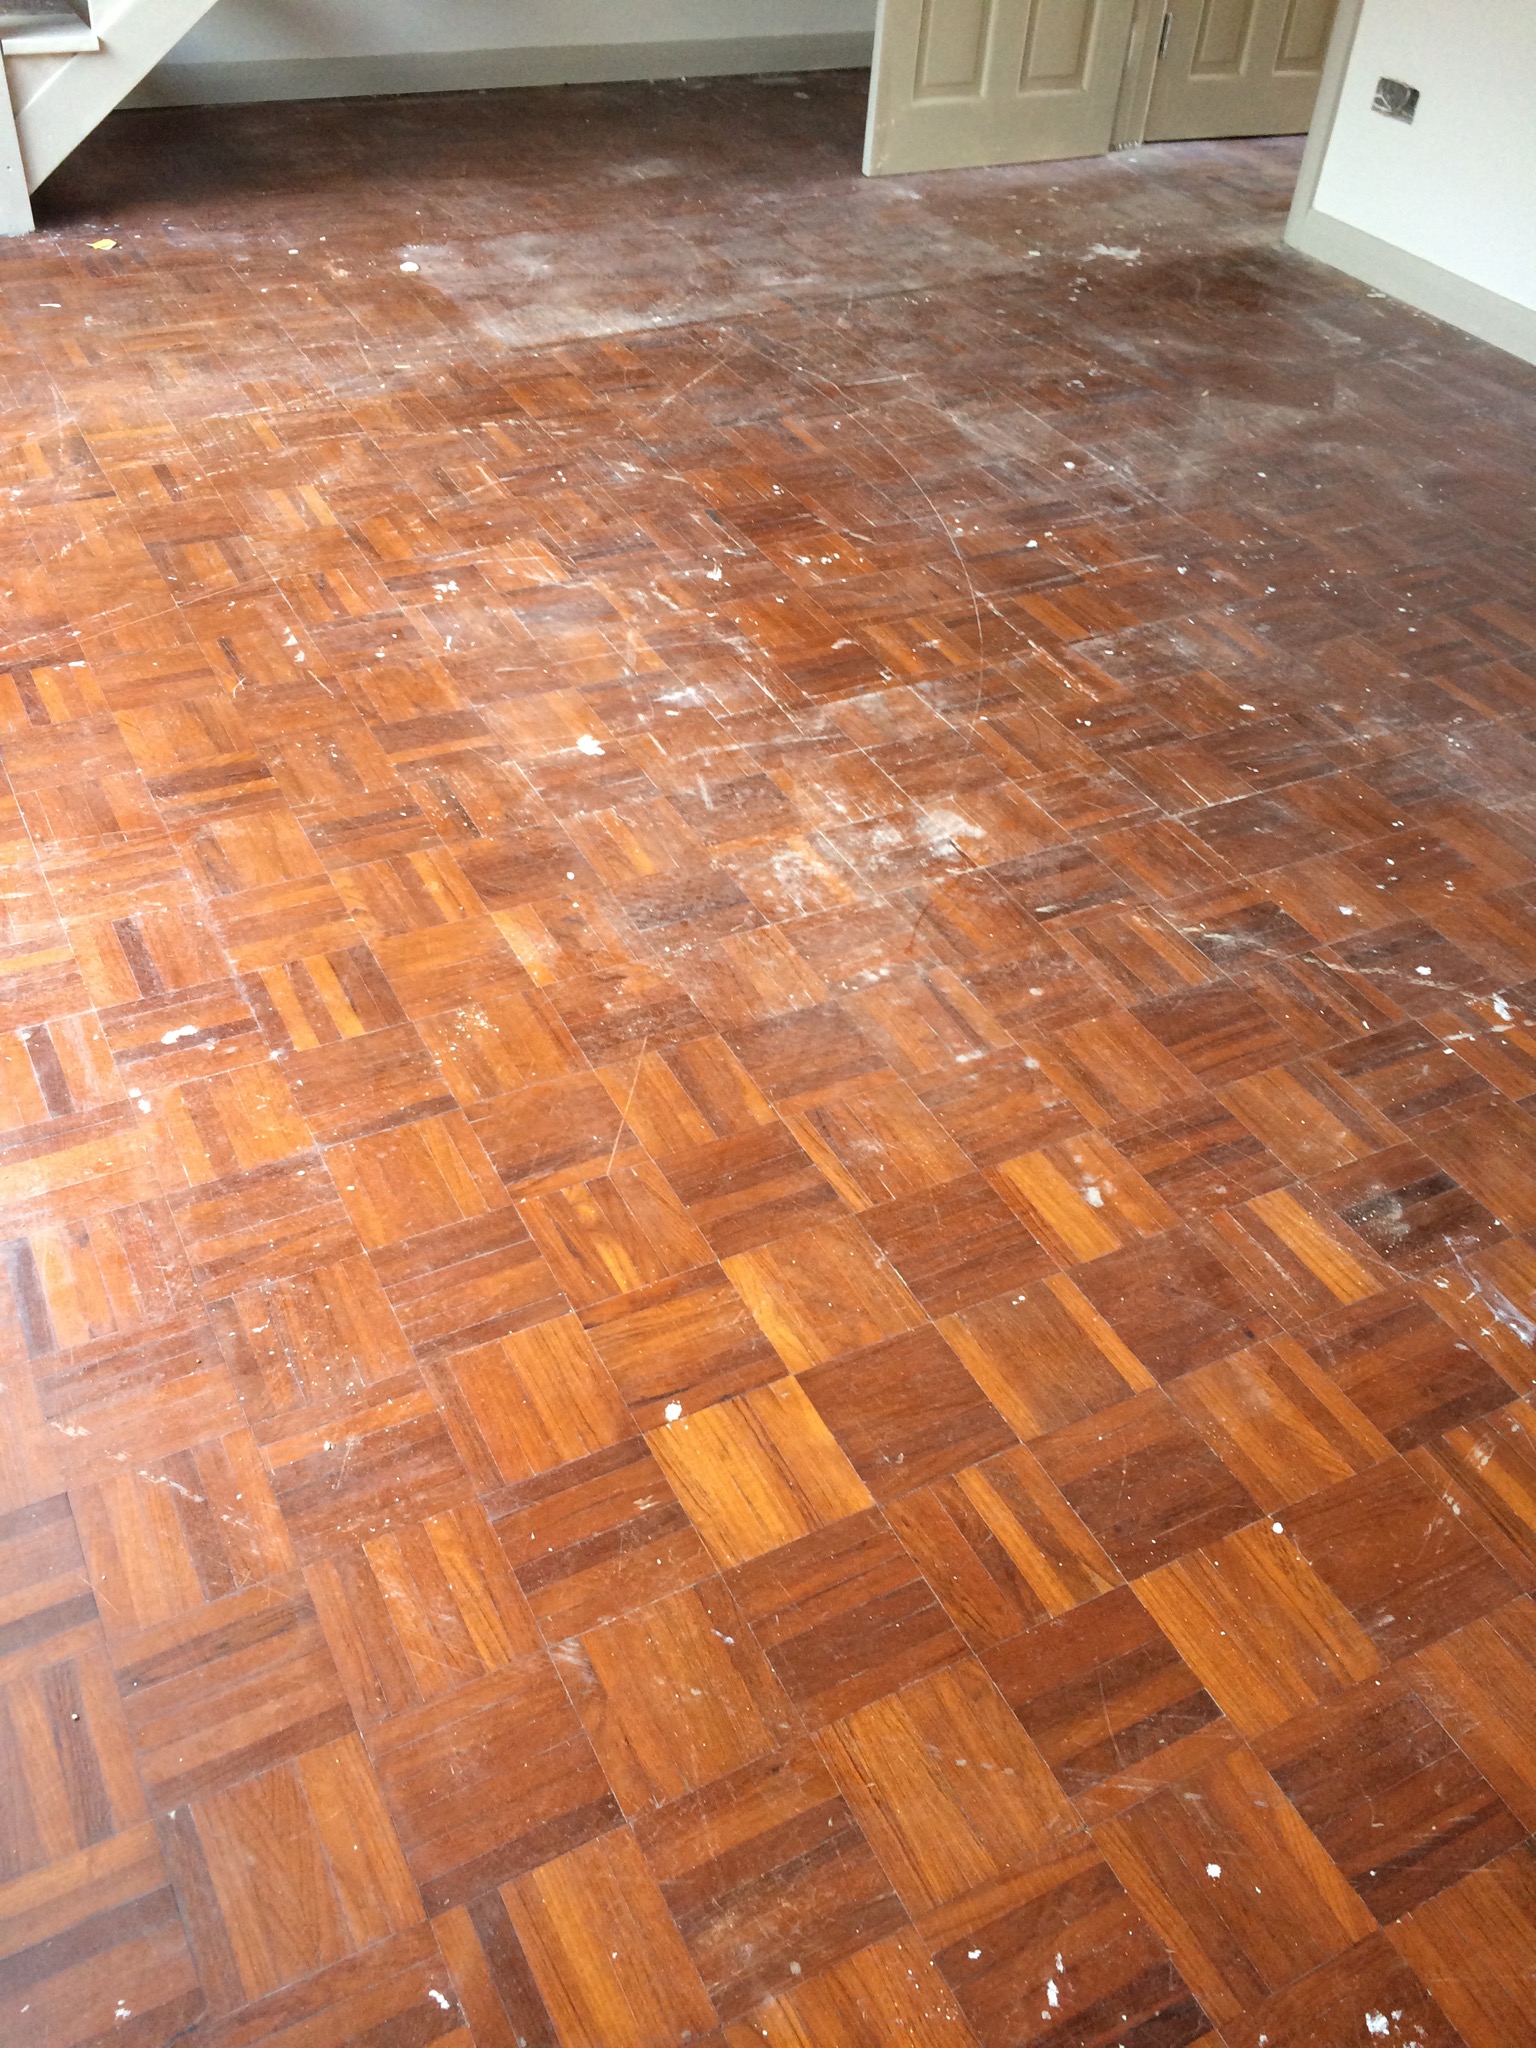
When we are sending the floor we never know how easy is to remove the old finish. In this particular case, it turned out that it was not easy at all. We were using diamond blades to remove the old finish and it still left melted residue on the floor, so we had gone over with diamond blades once more.
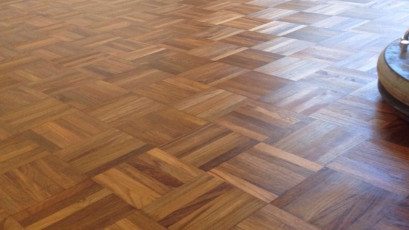
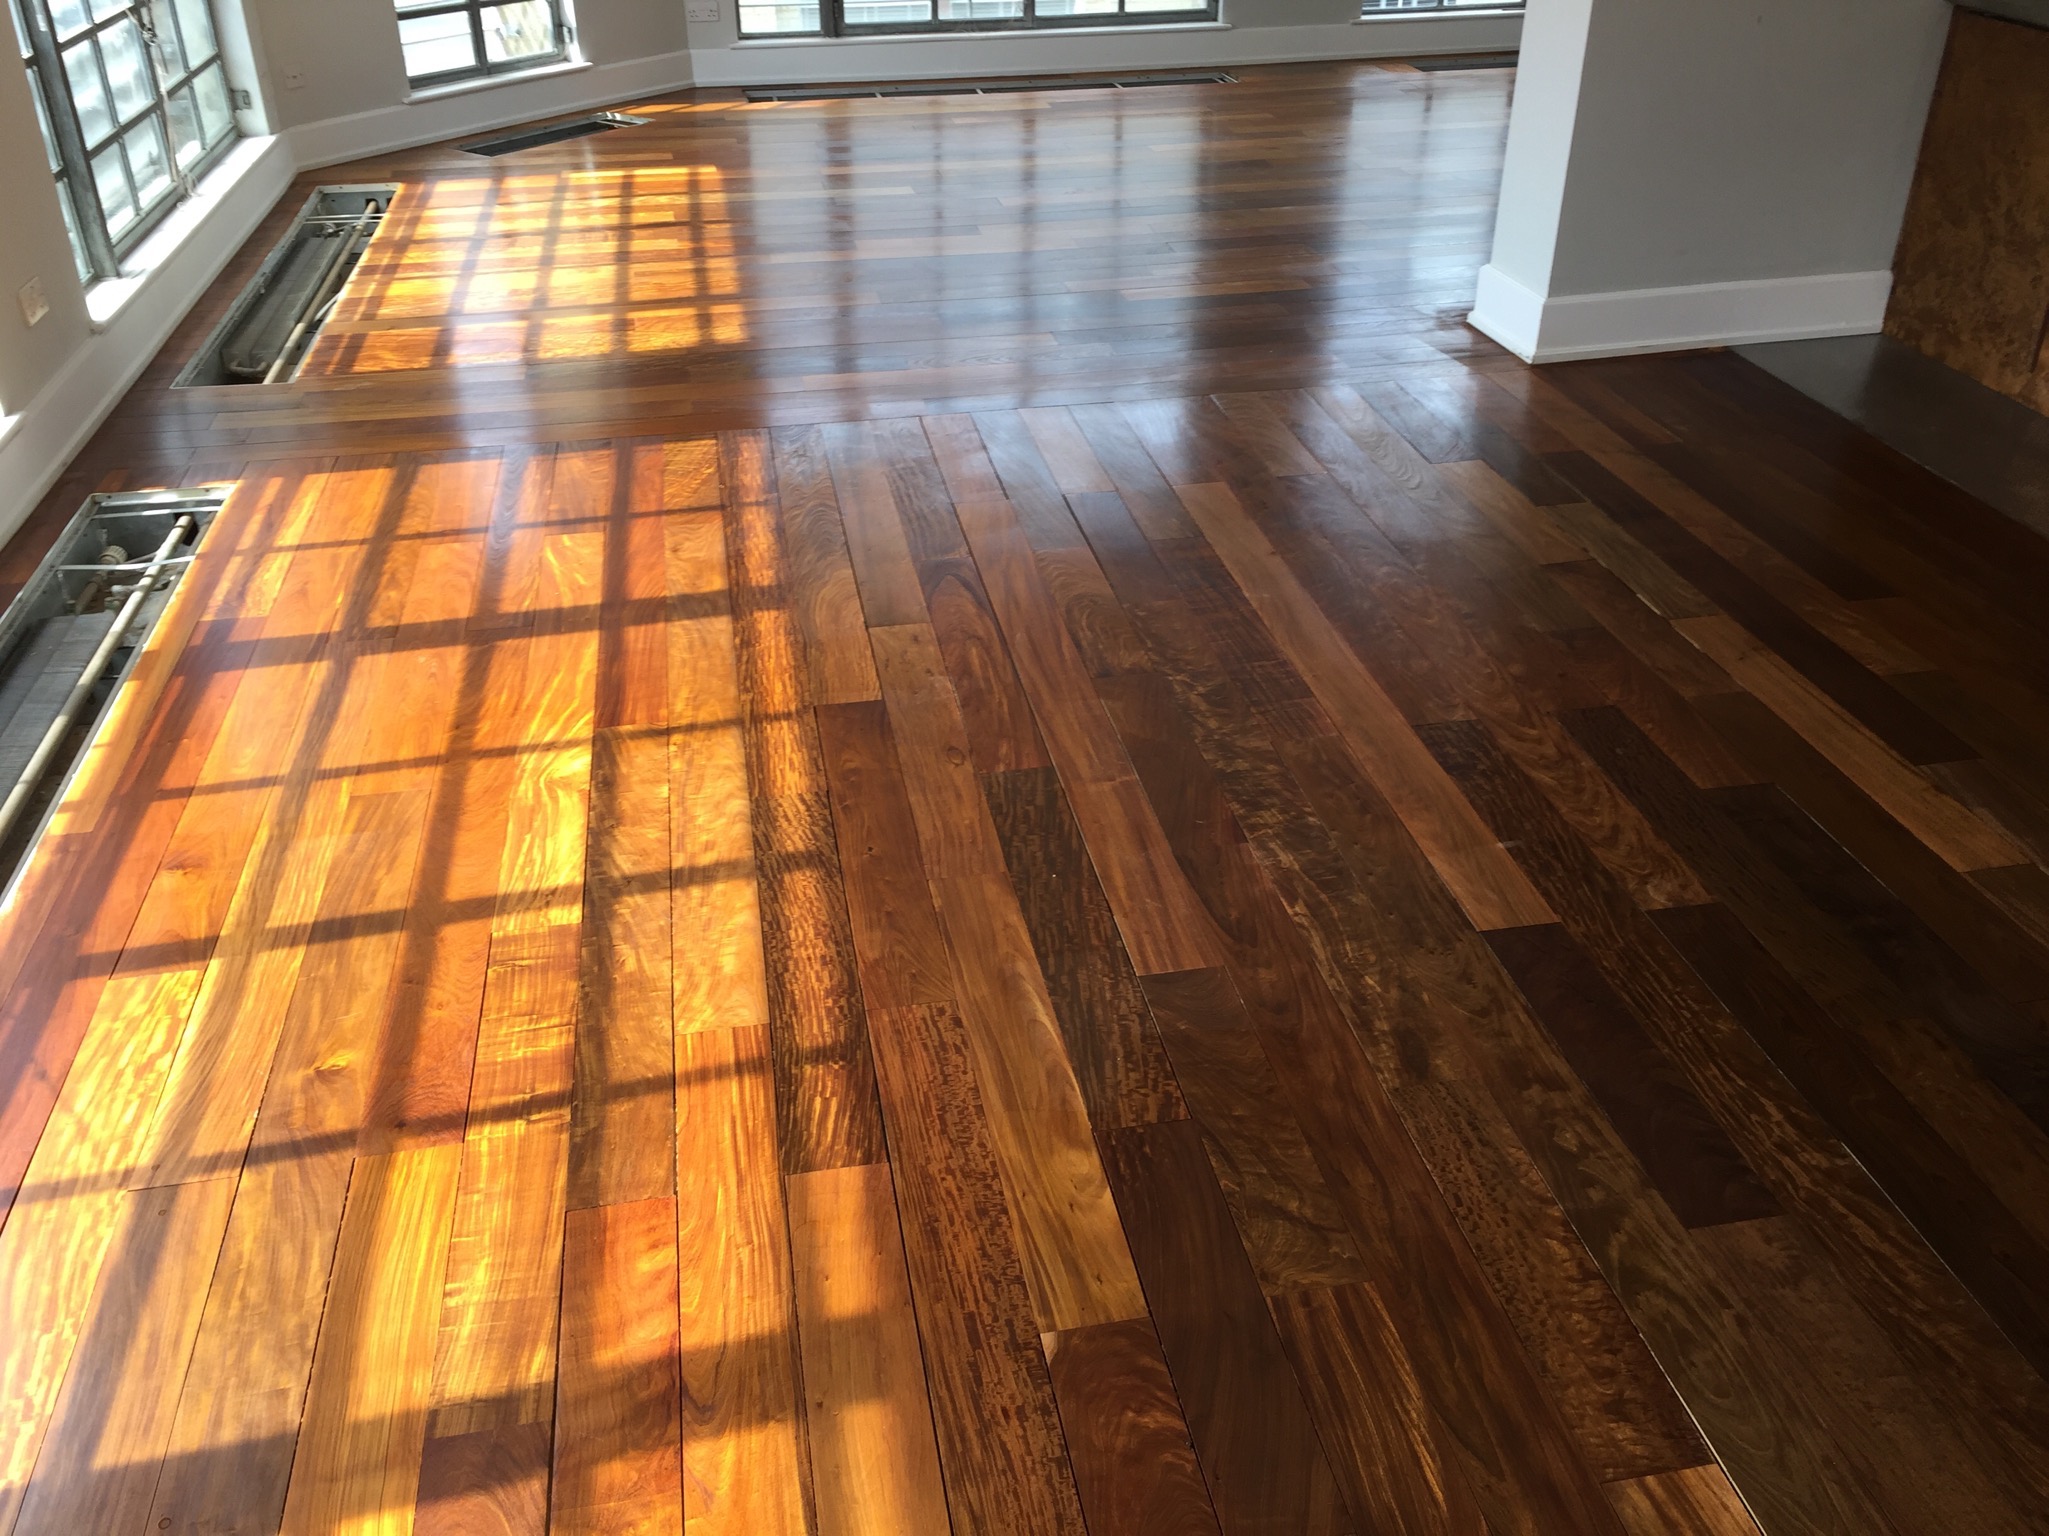
Great result for teak floor sanding in London
The job was incredibly challenging, but at the end, we managed to make this teak parquet floor looking better then customer expected. It is very rewarding to the client and to us to see how we can help you to get your floors looking often better than new with a fraction of the cost.
We started this teak floor sanding with this
and finishing with magic oil we made it look like this.
If would like to book free consultation how we can make your floors looking great get in touch now.
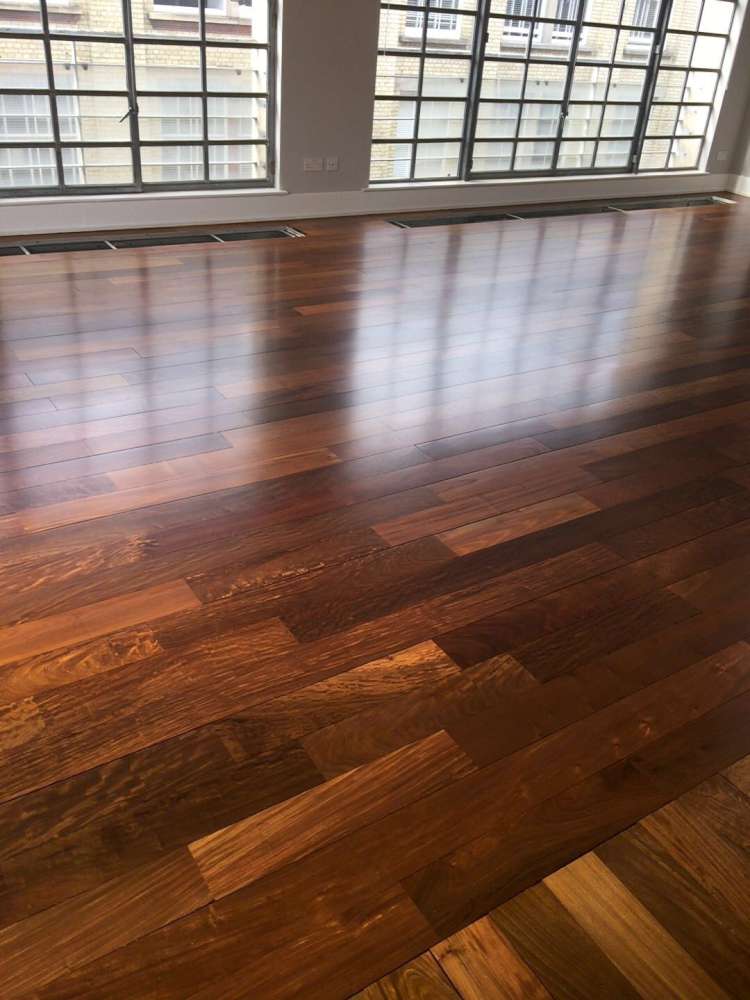
Ipe Lapacho wood floor sanding job in London – Ipe is an exotic wood from South America. It is one of the hardest wood on our planet. Therefore, Ipe lapacho wood floor sanding is almost impossible to get absolutely perfect. Maybe thanks to our state of the art equipment or Wojtek :), we have managed to sand it to a scratch-free and beautiful finish, so the client was over the moon with the result.
Ipe lapacho wood floor sanding is challenging not only because of its hardness. In addition, it may also react oddly with different types of finishes, especially water-based. Therefore, in an ideal world, you are supposed to use solvent rather than water-based lacquer. These lacquers are horrible for the health of the person while applying and furthermore, they also have an irritating smell even for up to two weeks after work is completed. As a result, when using solvent-based lacquers, you should always notify the neighbours about the smell and risks involved. Obviously, follow health and safety regulations and common sense while using those products and always read the label and contact the manufacturer if needed
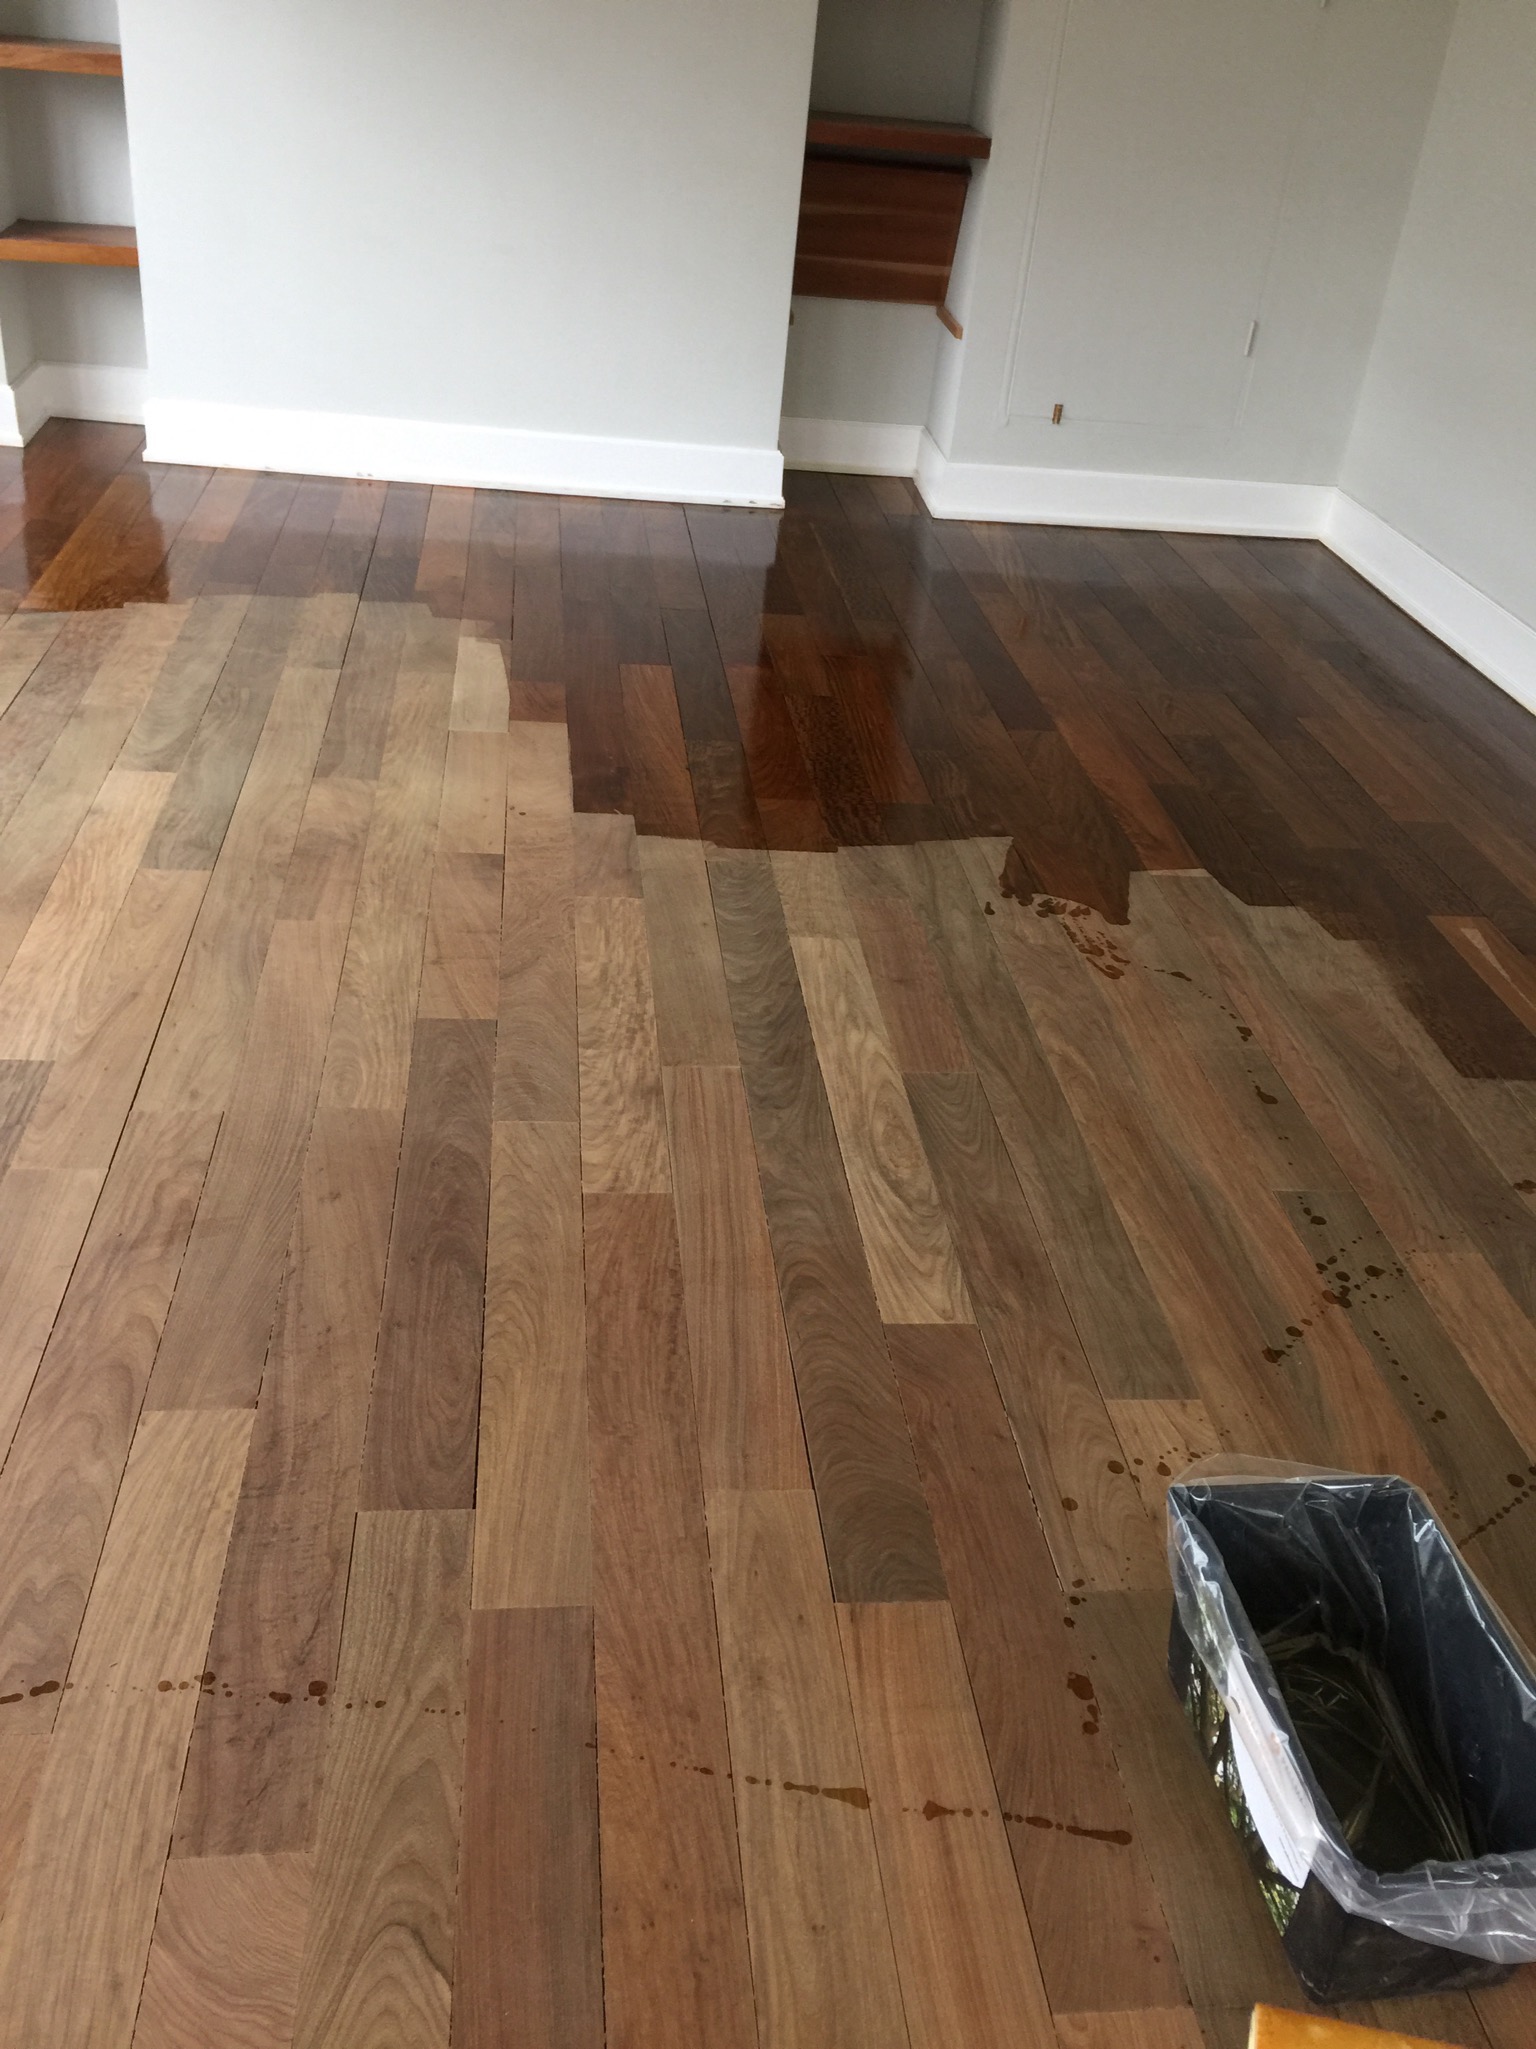
Primer for Ipe Lapacho floor
Ipe is so hard that water has difficulty penetrating it. Due to that fact, if water-based primers are used, they may probably not bring all the colours and it will likely end up with a dull and boring finish. Hence, the only option is a solvent-based primer from Pallmann. It is much more difficult to apply rather than water-based and requires 2 coats. The end product looks amazing and as a result, you will avoid problems with chemical reactions. The picture shows the difference between freshly sanded floor and with the primer applied.
Lacquers for Ipe Lapacho
As much as solvent-based lacquers should be used, we took a chance with water-based. There is a risk of pigments reacting with water-based lacquer, so a test must be carried out prior to application. While testing one area of the floor, this will not guarantee for the finish to fix properly elsewhere. It is important to clarify this with the client and both sides, the client and contractor must agree to take that risk.
Luckily we achieved amazing results with water-based, 2 component lacquer Pall-X 98 and giving the floor the protection it needs over the years of use. From the reaction of the client, it seems that the choice of this finish was fantastic.
Can you stain the Ipe?
Generally, it is not advised to stain any tropical wood floor. They are beautiful as they are. Although we can offer wood staining to other timbers.
Get in touch with us if you want to find out more
Contact is for wood floors
So, if you like what you see and would like to have your wooden floors restored, do not hesitate to get in touch for a free, no-obligation consultation.
Creating Your Dream Bespoke Floors Hello there! I'm passionate about helping people like you transform their homes with the finest flooring solutions. At Silver Lining…
Varnish on Wooden Floors
Varnish on Wooden Floors: Choosing the Best Protection and Aesthetics The right varnish on wooden floors can transform your floor, not just in appearance but…
Staining Wood
Staining Wood Simplified: Achieve Flawless Finish Every Time Imagine transforming a plain piece of wood into a stunning piece of furniture or a breathtaking focal…
Humidity for Solid Wood Floors
Mastering Humidity for Solid Wood Floors: Seasonal Care Tips from Silver Lining Floor Care Silver Lining Floor Care emphasizes the importance of a balanced home…
Guide to cleaning wooden floors
Cleaning Wooden Floors - The Easiest Way to Keep Your Home Shining! Wooden floors are a beautiful addition to any home. They bring warmth, character,…
Guide to Parquet Floor Polishing
The Ultimate Guide to Parquet Floor Polishing A well-polished parquet flooring can significantly enhance the ambience of any room, bringing a sense of warmth, class,…
Wood Flooring Water Damage
Dealing with Water Damage on Wood Floors: Prevention and Restoration Introduction Wood floors are a beautiful and timeless addition to any home, providing warmth and…
Sanding and Oiling Restaurant Floor
Restaurant Floor Sanding: Choosing the Right Finish for Long-Term Benefits Introduction: Restaurants, known for their bustling atmosphere and heavy foot traffic, require durable, low-maintenance flooring…
Best Finish on Oak Floors
When it comes to oak floors, there is no universal solution that suits everyone. We understand that each individual is unique, with different preferences and…
Maintaining White-Stained Wood Floors
Maintaining the Elegance of White-Stained Wood Floors: A Comprehensive Guide Preserving the exquisite allure of white-stained wood floors, particularly those graced with the timeless Pall-X…
This website uses cookies so that we can provide you with the best user experience possible. Cookie information is stored in your browser and performs functions such as recognising you when you return to our website and helping our team to understand which sections of the website you find most interesting and useful.
Strictly Necessary Cookies
Strictly Necessary Cookie should be enabled at all times so that we can save your preferences for cookie settings.
If you disable this cookie, we will not be able to save your preferences. This means that every time you visit this website you will need to enable or disable cookies again.
3rd Party Cookies
This website uses Google Analytics to collect anonymous information such as the number of visitors to the site, and the most popular pages.
Keeping this cookie enabled helps us to improve our website.
Please enable Strictly Necessary Cookies first so that we can save your preferences!