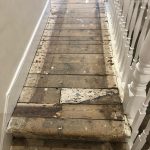
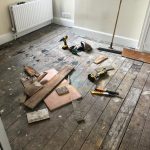
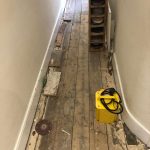
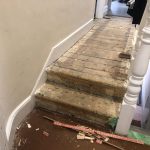
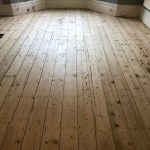
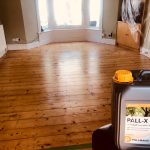
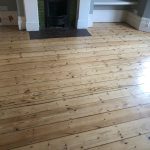
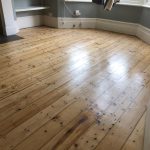
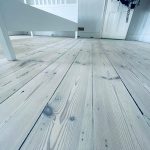
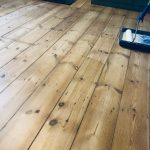
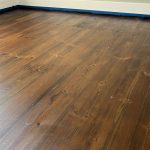
Floorboards repairs in London
Written by Silver Lining Floor Care

What Lies Beneath Wooden Floorboards?

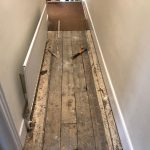
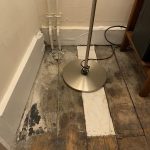
Hidden Elements Under Floorboards

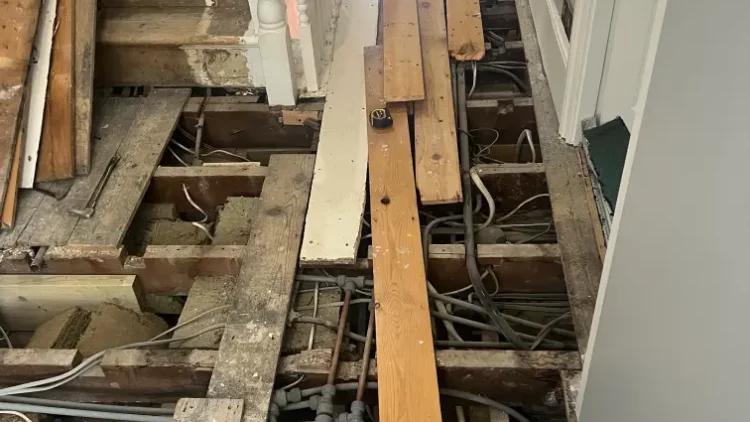
Underneath wooden floorboards, you can find:

  • Joists
  • Water pipes
  • Electrical cables
  • Soil (if it’s the ground floor)
  • The ceiling of the room below (if it’s an upper floor)
  • A lot of empty space (and perhaps even a bit of “dark matter”)

under floorboards

Hidden Elements Under Floorboards

Underneath wooden floorboards, you can find:

  • Joists
  • Water pipes
  • Electrical cables
  • Soil (if it’s the ground floor)
  • The ceiling of the room below (if it’s an upper floor)
  • A lot of empty space (and perhaps even a bit of “dark matter” humorously speaking)

The Reality of Restoring Floorboards

We often receive requests to restore floorboards. A common part of these inquiries is, “There are a few loose boards that JUST need securing.” However, it’s never just a simple fix.

The Risks Involved

There’s a significant risk of damaging something underneath if you blindly screw or nail the boards down. If you’ve done it yourself at home without incident, consider yourself lucky. This is a rare task for most homeowners, but it’s our daily routine, and we cannot afford to take those risks. The math doesn’t lie.

Proper Procedure for Floorboard Restoration

To properly address this issue, we need to:

  1. Lift the floorboards
  2. Ensure there’s support underneath
  3. Verify there’s enough space for a screw or nail

Remember, we’re often dealing with boards that are 50, 70, or even 100 years old, and there’s a high chance they will break during the lifting process. What seems like a 5-second job can quickly turn into a more complex task that involves buying a new board, cutting it to size, and securing it properly.

A Word of Caution

Next time you ask for a quick fix, please keep in mind it might not be as simple as it seems. If you want to do it yourself, either take a chance or inspect it properly first. Typically, landing areas are junctions for these concerns, but this issue can also occur in other rooms.


contat uș

wavy floorboards
Written by Silver Lining Floor Care

Common Wood Floor Sanding Challenges

Understanding the Challenges of Wood Floor Sanding

Restoring wood floors is an art that balances preservation with improvement, but some challenges lie beyond the control of even the most skilled professionals. Here are several issues that homeowners should be aware of before starting a restoration project:


Stains and Contamination
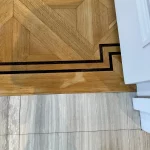
contamination on wooden floors

contamination that appeared after applying a coat of primer

Deeply embedded stains in wood floors often present significant restoration challenges. While superficial stains can sometimes be sanded away, those that penetrate deeper into the wood may not be completely removable. Continuous sanding in an attempt to remove such stains could risk damaging the wood veneer, leading to an uneven or shallow surface.

Unexpected stains might also emerge after applying the first coat of finish, potentially caused by residues such as primer or other chemicals used in prior treatments. These areas might initially appear lighter but can sometimes fade as the finish fully dries.

Urine Damage

Particularly for pet owners, urine stains pose a unique problem. A single accident on the floor might be cleaned effectively, but repeated incidents in the same area can saturate the wood, embedding the odour and contamination deep within. While the smell can often be neutralized, the underlying damage to the wood might be irreversible.

Risks of Sanding Through Wood Veneer

Engineered wood floors feature a thin layer of wood veneer which varies in thickness and can pose a significant challenge during restoration. If your floor has been sanded previously, it can be difficult to determine the remaining thickness of the veneer. During the sanding process, there’s always a risk of accidentally sanding through this layer, which may result in an uneven or aesthetically displeasing appearance.

As professional floor sanders, we always aim to remove only the minimal amount of wood necessary to strip old finishes and smooth the surface. We take great care to assess the condition of the wood and avoid deeper sanding that could compromise the veneer. It’s important to note that wood veneers can range from as thick as 8mm to as thin as 1mm, making each restoration project unique in its approach and potential risks.

Paint Touch-Ups to Skirting Boards
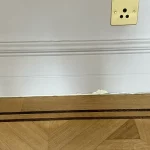
skirting damage during sanding

skirting damage during sanding

During the floor sanding process, achieving a completely restored look often involves getting close to the edges of your room. This requires the use of heavy-duty sanding equipment, which can sometimes damage skirting boards. To ensure a seamless finish, these areas might need subsequent paint touch-ups.

If you’re planning a full house renovation, we highly recommend scheduling paint touch-ups for your skirting boards after the sanding is completed. This allows for any accidental damage from the sanding equipment to be corrected effectively. Additionally, if there is silicone sealant between your skirting boards and the floor, it’s almost certain that adjustments will be needed post-sanding to maintain a clean and polished appearance

Woodworm Damage in Old Pine Floors
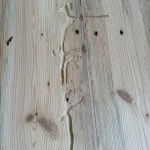
wood worm damage

woodworm damage

wood worm damage

woodworm damage

When restoring old pine floors, the sanding process may reveal damage caused by woodworms. Unfortunately, it’s impossible to predict the extent of woodworm damage beneath the surface until the floor is sanded. If extensive damage is uncovered, the affected planks might need to be replaced entirely, which can add to the overall scope and cost of the project.

For less severe cases, we have the option to fill the damaged areas with wood filler, which can help stabilize and smooth the surface. Alternatively, some clients choose to leave minor woodworm damage visible, as it can contribute to the rustic charm and character of the floor. This choice depends on the desired aesthetic and the structural integrity required for your space.

Managing Expectations with Green or Patchy Wet-Looking Floorboards
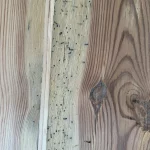
green stains on old floorboards
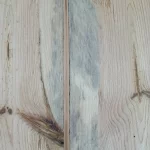
green stains on old floorboards
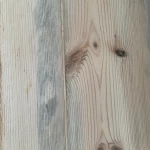
green stains on old floorboards
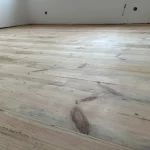
green stains on old floorboards

green stains on old floorboards

green stains on old floorboards

green stains on old floorboards

green stains on old floorboards

Restoring century-old floorboards often brings unexpected surprises, such as patchy or greenish appearances that become evident after sanding or finishing. It’s important to remember that these are historic floors with inherent imperfections, which are part of their charm and history. Achieving the look of a brand-new floor is not always possible with such aged materials.

Rearranging floorboards to conceal discoloured areas under furniture is a time-consuming and delicate process, with the risk of damaging the boards during removal. Adding extra days to accommodate these changes isn’t always feasible, given the tight schedules of professional restoration teams.

For those seeking perfection, it’s advisable to discuss potential issues and solutions after the initial sanding reveals the floor’s condition. Planning for additional repair and finishing sessions might be necessary, though this can extend the duration of the project significantly. Understanding and accepting these aspects of historic floor restoration upfront can help set realistic expectations and ensure satisfaction with the end result.

Patchy and Wet-Looking Boards

When dealing with century-old floorboards, inconsistencies like patchy colouring or a wet look after sanding are common. These are often inherent to the age and history of the wood, adding character but also presenting restoration challenges.

Addressing Post-Restoration Board Breakage
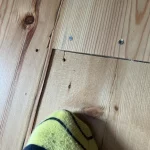
floorboard with no support

floorboard with no support

Despite meticulous attention during restoration, boards may sometimes crack afterwards due to insufficient underlying support, an issue not always visible during initial restoration efforts. It’s important to understand that floor restoration specialists can only address visible issues. We thoroughly inspect and work on every inch of the floor with heavy sanding equipment, but hidden problems beneath the boards, such as joist conditions, typically remain unchecked unless specifically included in the service agreement.

Board breakage post-restoration is relatively rare and often unforeseen. Should such an issue occur, the repair process is intricate and time-consuming. It involves removing the damaged filler and planks, installing new ones, re-sanding these areas, and then refilling the gaps—usually with slivers or Sikaflex, which require 24-48 hours of drying time. Additionally, applying finishing products like a primer and multiple coats of lacquer, each necessitating further drying time can extend the repair over several days.

Understanding the Odd Wavy Floorboards
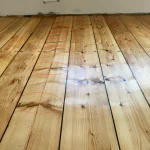
wavy floorboards

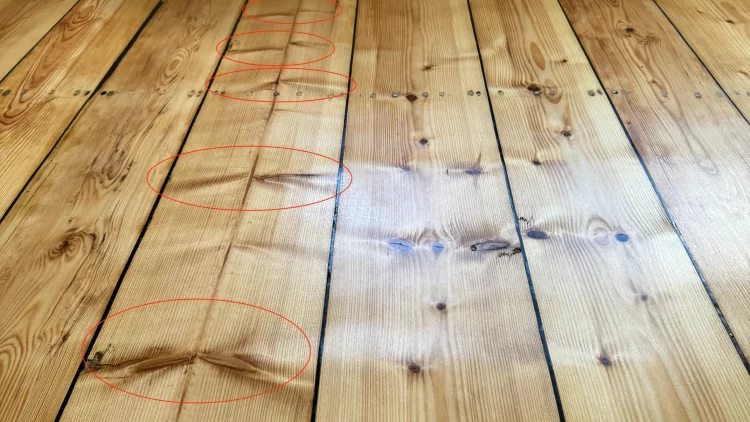
photo 1. See the pattern of knots on this plank – circled in red
wavy floorboards

wavy floorboards

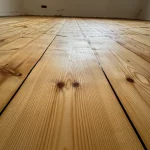
When restoring pine floorboards, it’s helpful to see the difference between regular planks and those with knotted patterns that can appear wavy after sanding. To better understand the visual impact of knotted wood on your floor’s appearance, please refer to Photo 1. Focus on the areas circled in red to see how the knot patterns contribute to the unique texture and character of the restored floor.

These images illustrate how the sanding process accentuates the knots, creating a textured effect that can be visually distinct from other planks with random knot patterns.

By referring to these photos, you can appreciate the unique beauty and rustic charm that knotted planks bring to a restored wood floor, as well as make more informed decisions about the aesthetic you desire for your home. This approach ensures that the natural features of the wood are both understood and appreciated, aligning expectations with the intrinsic properties of pine flooring.

Floor Delamination Explained

Delamination of flooring can occur due to several reasons, such as manufacturing defects or exposure to water damage. While relatively rare, these issues often become apparent only during the sanding stage of floor restoration. This discovery underscores the intricate challenges involved in bringing a floor back to its best condition.

Crowning and Bowing in Restored Floors
massive moisture issue

massive moisture issue

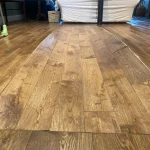
Crowning and bowing of floorboards can occur if there is an issue in the basement, such as moisture seeping up through the subfloor. This is particularly likely if there is no moisture barrier, like a damp proof membrane (DPM), installed. While minor moisture problems may resolve naturally as the boards dry and potentially regain their original shape, severe cases might lead to permanent damage that is not reversible.

Soil and Bitumen Challenges in Floor Gaps

When filling the gaps in old floors using sawdust and special resin, bitumen used as an old adhesive can pose a challenge. Over time, bitumen may rise to the surface, interacting with the moisture in the filler. This issue is often unforeseen by floor sanding specialists, as the bitumen’s behaviour under new conditions can be unpredictable.

Additionally, these gaps often harbour significant amounts of soil. While most of the soil is dry and can be removed with a vacuum cleaner, some of it becomes sticky and attracts water-soluble soils that are harder to manage. These residues can rise to the surface along with the gap filler. In cases where the gaps are particularly thin, completely removing this embedded soiling can be impractical. This highlights the complexities of dealing with legacy materials and contaminants during floor restoration.

Conclusion

Wood floor restoration can significantly enhance the beauty of a home, but it comes with its own set of challenges. While these situations are rare, understanding potential issues like deep stains, veneer damage, and moisture effects is essential for setting realistic expectations. This knowledge facilitates a smoother process for both homeowners and professionals. Remember, some imperfections can add unique character to your floors, embodying the history and natural beauty of the wood. It’s important to note that as floor sanding specialists, we mention these potential complications not because they are common, but because they can manifest unexpectedly and are beyond our control.


contat uș

Can You Sand Engineered Wood Flooring
Written by Silver Lining Floor Care

Can You Sand Engineered Wood Flooring?

Understanding Engineered Wood Flooring

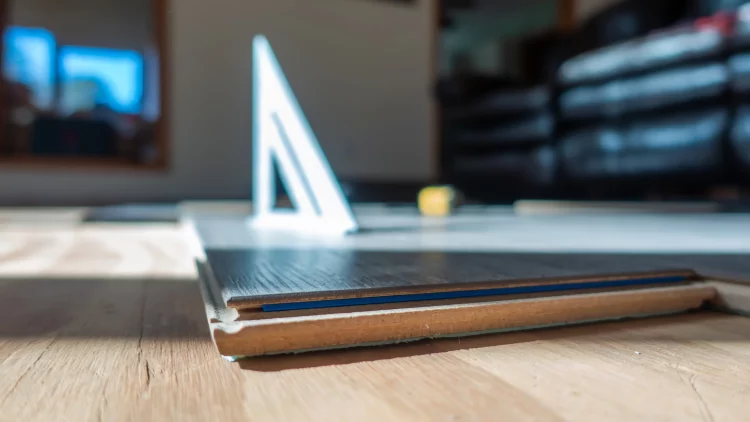
Before diving into the intricacies of sanding engineered wood flooring, it’s crucial to understand what sets it apart from traditional hardwood. Engineered wood floors comprise multiple layers, with a veneer of real wood on the top. This construction enhances stability and resistance to environmental changes, making it a popular choice for many homeowners.


The Possibility of Sanding Engineered Wood Floors

Evaluating the Thickness of the Top Layer

The key factor in determining whether you can sand engineered wood flooring is the thickness of the top hardwood layer. Floors with a thicker veneer can often be sanded and refinished multiple times, much like solid hardwood. However, if the veneer is too thin, sanding is not advisable as it could damage the flooring beyond repair.

The Role of Professional Assessment

Given the complexity of this task, seeking professional advice is paramount. Experts at Silver Lining Floor Care can assess your engineered flooring to determine if sanding is a viable option. Our team has the expertise to evaluate the condition of your floor and recommend the best course of action.

The Sanding Process: What to Expect

If your engineered wood flooring is deemed suitable for sanding, here’s what the process entails:

Preparation and Sanding

Our team begins with a thorough assessment, ensuring the floor is clean and free of any fixtures that might impede the sanding process. Using specialized equipment, we carefully sand the top layer of the wood, removing scratches, dents, and old finish.

Refinishing for a New Look

After sanding, you have the opportunity to refinish your floor. This step not only enhances the floor’s appearance but also provides an added layer of protection. From natural looks to darker stains, refinishing can transform your space entirely.

The Benefits of Sanding Engineered Wood Flooring

Sanding engineered wood floors can revive your space, making floors look brand new. It’s an eco-friendly alternative to complete floor replacement, reducing waste and extending the life of your flooring. Additionally, it’s a cost-effective solution to improve your home’s aesthetics and value. Above all we recommend maintaining your floors so they can last much longer.

Final Thoughts: Is Sanding Right for Your Engineered Wood Flooring?

“Sanding engineered wood flooring” is a question with a nuanced answer. It depends on several factors, including the thickness of the veneer and the floor’s overall condition. At Silver Lining Floor Care, we’re committed to providing you with the information and services needed to make informed decisions about your flooring.

For more insights and professional flooring solutions, visit our home page. Our experts are here to guide you through every step of the process, ensuring your engineered wood flooring remains a lasting and beautiful component of your home.

contat uș

Floor Sanding and Polishing. Knowing the Right Time
Written by Silver Lining Floor Care

Floor Sanding and Polishing: Knowing the Right Time

Welcome to our latest blog post where we delve into the essential process of floor sanding and polishing, and importantly, when it’s time to undertake this task for your wooden floors. At Silver Lining Floor Care, we understand the importance of maintaining the beauty and durability of your wooden floors, which is why we’re here to guide you through understanding when and why floor sanding and polishing are necessary.


Understanding Floor Sanding and Polishing

Floor sanding is the process of removing the old finish and any imperfections from your wooden floor using specialized machinery, such as belt sanders. This process is crucial for preparing the wood for a new finish, ensuring it’s perfectly smooth and ready to be treated.

Polishing, or buffing, often follows sanding. It involves using higher grades of sandpaper to achieve a smooth surface. However, polishing can also refer to a maintenance cleaning process for floors that don’t necessarily need full sanding. This approach, known as ‘buff and coat,’ can enhance the appearance of your floor, although it won’t remove deep scratches.

The Importance of Timely Maintenance

One common misconception is that polishing is only a deep cleaning process. While it’s true that floors can appear dull after deep cleaning and might require an extra coat of lacquer or oil, timely maintenance is critical. Just like dental hygiene, where you wouldn’t wait for your teeth to show signs of neglect before cleaning them, your wooden floors shouldn’t be left until they’re visibly worn or damaged. Postponing maintenance can lead to irreversible damage, making more intensive and costly procedures like full sanding inevitable.
Why You Shouldn’t Delay Floor Care

The protective layer on your wooden floors is there to prevent moisture absorption. Without it, wood can darken and deteriorate quickly. Moreover, with the prevalence of engineered wood planks, there’s a limit to how many times your floor can be sanded before needing replacement. Regular maintenance is key to extending the life of your floors and keeping them looking their best.

Silver Lining Floor Care: Your Partner in Floor Maintenance

Choosing us for your floor care needs means you’ll never have to worry about remembering to maintain your floors. Once we’ve completed a job, we’ll add you to our 6-month reminder list for DIY maintenance, ensuring your floors remain in top condition year-round.

In conclusion, understanding the importance of timely floor sanding and polishing is crucial for maintaining the beauty and longevity of your wooden floors. Whether it’s full sand and polish or a simple buff and coat, these procedures protect your floors from damage and keep them looking their best. Remember, regular maintenance is far less costly than delaying care until problems become apparent. Trust Silver Lining Floor Care to keep your floors shining bright, and feel free to reach out for any advice or services you might need to keep your wooden floors in pristine condition.

contat uș

how much floor sanding cost
Written by Marta Nowak

How much wood floor sanding cost?

Understanding Floor Sanding Costs: Key Factors and Pricing Insights

When considering floor sanding services, many clients hope for a straightforward answer, like £35 per square meter. However, determining the cost of floor sanding isn’t that simple due to several influencing factors, including project duration, material costs, and overall investment. Our general pricing policy carefully takes all these aspects into account, especially when it comes to wood floor sanding.


What’s Your Vision?

It’s essential to start with a clear idea of the desired outcome for your floor. Whether it’s a specific finish you’ve seen on Instagram or a style admired in a neighbour’s home, the variety of available finishes and products can be overwhelming. If you’re uncertain about what you want, that’s perfectly okay too. We will guide you through what’s available and, after a detailed discussion, provide bespoke advice tailored to your preferences and needs. Knowing what you want helps in guiding the decision-making process.

Balancing Durability and Aesthetics

Our objective might seem ambitious, but we aim for you to spend as little as possible while enjoying a durable and attractive floor. We prioritise quality and maintenance ease, primarily using Pallmann products—top-tier wood care and finishing products. These aren’t the cheapest options, but they’re worthwhile for those seeking beauty and longevity. If your budget is tight, we may not be the best fit. However, if you’re after a beautiful, high-quality finish, we should definitely talk. Our method statement for floor sanding outlines various finishing options, from basic clear coats to custom stains, highlighting why a simple per-square-meter pricing model doesn’t fit all scenarios. Just to help you get an idea, our full-service floor sanding starts at around £42 per m2.

Proudly Showcased on Social Media

We take pride in our work, eager to showcase completed floors on our social media platforms. More than just visually appealing, we focus on building long-term trust in our services and the quality brands we use. We ensure your flooring withstands the demands of a busy household—be it pets or kids—by setting you up with DIY maintenance reminders tailored to your chosen finish. This approach not only extends the life of your floors but also eliminates the need for further significant investments. Remember, regular maintenance is crucial for lasting beauty and durability.

contat uș

cleaning terracotta tiles
Written by Silver Lining Floor Care

Cleaning Terracotta Tiles

Ultimate Guide to Cleaning Terracotta Tiles:

Maintain Their Natural Beauty

Terracotta tiles, with their distinctive warm and earthy tones, add a unique charm to any space they adorn. However, to ensure these tiles retain their appeal over the years, a dedicated cleaning and maintenance regime is essential. This guide dives into the best practices for cleaning terracotta tiles, emphasizing techniques that safeguard their porous nature while enhancing their inherent beauty.


Essential Steps for Cleaning Terracotta Tiles

The cornerstone of terracotta tile upkeep is a consistent cleaning routine coupled with proper sealing. When attended to regularly, cleaning terracotta floors may only require a minimal reapplication of sealer—often just one or two coats. This not only keeps the process straightforward but also crucially maintains the tiles’ resistance against moisture and grime.

Tackling the Challenges of Terracotta Tile Restoration

Delaying regular cleaning can lead to a more daunting task—complete restoration. This process can involve stripping the old sealer, a step that demands considerable effort and preparation. Once the old sealer is removed, and the tiles are deep cleaned, an extended period is necessary for the tiles to dry thoroughly. Afterwards, applying three to six coats of sealer ensures the tiles are adequately protected once again.

The Role of Dry Soil Removal and Coir Mats in Cleaning Terracotta Floors

A pivotal, yet often underestimated, aspect of maintaining terracotta tiles is effective dry soil removal. Since dry soil can act as an abrasive and degrade the sealer over time, removing it regularly through vacuuming or sweeping is crucial. Additionally, employing coir mats at entryways dramatically reduces the ingress of dirt and moisture, effectively preventing potential damage to the tiles. Implementing these strategies significantly contributes to the longevity and aesthetic of terracotta tiles by minimizing wear and tear.

Consistent Care for Terracotta Tiles’ Long-Lasting Beauty

Adopting a routine of diligent cleaning, strategic sealing, effective dry soil management, and the use of coir mats at entrances ensures the lasting beauty and durability of terracotta tiles. Such meticulous care not only preserves the visual appeal of your flooring but also safeguards your investment in your home’s aesthetics.

Silver Lining Floor Care specializes in the expert cleaning and maintenance of terracotta tiles, offering comprehensive solutions tailored to keeping your floors in pristine condition. Discover how our expertise in terracotta tile care can help maintain the natural allure and integrity of your flooring.

contat uș

Oil or lacquer
Written by Silver Lining Floor Care

Oil or Lacquer – what is the best option for me?

Oil or Lacquer – Which Floor Finish Suits You Best?

In the world of floor finishes, the choice often boils down to oil-based versus water-based lacquer. Both options come with unique benefits, tailored to different preferences and needs. This blog explores these differences, guiding you to the ideal choice for your floor.

The Aesthetic Factor: A Personal Decision

The look of your floor is a personal statement. While oil-based finishes offer a deep, natural charm, enhancing the wood’s grain and character, water-based lacquers provide a modern, sleek appearance. It’s not about labelling one as better than the other; it’s about what resonates with you.

Performance: Quality Matters

When it comes to performance, the brand and quality of the finish play a crucial role. High-quality brands like Pallmann ensure that whichever finish you choose, you’re picking a winner.

Water-Based Lacquers: Balancing Performance and Aesthetics

Water-based lacquers are evolving in the world of floor finishes, offering a delicate balance between durability and aesthetic appeal. Unlike the older alcohol-based lacquers, modern water-based options have significantly improved in both performance and appearance.

Application Process: Precision and Patience

The application of water-based lacquers requires attention to detail and time. Typically, it involves a coat of primer followed by two coats of lacquer. This process demands patience, especially in occupied spaces, as each coat needs sufficient drying time. It’s not just about applying the finish; it’s about allowing each layer to properly settle and cure for optimal results.

Misconceptions and Realities

There’s a common misconception that water-based lacquers dry quickly and leave a plastic sheen. However, this isn’t the case with newer formulations. These lacquers have been refined to provide a finish that’s both hardy and visually appealing. The key is in the application – too many layers or overly thick coats can lead to an undesired plastic-like appearance.

The Hardness-Elasticity Spectrum

In the realm of lacquers, it’s not just about achieving maximum hardness. What’s crucial is finding the perfect harmony between hardness and elasticity. Imagine a glass floor – incredibly hard but prone to shattering. On the other hand, a cartoon-like material might never break but will dent with ease. Water-based lacquers aim to hit that sweet spot: resilient enough to resist dents and scratches, yet flexible enough to absorb impacts without cracking.

The Verdict on Water-Based Lacquers

In conclusion, water-based lacquers are a testament to the advancements in flooring technology, offering a solution that is both durable and elegant. Their application might require more time and care, but the end result is a floor finish that strikes a beautiful balance between toughness and visual appeal. When applied correctly, they provide a finish that enhances the natural beauty of the wood without the drawbacks of older lacquer formulations. Aftercare is crucial to increase the life span of your lacquer floor.

Oil Finishes: Enhancing Wood’s Natural Beauty with Precision

Oil finishing is more than just a floor treatment; it’s an art that accentuates the natural allure of wood. Recognized as a premium service, it demands exceptional sanding quality, as the oil not only enhances the wood’s beauty but also magnifies any imperfections in the sanding process.

The Mastery of Application

At the heart of our approach is the use of two-component oils, ensuring a finish that is not just visually stunning but also remarkably durable. The philosophy behind oil finishes is longevity; with proper maintenance, it’s conceivable that your floors may never need sanding again. This aspect makes oil finishing an attractive choice, even more so for smaller projects.

The Efficiency in Smaller Jobs

In contrast to lacquer finishes that require idle time between coats, oil application is more streamlined. This efficiency is particularly advantageous in smaller jobs, where the entire floor can be saturated with oil in a single, continuous process. The lack of downtime between applications significantly speeds up the completion.

Essential Steps for Flawless Finish

Before applying the oil, the floor must undergo a water-popping process. This crucial step ensures even absorption across the entire surface. The first coat of oil is allowed to rest on the wood for approximately 15 minutes, promoting deep penetration. A subsequent coat ensures the wood is fully saturated. Any surplus oil is then meticulously wiped off, leaving a perfectly even finish.

Flexibility and Adaptability

One of the unique advantages of an oil finish is its adaptability. Should your style preferences change over time, transforming an oiled floor to a lacquered one is achievable with the use of a specialized bonding agent. However, it’s important to note that the reverse—from lacquer to oil—is not as straightforward and typically requires full sanding.

Embracing the Essence of Wood

Opting for an oil finish is not just choosing a flooring treatment; it’s embracing the essence of the wood itself. It’s a commitment to preserving and enhancing the natural character of your floors, ensuring they remain a timeless and cherished feature of your home.

Environmental Considerations

The shift towards environmentally friendly products is evident in the flooring industry. Water-based lacquers, especially low-VOC options like Pall-X Zero, are leading this change, offering sustainable beauty without compromising quality.

Oil or Lacquer: The Verdict

The decision boils down to personal preference and lifestyle. If a natural, warm look is what you seek, oil finishes are your ally. For a sleek look, water-based lacquer is the way to go. Professional application is key to achieving the best results regardless of your choice.

From Our Experience

As Parkettprofi contractors, we believe in the timeless beauty of oiled floors. They age gracefully, telling stories of the life lived upon them. It’s an eco-friendly choice, minimizing the need for new wood and embracing imperfections as part of the floor’s character.

Final Thoughts

Choosing the right floor finish is more than just a functional decision; it reflects your style and values. Whether it’s the natural elegance of oil or the practical beauty of lacquer, the best choice is the one that makes you feel at home.


Contact us at 0203 8076 330 or visit our website to explore how we can transform your floors. Let us help you make a choice that you’ll cherish for years to come.

contact us

Services related to wooden floors we offer:

white washed wood floor
Written by Silver Lining Floor Care

Whitewashed Wood Floor

Whitewashed wood floor – how to achieve a Scandinavian look?

There is a certain charm to whitewashed Scandinavian wood floors that have been capturing the hearts of homeowners for centuries. While the look is timeless, achieving it can be a little tricky. In this blog post, we will discuss the difference between the traditional Scandinavian whitewash technique and more modern methods. We will also talk about how to maintain your wood floor once you have achieved the desired look, and whether soap or sealant is the best option.

What is the Scandinavian look?

If you are considering whitewashing your wood floor, it is important to understand the difference between the traditional Scandinavian method and more modern techniques. The original approach uses a mixture of lime and water, which is applied to the floor with a brush. This method is not as durable as more modern approaches, and it will require more frequent maintenance. Do expect to re-soap your floors every 2 weeks.

Modern approach for white wash effect

Nowadays, there are many different products on the market that can be used to whitewash your wood floor. Pallmann offers a wide range of high-quality sealants that can be used to achieve the desired look. When choosing a product, it is important to consider how often you will need to refresh your floor. For example, if you have a busy household, you may need to re-oil your floor more often than if you live alone.

How to protect your whitewashed wood floor – Oil or Lacquer?

My personal opinion and the best advice to keep a whitewashed wood floor is to lock white pigment under 2 coats of 2k lacquer with additional white pigment built-in. Maintaining the white finish with this option is so much easier. You could decide on 2k white or pure oil which should be all right for light traffic areas like bedrooms.

Once you have chosen the right product for your needs, it is important to follow the instructions carefully. After the full sanding process of your floor, applying too much sealant or soap can damage your wood floor, so it is important to apply the product evenly and in thin layers. Once you have achieved the desired look, it is important to maintain your wood floor properly. Regular sweeping and mopping will help to remove dirt and debris, and Pallmann offers a wide range of cleaning products specifically designed for use on sealed floors.

Conclusion

So, there you have it! Whitewashing your wood floor is a great way to achieve the sought-after Scandinavian look. With a little bit of planning and the right products, you can achieve a beautiful finish that will last for years to come. Thanks for reading!

Do you have any questions about whitewashing your wood floor? Get in touch with us and we will be happy to help!

contact

If you enjoyed this blog post, be sure to check out our other posts on home improvement and decorating ideas! We are always updating our blog with new content, so be sure to check back often! Thanks for reading!

Have a great day! 🙂

Service related to wooden floors we offer:
dust free wood floor sanding process
Written by Silver Lining Floor Care

Dust-Free Floor Sanding

How dusty is it?

Dust-free floor sanding stands for its name. Floor sanding is not dusty anymore! It used to be years ago. The development in equipment and Health & Safety Laws evolved and as a result, it formed dust-free floor sanding procedures.

Skill & Knowledge

Knowledge is the key to everything. If unskilled technicians work with good equipment the results are going to be average, which we assume is not what you are looking for. We use state of the art equipment which minimises the amount of dust protecting you, your family and the technicians. Along with high-quality equipment, we have vacuums with HEPA filters connected to the equipment to minimise the amount of dust in the air. All of your floor sanding technicians are Pallmann Parkettprofi approved and have completed at least one Ultimate Floor Sanding Company Training.

Wood dust can hurt your lungs

Wood dust particles can be very fine and due to that fact, they may stay airborne for a very long time. You might have experienced a similar situation when you had some building work at your home. The building dust can stay airborne for even a month if not longer. You don’t want that dust to be in your lungs and your loved ones, do you?

Exposure to dust

You may think that you will be just fine with so little exposure and you might be actually wrong. Devil is in the details! It is a one-time exposure for you. Our technicians do it every day and in the long run for them, it may be critical. So, please protect yourself and others by choosing a dust-free system and make sure the technicians involved in the job are well trained and educated in this matter.

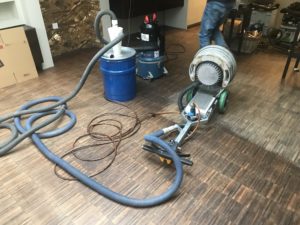
Dust-free floor sanding equipment

Our dust-free floor sanding equipment

Is it 100% Dust Free Sanding?

Although we do our best to prevent any dust in the air, it is not possible yet to remove all of it. Especially when working on the edges and stairs. Our floor sanding system is good enough to work in the commercial environment without any additional protection. We have done some work in high-end shops with the shoes on the shelves. Time limitations and deadlines didn’t really allow us to protect everything, as it was not necessary at all.

We are simply honest with you. We do not try to oversell the greatness of our system and promise you something which is not achievable. Please expect that some of the cleaning work might have to be done after the project, but it is not a massive amount. It can easily fit into your general cleaning schedule and doesn’t require any extra amount of specialised work. If you prefer, we can put you in touch with some cleaning companies in the area as we have a good network with local businesses.

Service related to wooden floors we offer:
pine floorboard sanding
Written by Silver Lining Floor Care

Floorboards Sanding DIY

pine with white finish

Pine floorboards sanding

The beauty of the floorboards hidden under

Floorboard sanding has gained significant attention in households across the UK in recent times. Intrigued by this trend, I’ve delved into the intricacies of this transformative process.

The charm of wooden floors graces numerous residences throughout the UK. Often hidden beneath carpets or other coverings, these floors harbor untapped potential waiting to be uncovered.

When carpets are lifted, the typical appearance of a floor is as follows:

Floorboards sanding difficulties 

Uneven floorboard covered in residue.

Sanding pine floorboards presents a challenging task. These surfaces often feature adhesives, nails, screws, staples, and more. Additionally, they can be uneven and marred by various factors like woodworms, plumbers, and electricians. The initial step in floorboard sanding involves levelling the floor and streamlining subsequent sanding phases for improved results. This phase can demand significant time and material resources.

The floorboards are softwood.

As a softwood, pine necessitates a higher quantity of sanding paper compared to hardwoods like oak. Its softer nature leads to quicker paper clogging. Consequently, attaining a refined, smooth finish during the sanding and finishing stages is more challenging, resulting in a lengthier project completion timeframe.

Repairing the floorboards.

Frequently, floorboard sanding projects entail necessary repairs. The challenge lies in the fact that acquiring new pine boards would result in a noticeable disparity when compared to your century-old planks. Instead, opting for reclaimed pine timber of similar age, thickness, and width is crucial. While sources for such timber exist, their availability can be elusive, demanding a dose of patience – perhaps even some yoga or meditation :).

Repair work might encompass board replacement, hole filling, and joist building or replacement. Numerous concealed issues may remain undisclosed during the initial quote visit, often surfacing after repairs commence or heavy machinery is applied to the floor. Restoring old pine floors demands a degree of tolerance. In essence, they were never intended to serve as final flooring but rather subfloors. Even after meticulous repair work, new issues may manifest over time. It’s vital to recognize that these aren’t shortcomings of the repair process, but rather a consequence of the floor’s unknown history and what lies beneath.

Staining & finishing your floorboards

The most common finish of the pine floor is just a natural look, however, if you like it stained, I personally think that the reactive stains from Ciranova look best on pine. Have a look at the Ciranova range here-click, and scroll down to reactive stains. It can be finished with either oil or lacquer.  Although the easiest and the cheapest to work with are solvent-based stains like Morrells. You can also use an oil-based stain like Pall-X 333 range if there aren’t too many imperfections on the floor and the gaps are filled.

Some examples of our work

Pricing floorboard sanding work

Clearly, this task isn’t a simple endeavour, making it challenging to predict every potential obstacle during the floorboard restoration process. Frequently, the floor is concealed beneath carpets, rendering the underlying condition invisible. While carpets are in place, we can provide a preliminary assessment, but please note that we won’t account for floorboard repairs at this stage.

Upon carpet removal, we can thoroughly evaluate the scope of work required and then furnish you with a more accurate quote for your wooden floor’s rejuvenation. Our preference for completing the project involves utilizing top-tier products from Pallmann to achieve a high-quality finish.

Get in touch with us for a free quote

Call back short
Service related to wooden floors we offer:
1 2
Free quote