Common Wood Floor Sanding Challenges
Understanding the Challenges of Wood Floor Sanding
Restoring wood floors is an art that balances preservation with improvement, but some challenges lie beyond the control of even the most skilled professionals. Here are several issues that homeowners should be aware of before starting a restoration project:
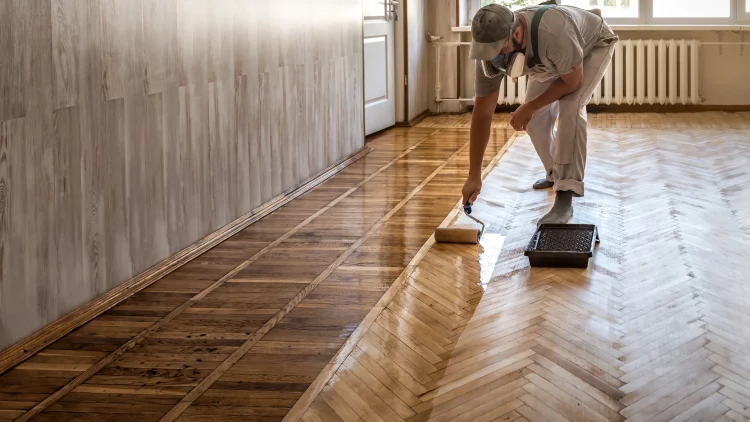
Stains and Contamination

contamination that appeared after applying a coat of primer
Deeply embedded stains in wood floors often present significant restoration challenges. While superficial stains can sometimes be sanded away, those that penetrate deeper into the wood may not be completely removable. Continuous sanding in an attempt to remove such stains could risk damaging the wood veneer, leading to an uneven or shallow surface.
Unexpected stains might also emerge after applying the first coat of finish, potentially caused by residues such as primer or other chemicals used in prior treatments. These areas might initially appear lighter but can sometimes fade as the finish fully dries.
Urine Damage
Particularly for pet owners, urine stains pose a unique problem. A single accident on the floor might be cleaned effectively, but repeated incidents in the same area can saturate the wood, embedding the odour and contamination deep within. While the smell can often be neutralized, the underlying damage to the wood might be irreversible.
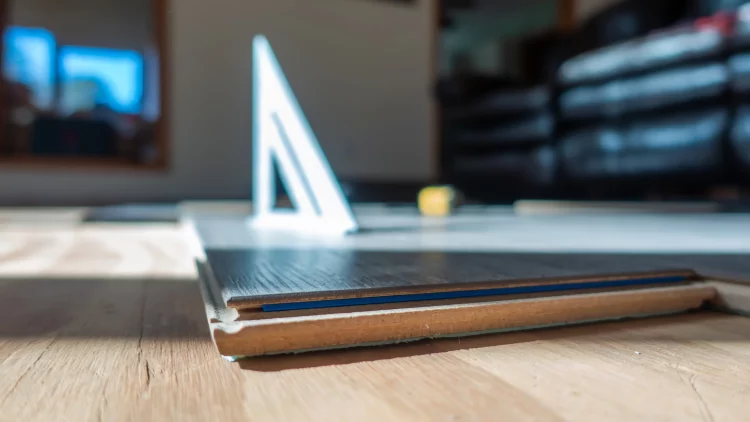
Risks of Sanding Through Wood Veneer
Engineered wood floors feature a thin layer of wood veneer which varies in thickness and can pose a significant challenge during restoration. If your floor has been sanded previously, it can be difficult to determine the remaining thickness of the veneer. During the sanding process, there’s always a risk of accidentally sanding through this layer, which may result in an uneven or aesthetically displeasing appearance.
As professional floor sanders, we always aim to remove only the minimal amount of wood necessary to strip old finishes and smooth the surface. We take great care to assess the condition of the wood and avoid deeper sanding that could compromise the veneer. It’s important to note that wood veneers can range from as thick as 8mm to as thin as 1mm, making each restoration project unique in its approach and potential risks.
Paint Touch-Ups to Skirting Boards

skirting damage during sanding
During the floor sanding process, achieving a completely restored look often involves getting close to the edges of your room. This requires the use of heavy-duty sanding equipment, which can sometimes damage skirting boards. To ensure a seamless finish, these areas might need subsequent paint touch-ups.
If you’re planning a full house renovation, we highly recommend scheduling paint touch-ups for your skirting boards after the sanding is completed. This allows for any accidental damage from the sanding equipment to be corrected effectively. Additionally, if there is silicone sealant between your skirting boards and the floor, it’s almost certain that adjustments will be needed post-sanding to maintain a clean and polished appearance
Woodworm Damage in Old Pine Floors

woodworm damage

woodworm damage
When restoring old pine floors, the sanding process may reveal damage caused by woodworms. Unfortunately, it’s impossible to predict the extent of woodworm damage beneath the surface until the floor is sanded. If extensive damage is uncovered, the affected planks might need to be replaced entirely, which can add to the overall scope and cost of the project.
For less severe cases, we have the option to fill the damaged areas with wood filler, which can help stabilize and smooth the surface. Alternatively, some clients choose to leave minor woodworm damage visible, as it can contribute to the rustic charm and character of the floor. This choice depends on the desired aesthetic and the structural integrity required for your space.
Managing Expectations with Green or Patchy Wet-Looking Floorboards
green stains on old floorboards
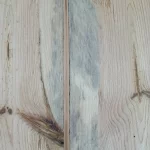
green stains on old floorboards
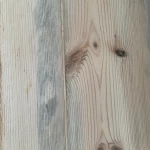
green stains on old floorboards
green stains on old floorboards
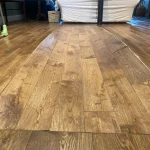
Restoring century-old floorboards often brings unexpected surprises, such as patchy or greenish appearances that become evident after sanding or finishing. It’s important to remember that these are historic floors with inherent imperfections, which are part of their charm and history. Achieving the look of a brand-new floor is not always possible with such aged materials.
Rearranging floorboards to conceal discoloured areas under furniture is a time-consuming and delicate process, with the risk of damaging the boards during removal. Adding extra days to accommodate these changes isn’t always feasible, given the tight schedules of professional restoration teams.
For those seeking perfection, it’s advisable to discuss potential issues and solutions after the initial sanding reveals the floor’s condition. Planning for additional repair and finishing sessions might be necessary, though this can extend the duration of the project significantly. Understanding and accepting these aspects of historic floor restoration upfront can help set realistic expectations and ensure satisfaction with the end result.
Patchy and Wet-Looking Boards
When dealing with century-old floorboards, inconsistencies like patchy colouring or a wet look after sanding are common. These are often inherent to the age and history of the wood, adding character but also presenting restoration challenges.
Addressing Post-Restoration Board Breakage
floorboard with no support
Despite meticulous attention during restoration, boards may sometimes crack afterwards due to insufficient underlying support, an issue not always visible during initial restoration efforts. It’s important to understand that floor restoration specialists can only address visible issues. We thoroughly inspect and work on every inch of the floor with heavy sanding equipment, but hidden problems beneath the boards, such as joist conditions, typically remain unchecked unless specifically included in the service agreement.
Board breakage post-restoration is relatively rare and often unforeseen. Should such an issue occur, the repair process is intricate and time-consuming. It involves removing the damaged filler and planks, installing new ones, re-sanding these areas, and then refilling the gaps—usually with slivers or Sikaflex, which require 24-48 hours of drying time. Additionally, applying finishing products like a primer and multiple coats of lacquer, each necessitating further drying time can extend the repair over several days.
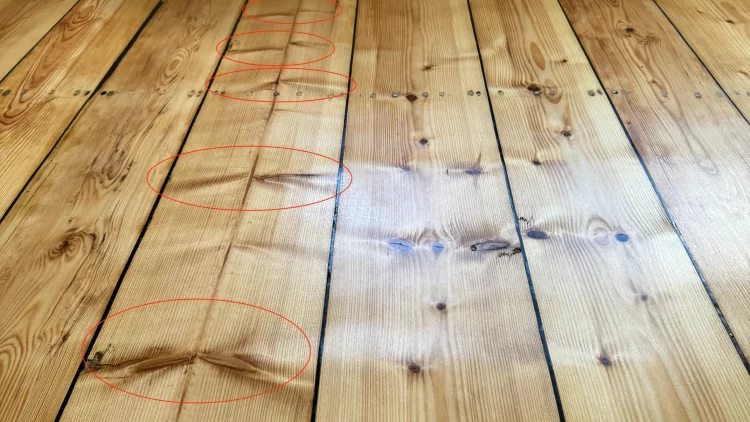
Understanding the Odd Wavy Floorboards
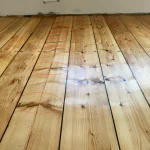
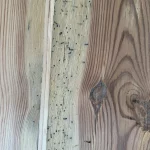
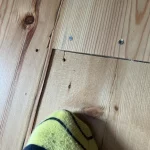
photo 1. See the pattern of knots on this plank – circled in red
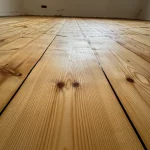
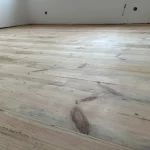
wavy floorboards
When restoring pine floorboards, it’s helpful to see the difference between regular planks and those with knotted patterns that can appear wavy after sanding. To better understand the visual impact of knotted wood on your floor’s appearance, please refer to Photo 1. Focus on the areas circled in red to see how the knot patterns contribute to the unique texture and character of the restored floor.
These images illustrate how the sanding process accentuates the knots, creating a textured effect that can be visually distinct from other planks with random knot patterns.
By referring to these photos, you can appreciate the unique beauty and rustic charm that knotted planks bring to a restored wood floor, as well as make more informed decisions about the aesthetic you desire for your home. This approach ensures that the natural features of the wood are both understood and appreciated, aligning expectations with the intrinsic properties of pine flooring.
Crowning and Bowing in Restored Floors
massive moisture issue
Crowning and bowing of floorboards can occur if there is an issue in the basement, such as moisture seeping up through the subfloor. This is particularly likely if there is no moisture barrier, like a damp proof membrane (DPM), installed. While minor moisture problems may resolve naturally as the boards dry and potentially regain their original shape, severe cases might lead to permanent damage that is not reversible.
Soil and Bitumen Challenges in Floor Gaps
When filling the gaps in old floors using sawdust and special resin, bitumen used as an old adhesive can pose a challenge. Over time, bitumen may rise to the surface, interacting with the moisture in the filler. This issue is often unforeseen by floor sanding specialists, as the bitumen’s behaviour under new conditions can be unpredictable.
Additionally, these gaps often harbour significant amounts of soil. While most of the soil is dry and can be removed with a vacuum cleaner, some of it becomes sticky and attracts water-soluble soils that are harder to manage. These residues can rise to the surface along with the gap filler. In cases where the gaps are particularly thin, completely removing this embedded soiling can be impractical. This highlights the complexities of dealing with legacy materials and contaminants during floor restoration.
Conclusion
Wood floor restoration can significantly enhance the beauty of a home, but it comes with its own set of challenges. While these situations are rare, understanding potential issues like deep stains, veneer damage, and moisture effects is essential for setting realistic expectations. This knowledge facilitates a smoother process for both homeowners and professionals. Remember, some imperfections can add unique character to your floors, embodying the history and natural beauty of the wood. It’s important to note that as floor sanding specialists, we mention these potential complications not because they are common, but because they can manifest unexpectedly and are beyond our control.