Can You Sand Engineered Wood Flooring
Written by Silver Lining Floor Care

Can You Sand Engineered Wood Flooring?

Understanding Engineered Wood Flooring

Before diving into the intricacies of sanding engineered wood flooring, it’s crucial to understand what sets it apart from traditional hardwood. Engineered wood floors comprise multiple layers, with a veneer of real wood on the top. This construction enhances stability and resistance to environmental changes, making it a popular choice for many homeowners.


The Possibility of Sanding Engineered Wood Floors

Evaluating the Thickness of the Top Layer

The key factor in determining whether you can sand engineered wood flooring is the thickness of the top hardwood layer. Floors with a thicker veneer can often be sanded and refinished multiple times, much like solid hardwood. However, if the veneer is too thin, sanding is not advisable as it could damage the flooring beyond repair.

The Role of Professional Assessment

Given the complexity of this task, seeking professional advice is paramount. Experts at Silver Lining Floor Care can assess your engineered flooring to determine if sanding is a viable option. Our team has the expertise to evaluate the condition of your floor and recommend the best course of action.

The Sanding Process: What to Expect

If your engineered wood flooring is deemed suitable for sanding, here’s what the process entails:

Preparation and Sanding

Our team begins with a thorough assessment, ensuring the floor is clean and free of any fixtures that might impede the sanding process. Using specialized equipment, we carefully sand the top layer of the wood, removing scratches, dents, and old finish.

Refinishing for a New Look

After sanding, you have the opportunity to refinish your floor. This step not only enhances the floor’s appearance but also provides an added layer of protection. From natural looks to darker stains, refinishing can transform your space entirely.

The Benefits of Sanding Engineered Wood Flooring

Sanding engineered wood floors can revive your space, making floors look brand new. It’s an eco-friendly alternative to complete floor replacement, reducing waste and extending the life of your flooring. Additionally, it’s a cost-effective solution to improve your home’s aesthetics and value. Above all we recommend maintaining your floors so they can last much longer.

Final Thoughts: Is Sanding Right for Your Engineered Wood Flooring?

“Sanding engineered wood flooring” is a question with a nuanced answer. It depends on several factors, including the thickness of the veneer and the floor’s overall condition. At Silver Lining Floor Care, we’re committed to providing you with the information and services needed to make informed decisions about your flooring.

For more insights and professional flooring solutions, visit our home page. Our experts are here to guide you through every step of the process, ensuring your engineered wood flooring remains a lasting and beautiful component of your home.

contat uș

Floor Sanding and Polishing. Knowing the Right Time
Written by Silver Lining Floor Care

Floor Sanding and Polishing: Knowing the Right Time

Welcome to our latest blog post where we delve into the essential process of floor sanding and polishing, and importantly, when it’s time to undertake this task for your wooden floors. At Silver Lining Floor Care, we understand the importance of maintaining the beauty and durability of your wooden floors, which is why we’re here to guide you through understanding when and why floor sanding and polishing are necessary.


Understanding Floor Sanding and Polishing

Floor sanding is the process of removing the old finish and any imperfections from your wooden floor using specialized machinery, such as belt sanders. This process is crucial for preparing the wood for a new finish, ensuring it’s perfectly smooth and ready to be treated.

Polishing, or buffing, often follows sanding. It involves using higher grades of sandpaper to achieve a smooth surface. However, polishing can also refer to a maintenance cleaning process for floors that don’t necessarily need full sanding. This approach, known as ‘buff and coat,’ can enhance the appearance of your floor, although it won’t remove deep scratches.

The Importance of Timely Maintenance

One common misconception is that polishing is only a deep cleaning process. While it’s true that floors can appear dull after deep cleaning and might require an extra coat of lacquer or oil, timely maintenance is critical. Just like dental hygiene, where you wouldn’t wait for your teeth to show signs of neglect before cleaning them, your wooden floors shouldn’t be left until they’re visibly worn or damaged. Postponing maintenance can lead to irreversible damage, making more intensive and costly procedures like full sanding inevitable.

Why You Shouldn’t Delay Floor Care

The protective layer on your wooden floors is there to prevent moisture absorption. Without it, wood can darken and deteriorate quickly. Moreover, with the prevalence of engineered wood planks, there’s a limit to how many times your floor can be sanded before needing replacement. Regular maintenance is key to extending the life of your floors and keeping them looking their best.

Silver Lining Floor Care: Your Partner in Floor Maintenance

Choosing us for your floor care needs means you’ll never have to worry about remembering to maintain your floors. Once we’ve completed a job, we’ll add you to our 6-month reminder list for DIY maintenance, ensuring your floors remain in top condition year-round.

In conclusion, understanding the importance of timely floor sanding and polishing is crucial for maintaining the beauty and longevity of your wooden floors. Whether it’s full sand and polish or a simple buff and coat, these procedures protect your floors from damage and keep them looking their best. Remember, regular maintenance is far less costly than delaying care until problems become apparent. Trust Silver Lining Floor Care to keep your floors shining bright, and feel free to reach out for any advice or services you might need to keep your wooden floors in pristine condition.

contat uș

When you should call us to renovate your floor? First signs!
Written by Silver Lining Floor Care

Essential Guide to Floor Restoration and Renovation for Your Home

Guide to Floor Restoration and Renovation

In the realm of house renovation, recognizing the opportune moment for floor restoration and renovation stands paramount. This guide unveils the essential early signs that your floors demand attention, providing actionable insights for maintaining an array of flooring types. From carpets to ceramic tiles, stone, and wood, learn the significance of preemptive renovation and restoration efforts to avert irreversible damage, thus amplifying your home’s allure and market value.


When Is the Right Time for Floor Restoration in Your Home? Key Indicators and Expert Advice

Floor maintenance is a pivotal aspect of home care, impacting both the aesthetic and structural integrity of your living space. Identifying the need for floor restoration and renovation is vital for preserving your home’s beauty and functionality. This comprehensive guide will navigate you through the early signs that your flooring materials require professional intervention, ensuring your house renovation projects are both timely and effective.

Early Warning Signs for Different Flooring Types:

Carpets:

The key to carpet longevity is routine cleaning, particularly for wool carpets which excel in concealing dirt. To prevent irreversible soil build-up and potential damage, it’s advisable to clean high-traffic areas at least annually, with bedrooms needing less frequent attention.

Ceramic/Porcelain Tiles:

Despite their resilience, these tiles benefit from regular mopping and occasional professional cleaning and buffing. Incorrect product use or dilution can lead to residue accumulation, attracting more dirt and necessitating deep cleaning. Regular sealing is recommended to maintain their lustre and prevent smearing during cleaning.

Stone Flooring:

Stone floors demand a balance between aesthetics and maintenance; the higher the sheen, the more care is required. Natural wear and micro-scratches can dull stone surfaces, but timely polishing can restore their original radiance. Delayed maintenance may lead to the need for extensive restoration work.

Wood Floors:

Wood flooring requires vigilant care to maintain its protective finish, whether oil or lacquer. Noticeable wear patterns or rapid drying after mopping signal diminished protection, risking moisture absorption and grain darkening. In such cases, mere cleaning is insufficient, and a thorough sanding may be necessary.

Unsure of Your Floor’s Condition?

Determining whether your floor needs a simple clean or a full-scale restoration can be challenging. By sharing images of your flooring with us, you can receive a tailored assessment and recommendations from our experts. We stress the importance of proactive measures over delayed reactions to preserve your flooring’s integrity and appearance.

Conclusion:

Floor restoration and renovation are integral components of house maintenance, directly influencing your home’s aesthetic appeal and longevity. By heeding the early warning signs across various flooring materials, homeowners can undertake timely interventions to avoid costly replacements and enhance their living space’s overall value. Remember, in the context of floor care, early action is invariably better than regrettable delays, ensuring your home remains a testament to meticulous upkeep and thoughtful renovation.

See our before and after photos on Facebook and Instagram.


contat uș

cleaning terracotta tiles
Written by Silver Lining Floor Care

Cleaning Terracotta Tiles

Ultimate Guide to Cleaning Terracotta Tiles:

Maintain Their Natural Beauty

Terracotta tiles, with their distinctive warm and earthy tones, add a unique charm to any space they adorn. However, to ensure these tiles retain their appeal over the years, a dedicated cleaning and maintenance regime is essential. This guide dives into the best practices for cleaning terracotta tiles, emphasizing techniques that safeguard their porous nature while enhancing their inherent beauty.


Essential Steps for Cleaning Terracotta Tiles

The cornerstone of terracotta tile upkeep is a consistent cleaning routine coupled with proper sealing. When attended to regularly, cleaning terracotta floors may only require a minimal reapplication of sealer—often just one or two coats. This not only keeps the process straightforward but also crucially maintains the tiles’ resistance against moisture and grime.

Tackling the Challenges of Terracotta Tile Restoration

Delaying regular cleaning can lead to a more daunting task—complete restoration. This process can involve stripping the old sealer, a step that demands considerable effort and preparation. Once the old sealer is removed, and the tiles are deep cleaned, an extended period is necessary for the tiles to dry thoroughly. Afterwards, applying three to six coats of sealer ensures the tiles are adequately protected once again.

The Role of Dry Soil Removal and Coir Mats in Cleaning Terracotta Floors

A pivotal, yet often underestimated, aspect of maintaining terracotta tiles is effective dry soil removal. Since dry soil can act as an abrasive and degrade the sealer over time, removing it regularly through vacuuming or sweeping is crucial. Additionally, employing coir mats at entryways dramatically reduces the ingress of dirt and moisture, effectively preventing potential damage to the tiles. Implementing these strategies significantly contributes to the longevity and aesthetic of terracotta tiles by minimizing wear and tear.

Consistent Care for Terracotta Tiles’ Long-Lasting Beauty

Adopting a routine of diligent cleaning, strategic sealing, effective dry soil management, and the use of coir mats at entrances ensures the lasting beauty and durability of terracotta tiles. Such meticulous care not only preserves the visual appeal of your flooring but also safeguards your investment in your home’s aesthetics.

Silver Lining Floor Care specializes in the expert cleaning and maintenance of terracotta tiles, offering comprehensive solutions tailored to keeping your floors in pristine condition. Discover how our expertise in terracotta tile care can help maintain the natural allure and integrity of your flooring.

contat uș

Seasonal wood floor care
Written by Silver Lining Floor Care

Humidity for Solid Wood Floors

Mastering Humidity for Solid Wood Floors: Seasonal Care Tips from Silver Lining Floor Care

Silver Lining Floor Care emphasizes the importance of a balanced home environment for the well-being of your solid wood floors. Reacting naturally to the ebbs and flows of air humidity, these floors require a nuanced understanding of seasonal changes to maintain their beauty and structural integrity.

Understanding the Dynamics of Wood and Humidity

Winter Considerations

In the colder months, heating systems can cause indoor air to become quite dry, potentially leading to wood floors shrinking and forming small gaps. This occurrence, more common when humidity levels fall below 45%, is a typical response of wood to the dry conditions of winter and should not be a major concern.

Adapting in Spring

Humidity and wooden floors 1As the air becomes more humid in spring, these gaps usually close naturally. To prevent them from occurring during dry periods, maintaining a consistent level of indoor humidity is crucial. Utilizing air humidifiers to sustain a humidity level between 45-60% not only benefits the wood floors but also promotes a healthier living environment. It’s important to select high-quality humidifiers and steer clear of lower-grade ultrasonic or droplet humidifiers, which can leave deposits on your floors and furniture. There are many smart humidifiers nowadays that can regulate the conditions in the room we found your interventions.


Summer Humidity Management

Crowning of wooden floor

Summer brings higher humidity, which can lead to the wood absorbing moisture and swelling. This is often seen in the ‘crowning’ effect, where the edges of floorboards curl. It’s essential to keep room humidity under 60%, ideally around 50%, using air conditioners or dehumidifiers to achieve this balance.


Houseplants:

Humidity and wooden floors 4

A Natural Humidity Solution Incorporating houseplants into your home is an excellent way to regulate humidity. Through transpiration, plants release moisture, helping to balance the indoor climate, especially beneficial in the dry winter months. In summer, they can assist in absorbing excess humidity, creating a stable atmosphere that’s conducive to the health of your wood floors.


Addressing the ‘cupping’ Effect

Cupping of wooden floor

In case you notice the ‘cupping’ effect, quickly identifying and eliminating the source of excess moisture is crucial. Following this, the wood typically returns to normal as it dries out. Severe cupping may necessitate professional floor treatment. Before you go to any treatments on the wood floor, you just need to make sure that the moisture issue has been fully resolved. Note if the flooring bends this way, the moisture is likely coming from beneath the floorboards rather than above.


Conclusion

Silver Lining Floor Care advocates a holistic approach to caring for your solid wood floors. Proper humidity management, aided by humidifiers, dehumidifiers, and the strategic use of houseplants, is key to preserving your floors. These practices not only ensure the durability of your flooring but also enhance the overall comfort and health of your home environment.


contat uș

parquet floor polishing
Written by Silver Lining Floor Care

Guide to cleaning wooden floors

Cleaning Wooden Floors – The Easiest Way to Keep Your Home Shining!

Wooden floors are a beautiful addition to any home. They bring warmth, character, and elegance to any space. However, maintaining their pristine appearance can be challenging, especially with the daily wear and tear of life. Are you looking for an effective, easy-to-follow cleaning routine for your hardwood flooring? Look no further! In this blog post, we will guide you through the essential steps to keep your hardwood floors shining, from identifying your floor type to deep cleaning and stain removal, with a focus on cleaning hardwood floors. Say goodbye to dull, scratched floors and hello to a gleaming, well-maintained surface.

Key Takeaways

  • Identify your hardwood floor type for proper cleaning and maintenance.
  • Implement a weekly cleaning routine, including appropriate cleaners and buffing.
  • Protect wooden floors from damage with rugs & mats, furniture pads & regular maintenance.

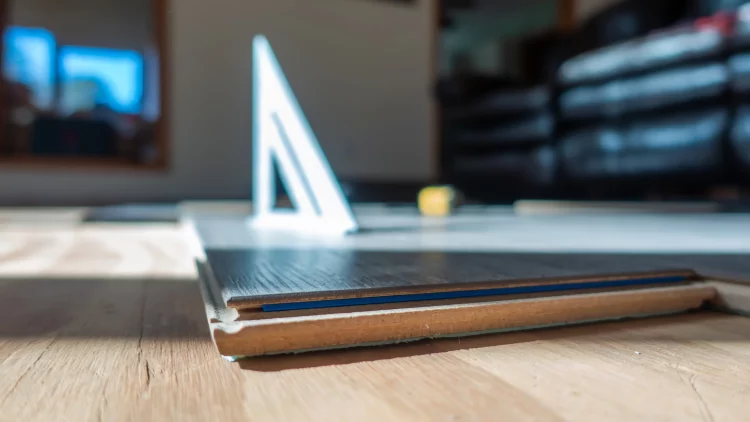
Identifying Your Wooden Floor Type


Understanding the type of hardwood floors is the first and foremost step in their maintenance. Different floor finishes require unique cleaning methods to prevent damage and prolong their lifespan. Waxed hardwood floors, oiled hardwood floors, and lacquered hardwood floors each have specific care requirements.

A simple way to determine your floor type is by gently running a finger along its surface, which will reveal whether it’s sealed with:

  • wax
  • oiled floors
  • polyurethane lacquer

Once you identify your floor type, choosing the right cleaning products and techniques becomes easier, which aids in maintaining the pristine condition of your hardwood floors.

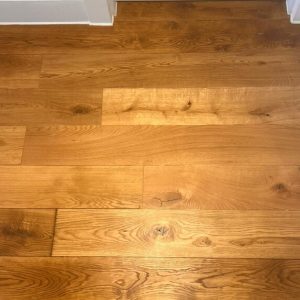
Oiled Hardwood Floors

Oiled hardwood flooring is a popular choice for more natural homes, not necessarily requiring more care and attention to maintain their appearance. These floors are treated with oil, providing a natural matte finish that gives the wood a more natural look. Using specialized cleaners designed for this flooring type is the key to the effective cleaning of hardwood floors.

Cleaning hardwood floors with an oil finish is relatively simple:

  1. Clean hardwood floors using neutral hardwood floor cleaner
  2. Allow your hardwood floors to dry completely
  3. Using a flat mop use products like Magic Oil Care undiluted and flat mope to apply a thin coat throughout all hardwood floors
  4. Avoid walking on the floor for up to 4 hours

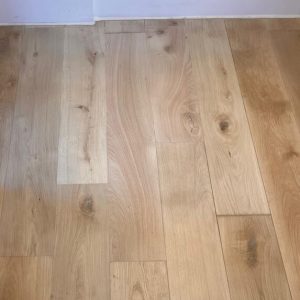
Lacquered Hardwood Floors

Lacquered hardwood floors have a glossy/satin finish due to a protective layer of lacquer applied to the surface. This type of flooring is similar to oiled wood floors in terms of care and maintenance requirements. To clean hardwood floors effectively with a lacquer finish, follow these steps:

  1. Use a neutral wood floor cleaner specifically designed for this type of floor.
  2. Avoid using harsh or abrasive cleaning products that can damage the lacquer layer.
  3. Use a soft, damp mop or cloth to gently clean the surface.
  4. Wipe up any spills or stains immediately to prevent them from penetrating the wood.
  5. Avoid excessive moisture when cleaning, as it can cause the wood to warp or swell. By following these guidelines, you can preserve the integrity of the lacquer layer and keep your lacquered hardwood floor looking beautiful.

A lacquered wood floor can be additionally protected with emulsion-based polish like Pallmann Finish Care.
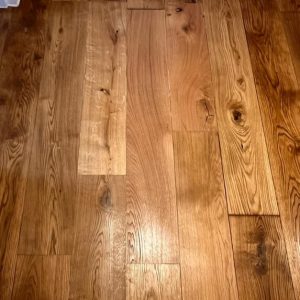
Waxed Wood Floors

Waxed wood floors are a mix of lacquer and oil. They have a protective coating or sealant that makes them more straightforward to clean and maintain. This type of finish is not recommended on commercial flooring as it is more prone to scratch as a top coating is not as durable as a lacquer finish. Avoiding harsh chemicals and abrasive products that can harm the protective layer is key when cleaning waxed hardwood floors. Instead, use a damp mop or cloth and a suitable cleaner, such as a natural cleaning solution, to clean the floors without causing harm.

Also, the lifespan of your waxed wood floors can be extended by regular sweeping, vacuuming, and dust mopping to remove dirt and debris. A fresh coat of wax finish can be applied.

Daily Maintenance to keep Clean Wooden Floors


Having identified your wooden floor type, you should now establish a daily maintenance routine to keep your floors in their best condition. Here are some steps to follow to keep your hardwood floors clean longer:

  1. Sweep, vacuum with a soft floor brush attachment, or dust mop your floors daily to remove dirt, dust, and debris that can scratch and damage the floor surface.
  2. Invest in the right tools, such as a soft-bristled broom or microfiber mop, to ensure gentle cleaning.
  3. Perform these tasks regularly to maintain cleanliness and the overall condition of your hardwood floors. It is a good way to clean hardwood floors and maintenance cleaning is so much better than deep cleaning.

Remember, a little daily effort goes a long way in preserving the beauty and longevity of your solid wood floors.

Sweeping

For daily sweeping of your hardwood floors, it’s crucial to use tools like a soft-bristled broom, microfiber mop or a soft cloth. These tools are highly effective at capturing dust and debris without causing any harm to the floor surface. To clean wooden floors more efficiently, make sure to sweep in the direction of the wood grain. This helps prevent dirt and dust from getting trapped in the grooves.

Regularly sweeping your floors is a surefire way to clean hardwood floors and minimize the buildup of dirt and debris, thus reducing the risk of scratches and abrasions over time. So, never underestimate this simple, yet essential step in maintaining the beauty and shine of your hardwood floors.

Vacuuming

For clean hardwood floors, vacuuming is an essential daily task. Using a vacuum with a floor-brush attachment can help in removing dirt and debris without scratching the surface. It is advised to vacuum at least once a week to prevent dirt from getting embedded into the floors, ensuring they stay clean.

Keep in mind, that for effective cleaning and preservation of your floor’s condition, it’s important to invest in a high-quality vacuum cleaner designed to clean hardwood floors.

Dust Mopping

In addition to sweeping and vacuuming, using a microfiber dust mop is an excellent way to capture fine particles and pet hair from your wooden flooring. Microfiber mops are highly effective at trapping dust and dirt, ensuring a thorough cleaning without causing damage.

Incorporating dust mopping into your daily maintenance routine ensures your hardwood floors stay spotless and well-protected against scratches and damage, making cleaning hardwood floors an easy task and keeping your hardwood floors clean.

Weekly Cleaning Routine for Wood Floor


To ensure longevity and maintain the beauty of your wooden flooring, a weekly cleaning routine is necessary. This routine should include selecting the appropriate cleaner, damp mopping, and possibly buffing to achieve a thorough clean that leaves your floors at their best. This process will help you eliminate any accumulated dirt and grime throughout the week, ensuring you always have clean hardwood floors.

Choosing the Right Cleaner

To avoid damage and prolong the lifespan of your flooring, it’s vital to select the right cleaner for your hardwood flooring finishes to ensure proper adherence. Be sure to avoid harsh chemicals and abrasive products that can strip away the protective layer and damage wood floors. Instead, choose a cleaner specifically formulated for your floor type, whether it’s waxed, oiled, or lacquered.

When in doubt, always test the cleaner on a soft cloth in a small, inconspicuous area before using it on the entire floor.

Damp Mopping

cleaning floors with a mop

Damp mopping is a vital part of your weekly cleaning routine. Here’s how to do it:

  1. Use a microfiber mop and the appropriate cleaning solution.
  2. Gently mop your wood floor to remove dirt and grime.
  3. Be sure to wring out the mop thoroughly to avoid using excessive water, which can damage the floor.

Once you’ve mopped, dry the floor with a clean, dry cloth or towel to prevent any moisture from seeping into the wood, causing damage. Avoid using steam cleaners. They can potentially force too much moisture into your wood floor.

Deep Cleaning Hardwood Floors


It’s essential to deep clean hardwood floors periodically to maintain their beauty and extend their lifespan. The method for a deep clean depends on the type of your floor, with specific cleaning techniques for an oiled or lacquered wooden floor.

Deep cleaning your floors removes stubborn dirt and grime, ensuring your floors stay in top condition and extending their lifespan.

Oiled Floor

Deep cleaning of oiled wood floors requires a more hands-on approach. Here’s how to do it:

  1. Vacuum or dust mop the floors.
  2. Lightly sand the floor with fine paper or deep clean hardwood floors with a rotary machine with cleaner and warm water.
  3. Extract all the moisture and allow the clean wooden floors to dry fully.
  4. Apply maintenance oil.
  5. Finally, buff the floor with the oil that matches your floor’s natural colour.
  6. Remove any excess with a soft cloth.

This deep cleaning process eliminates stubborn dirt and stains, ensuring your oiled wood floor is well-protected and fully saturated with a protective treatment.

Lacquered Wood Floors

Lacquered wood floors require similar deep cleaning methods to oiled floors. Here’s how to clean them:

  1. Begin by vacuuming or sweeping with a damp microfiber cloth to remove any loose dirt, debris and pet hair.
  2. Use a rotary machine to deep clean hardwood floors using a wood floor cleaner and warm water.
  3. Be cautious not to use excessive water, as this can cause damage to your wood floor.
  4. Make sure the floor is fully dry and apply a coat of bonding agent like Pall-X 350 to make sure your parquet wood floor’s finish will adhere properly.
  5. Apply a coat of 2k lacquer like Pall-X 98

For persistent stains, apply a small amount of the cleaner and leave it on the floor for a few minutes before mopping it off with clean water. Deep cleaning of your lacquered wood floors helps maintain their beautiful appearance and extends their lifespan. It is important not to leave it for too long before recoating. Once you cross that line then a full sanding process is required.


Waxed Wood Floors

For deep cleaning waxed wood floors, use a trademarked cleaning product and a damp mop to effectively remove dirt and stains without causing damage. Be sure to follow the manufacturer’s instructions for diluting the cleaning product and avoid using excessive water to prevent damage to the protective layer.

Follow the manufacturer’s recommendation for re-waxing the floor.

Deep cleaning your waxed wood floors helps maintain their beauty and extend their lifespan, ensuring you have clean wood floors for years.

Removing Stains and Scuff Marks

cleaning wood flooring


Accidents happen, and sometimes your clean wooden floors may end up with unsightly stains and scuff marks. But fear not – there are effective methods to tackle these blemishes and restore your floors to their original glory.

From watermarks and white stains to dark spots and pet stains, we’ll guide you through the process of removing these imperfections and keeping your floors looking their best.

Watermarks and White Stains


Watermarks and white stains can be a challenge to remove, but with the right technique, your floors can be restored to their original beauty. To tackle these stains, follow these steps:

  1. Lightly sand the floor to prepare it for treatment.
  2. Clean the surface with fine steel wool and odourless mineral spirits.
  3. Alternatively, you can use a combination of steel wool and floor wax.

By carefully addressing watermarks and white stains, you’ll ensure your clean wooden floors remain pristine and well-maintained.

Dark Spots and Pet Stains

Removing dark spots and pet stains from hardwood flooring can be a daunting task, but with the right approach, you can successfully eliminate these blemishes. Here’s how:

  1. Try cleaning the floors with a vinegar solution to neutralise the stain.
  2. Work on the entire affected plank
  3. Try using fine sanding paper to remove the stain. Go with the lower grit if necessary but always finish on 100 grit sanding paper.
  4. Recoat the planks with the same finish using a proper wood stain trying to match the surrounding planks.

Please note that if the floor is soaked with pet urine, the damage might be permanent and repair is necessary with a plank replacement.

Heel Marks and Scratches

Heel marks and scratches on your wooden floors can be unsightly and frustrating, but with the right technique, you can effectively remove them. To eliminate heel marks, rub floor wax into the mark with fine steel wool. For scratches, use a soft cloth and dish detergent to gently clean the affected area, followed by rinsing with clear water.

It is much easier to repair small scratches on oiled floors than on lacquered floors.

It also may be the case that you have to work on the entire affected plank and do some sanding, staining and refinishing.

Protecting Your Wooden Floors

rug on hardwood floors


Keeping your wooden floors looking their best requires taking preventive measures. Using rugs and mats, furniture pads, and performing regular maintenance effectively protect your floors from dirt, scratches, and other damage.

With these simple steps, you’ll ensure your clean hardwood floors remain in top condition and serve as a beautiful feature in your home for years to come, starting with the installation of a quality hardwood floor.
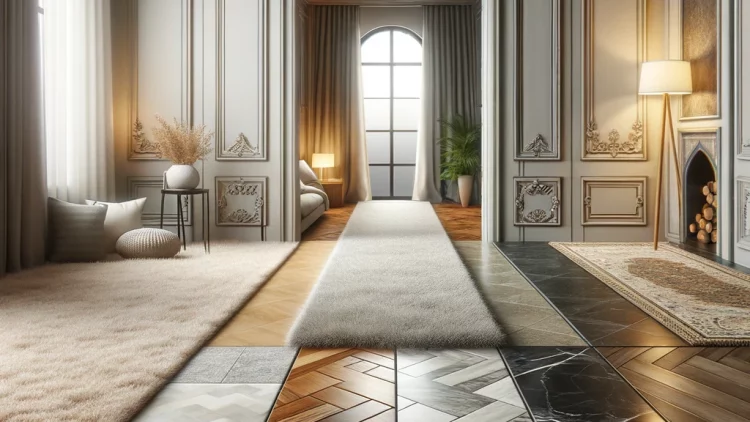
Using Rugs and Mats

Placing rugs and mats in high-traffic areas is a great way to protect your wooden floors from dirt and scratches. Be sure to use non-slip rug pads or underlays to prevent movement or slipping of the rug, ensuring the floor remains well-protected. Regularly clean these rugs and mats to prevent dirt and debris from being tracked onto the floor.

Furniture Pads

Furniture pads are an essential tool for protecting your wooden floors from scratches and dents caused by furniture legs. Here are some tips for using furniture pads effectively:

  1. Use felt or rubber pads, as they offer effective protection without causing scuff marks.
  2. Ensure the pads are thick enough for heavy furniture.
  3. Check regularly that the pads are in place for optimal protection.

Using furniture pads helps preserve the beauty and longevity of your wooden floors.
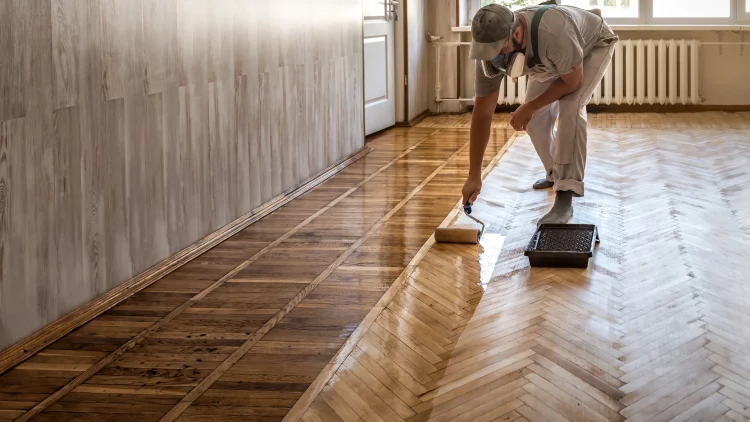
Regular Maintenance

Performing regular maintenance, such as oiling and waxing, is crucial to keeping wooden floors in good condition. Oiling and waxing not only maintain the floor’s appearance but also provide a protective layer that guards against damage and wear.

Investing time and effort in regular maintenance ensures your wooden floors stay beautiful and well-preserved for years to come.

Natural Cleaning Solutions for Wooden Floors

natural solutions for cleaning wooden floors

If you prefer eco-friendly alternatives to traditional cleaning products, several natural cleaning solutions can effectively clean your wooden floors. Using vinegar, essential oils, and other natural products, you can achieve a thorough, safe clean that’s gentle on both your floors and the environment, making them excellent hardwood floor cleaners.

Vinegar Solution

A simple yet effective wood floor cleaner for your wooden floors is a mixture of white vinegar and warm water. This inexpensive solution can be used to clean your floors with vinegar without causing damage or leaving harsh chemical residues behind. To clean your floors with vinegar solution, combine 1/2 cup of white vinegar with a gallon of lukewarm water, and use a slightly damp cloth, damp sponge or mop cloth to clean your floors.

Ensure to wring out the mop or cloth thoroughly to avoid using excess water, which can damage your wooden floors.

Essential Oils

Adding essential oils to your cleaning solution not only imparts a pleasant aroma but can also provide additional cleaning benefits. Many essential oils, such as lemon, eucalyptus, and tea tree, possess natural antibacterial and antifungal properties, making them an excellent addition to your floor cleaning regimen.

Simply add a few drops of your favourite essential oil to your cleaning solution and enjoy the fresh scent and added cleaning power as you mop your wooden floors.

Other Natural Cleaners

Several other natural cleaning solutions can be used to clean your wooden floors effectively. Lemon juice mixed with hot water and olive oil is an excellent option for cleaning and shining wooden floors. Baking soda mixed with warm water can also be used to remove stains and dirt from your floors.

Exploring these natural cleaning alternatives allows you to clean wood floors naturally, maintaining the beauty and longevity of your wooden floors while minimizing your environmental impact. Make sure you use a clean cloth or a clean mop and ensure your floors dry before recoating.

Preventing Damage to Wooden Floors


Implementing preventive measures is crucial to avoid damage to your wooden floors. Adopting a shoes-off policy and promptly cleaning up spills can minimize dirt and scratches on your floors, thereby preserving their beauty and extending their lifespan.

In this section, we’ll discuss these preventive measures and how they can help maintain the pristine condition of your hardwood floors.

Shoes-Off Policy

earth, wet earth, mud

Encouraging a shoes-off policy in your home is an effective way to minimize dirt, debris, and scratches on your wooden floors. Preventing tracked-in dirt and debris from damaging your floors is as simple as removing shoes at the door. Use a proper doormat by the main entrance

To make this policy easy for family members and guests to follow, create a designated landing space for shoes near the entrance of your home. Providing slippers or house shoes for guests to wear while in your home may also make the shoes-off policy more comfortable and inviting.

Prompt Spill Cleanup

Spills are inevitable, but cleaning them up promptly is essential to prevent stains and damage to your wooden floors. When a spill occurs, use a slightly damp cloth or damp clean mop to absorb the liquid as quickly as possible, followed by a dry cloth to remove any remaining moisture.

Addressing wet spills immediately helps maintain the beautiful appearance of your wooden floors and minimizes the risk of damage.

Summary

In conclusion, maintaining the beauty and longevity of your wooden floors doesn’t have to be a daunting task. By identifying your floor type, adopting a daily and weekly cleaning routine, and implementing preventive measures, you can keep your hardwood floors shining for years to come. Remember to use neutral floor cleaning solutions and avoid harsh chemicals to protect both your floors and the environment. With a little effort and care, your wooden floors will remain a stunning feature in your home, bringing warmth and elegance to any space.

Frequently Asked Questions

What is the best thing to use to clean wood floors?

For the best floor cleaning, use a microfiber dust mop to attract and trap dirt – it can then be washed and reused. Avoid using a broom with a beater bar as this can damage the hardwood surface.

Can you mop wooden floors?

Yes, you can mop wooden floors using a slightly damp mop or cloth; string mops are less recommended, while microfiber cloths are ideal.

What should you not clean wood floors with?

Avoid cleaning wood floors with straight ammonia, alkaline products, oils, waxes, furniture sprays, lemon juice or harsh cleaners as these can weaken the finish and expose the bare wood over time. Use a wood floor cleaning product specifically formulated for hardwood flooring instead.

Is it OK to mop wood floors with water?

It is not advisable to wet mop wood flooring, as too much water can cause damage. Use damp cloths or mops with a designated cleaning product. Clean up and standing water immediately.

What is the best way to identify my wooden floor type?

To identify the type of wood flooring, run a finger along the surface to check for wax, oil, varnish, or polyurethane sealant. This simple method can quickly tell you what kind of flooring you have.
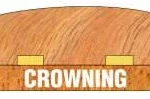
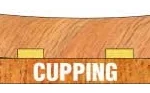
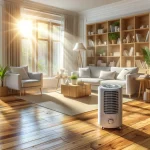
 

contat uș

Written by Silver Lining Floor Care

Guide to Parquet Floor Polishing

The Ultimate Guide to Parquet Floor Polishing

A well-polished parquet flooring can significantly enhance the ambience of any room, bringing a sense of warmth, class, and sophistication. This transformation is not only visually appealing but also adds a touch of elegance to your space.

But how can you achieve and maintain this remarkable effect for the long haul? The answer lies in understanding the process of parquet floor polishing and the best practices for maintaining it.

This all-encompassing guide to parquet floor polishing will equip you with the necessary knowledge and tips to refurbish, safeguard, and sustain your parquet flooring. It’s time to delve into the world of parquet floor restoration and discover the hidden charm of your parquet flooring!

Whether you’re a do-it-yourself aficionado or contemplating hiring a professional, this guide provides valuable insights and expert recommendations. From selecting the appropriate polish to preparing your floor for the polishing process, you’ll find everything you need here. With these tips and techniques, your parquet flooring will remain beautiful and resilient for many years.


Key Takeaways

  • Understand the benefits and types of polishes available for parquet flooring.
  • Prepare your parquet flooring before polishing, including cleaning the surface and addressing minor repairs.
  • Hire a professional to achieve a polished result with expert knowledge, specialized equipment and time-saving techniques.

The Art of Parquet Floor Restoration


Maintaining the beauty and longevity of your wood flooring involves parquet flooring maintenance. Floor restoration not only enhances the aesthetic appeal of your parquet floors but also safeguards them from harm, extending their service life and preserving their unique charm. Parquet flooring, a type of hardwood floor, is composed of solid wood blocks arranged in geometric or regular patterns, such as herringbone and chevron. This intricate design provides a distinctive and elegant appearance that can be maintained and protected through regular cleaning and care.

Understanding the various types of parquet flooring polishes and their respective benefits is key to achieving a beautifully polished parquet floor. Some examples of the different wood types used in parquet floors include:

  • Oak
  • Pine
  • Pitch pine
  • Teak

The type of polish you choose will depend on factors such as the wood type, the desired finish, and the current condition of your floor. In the following sections, we’ll delve deeper into the benefits of regular polishing, the different types of finishes available, and the importance of selecting the right polish for your parquet flooring.

Benefits of Regular Polishing

The beauty and functionality of your parquet flooring are preserved through regular polishing. By routinely polishing your floors, you help:

  • Restore their original shine and lustre, giving them a refreshed and revitalized appearance
  • Seal the parquet floors, preventing dirt and dust from entering the wood and causing damage
  • Protect your parquet floors from everyday wear and tear, extending its longevity
  • Ensure it remains a stunning focal point in your home

In addition to the aesthetic and protective benefits, regular re-coating also contributes to a healthier living environment. A well-maintained parquet flooring is easier to clean and less prone to harbour allergens, dust, and dirt. Incorporating regular polishing into your wooden floor maintenance routine not only maintains the beauty of your floor but also contributes to a cleaner, more pleasant living space for you and your family.

Types of Parquet Floors Polishes

There are several types of wooden floor polishes available, each with its own advantages and disadvantages. Wax, oil, and lacquer are the most common options, and understanding the differences between them will help you make an informed decision when choosing the right polish for your parquet floors.

  • Oil finishes penetrate the wood, providing internal protection and nourishing the wood from within. These types of finishes are an excellent choice for those seeking to preserve the natural colour and grain of their real wood floors. However, they may require more frequent reapplication compared to lacquer-based finishes unless you use 2 component oils like Magic Oil from Pallmann.
  • Lacquer, on the other hand, forms a protective film on the surface of the parquet, offering optimal protection with minimal upkeep. It is suitable for high-traffic areas but is more susceptible to scratches and may eventually wear off, leaving the floor unprotected unless renewed. Additionally, some people find that lacquer can give the floor a “plastic” appearance, detracting from the natural beauty of the wood.
  • Wax is a combination of both it permeates the wood and provides a protective layer on the surface. However, it is generally not the top pick for high-traffic areas since the surface layer is prone to scratches.

When selecting a polish for your parquet floor, consider factors such as the type of wood, the desired finish, and the level of protection you require. Obviously, if you had your floors already sanded and refinished it is crucial you use the same type of coating that already sits on your flooring. Ultimately, the right polish will not only enhance the appearance of your floor but also provide long-lasting protection and durability.

Preparing Your Parquet Floor for Polishing


Before starting the polishing process, proper preparation of your parquet floor is necessary. This includes thoroughly cleaning the surface and addressing any minor repairs that may be necessary. Proper preparation ensures that your parquet floor is in the best possible condition, allowing for a smooth and even polished application and a flawless final result.

The next subsections will address the importance of cleaning the surface of your parquet floor and dealing with minor repairs. By taking the time to complete these preparatory steps, you’ll set the stage for a successful parquet floor polishing process and a stunning outcome.

Cleaning the Surface

Cleaning the surface of your parquet floor thoroughly is an important part of the preparation process. Dirt, dust, and debris can cause scratches and other imperfections in the polish application, resulting in an uneven and unsatisfactory finish. To properly clean the surface, follow these steps:

  1. Use a vacuum cleaner with a brush attachment to remove dirt, dust, and debris from your floor.
  2. Following vacuuming, use a damp mop to effectively remove any remaining dirt and debris.
  3. Allow the floor to dry completely before proceeding to the polishing process.

Before applying the polish, it’s necessary to take time to inspect the floor carefully and remove any remaining dirt or debris. This attention to detail ensures that your parquet floor will be in the best possible condition for the polishing process, resulting in a smooth and even application and a beautiful, polished finish.

Addressing Minor Repairs

Addressing any minor repairs, including fixing a damaged parquet floor, is also crucial, along with cleaning the surface, before polishing your parquet floor. Here are the steps to follow:

  1. Fix loose blocks by reattaching or using replacement blocks as necessary, ensuring they are securely in place.
  2. Fill gaps with a suitable filler or slivers.
  3. Repair scratches by lightly floor sanding the affected area and applying a matching wood stain or finish. Deep scratches must be addressed by a professional floor restoration company and a full floor sanding process might be necessary.

These steps will not only improve the appearance of your floor but also enhance its overall quality and durability through floor restoration.

By taking the time to address these minor repairs, you’ll ensure a flawless polishing result and a stunning parquet floor that will stand the test of time. Properly preparing your parquet floor for polishing is an investment in the beauty and longevity of your wooden floors, and the effort will be well worth it in the end. Parquet floor restoration is a crucial step in maintaining the elegance of your home.

Step-by-Step Guide to Parquet Floor Polishing


Now that your parquet floor is prepared for polishing, we can proceed to the step-by-step process. In this section, we’ll provide you with a detailed guide on how to polish your parquet floor, from choosing the right polish to buffing the floor for a perfect finish. By following these steps, you’ll achieve a beautifully polished parquet floor that will not only enhance the appearance of your home but also provide long-lasting protection and durability.

Whether you’re a DIY enthusiast or considering hiring a professional, this comprehensive guide will equip you with the knowledge and techniques you need to polish your parquet floor successfully. So, let’s get started on your journey towards a stunning, polished parquet floor!

Choosing the Right Polish

The first step in the parquet floor polishing process is selecting the right polish for your floor. As mentioned earlier, there are several types of polishes available, including wax, oil, and lacquer. The best polish for your parquet floor will depend on factors such as the type of wood, the desired finish, and the level of protection you require.

When choosing a polish for your parquet flooring, it’s important to consider the following:

  • Read and follow the manufacturer’s instructions and recommendations.
  • Check if there are any specific requirements for your particular wood type or flooring.
  • Consider the application technique required for the polish. By selecting the right polish and following these guidelines, you’ll ensure optimal results and a long-lasting, beautiful finish.

Applying the Polish

Once you’ve chosen the appropriate polish for your parquet floor, it’s time to apply it. However, the application method can vary depending on whether you’re using lacquer, oil, or wax. Let’s delve into each one:

Applying Lacquer Polish

Lacquer is applied using a paintbrush or roller. Begin by stirring the lacquer to ensure it’s well mixed. Apply it in thin, even layers, always following the direction of the wood grain. It’s crucial to allow each layer to dry fully before applying the next.

Applying Oil Polish

Oil is typically applied using a cloth or brush. Like lacquer, it should be applied in thin, even layers. However, oil has the added benefit of penetrating the wood, nourishing it from within. After applying the oil, leave it to penetrate the wood for a few minutes before wiping off the excess. The floor should then be left to dry for several hours.

Applying Wax Polish

Wax is usually applied using a cloth or a wax applicator. Start by applying a thin layer of wax to a small section of the floor, then buff it using a cloth or a buffing machine. This will help the wax penetrate the wood and create a hard, protective layer. Once the wax has been buffed and the floor is dry, you can apply additional layers if desired for extra protection.

Parquet Floor Polishing Tips and Tricks


Achieving professional-looking results in parquet floor polishing requires practice and patience, but these can be attained quickly with the right tips and tricks. In this section, we’ll share some expert advice to help you polish your parquet floor to perfection.

From ensuring proper ventilation during the polishing process to testing the polish on a small, inconspicuous area of the floor, these tips and tricks will help you avoid common pitfalls and achieve a stunning, polished parquet floor to be proud of. So, let’s explore these valuable insights and put them into practice for your parquet floor polishing project!

Proper Ventilation

Adequate ventilation during the polishing process is vital for your health and the project’s success. Proper ventilation prevents the inhalation of harmful fumes from the polish and speeds up the drying time, allowing you to complete the project more efficiently.

To ensure proper ventilation, open windows and doors in the room where you’re working. Additionally, use fans to circulate the air and help remove fumes from the room. By maintaining adequate ventilation throughout the polishing process, you’ll not only protect yourself and others from potential health risks but also achieve better, faster results.

Testing the Polish

Before applying the polish to your entire floor, it’s important to test it on a small, inconspicuous area to ensure compatibility and the desired results. This simple test can help you avoid potential issues and ensure that your chosen polish is suitable for your parquet floor.

Apply the polish to a small, hidden area of the floor and allow it to dry completely. Assess the results for compatibility and appearance. If the test is successful and the polish produces the desired outcome, you can confidently proceed with the polishing process. If the test results are unsatisfactory, consider trying a different polish or consult with a professional for guidance.

Maintaining the Polished Floor

After achieving a beautifully polished parquet floor, proper maintenance is crucial to preserve its beauty and durability for years to come. Proper maintenance includes routine cleaning and care tips that will help prolong the life of your polished floor.

To maintain your polished parquet floor, follow these steps:

  1. Sweep and vacuum the floor regularly to remove dirt and debris.
  2. Use a damp mop and a mild detergent to clean the floor, being careful not to use excessive water.
  3. Consider applying a high-quality parquet floor polish on a regular basis to maintain the floor’s shine and protection and avoid/delay another floor sanding.

By following these maintenance tips, you’ll keep your parquet floor looking stunning and in top condition for years to come.

Hiring a Professional for Parquet Floor Polishing


Polishing your parquet floor can be a rewarding DIY project, but there are instances when it might be more feasible to hire a professional. A professional has the experience, knowledge, and specialized equipment to ensure a flawless result, saving you time and effort. In this section, we’ll explore the advantages of hiring a professional for parquet floor polishing and provide guidance on how to select a reputable floor restoration company.

Whether you’re unsure about the right polish for your floor, facing a particularly challenging repair, or simply want to ensure a perfect result, hiring a professional can provide peace of mind and a beautiful, polished parquet floor.

Advantages of Professional Services

Hiring a professional for wood floor polishing offers several advantages, including expert knowledge, specialized equipment, and time-saving techniques. Professionals possess the expertise to determine the most suitable polish for your parquet floors and the appropriate methods for applying and buffing the polish. They also utilise specialised floor restoration equipment, such as buffers, polishers, and vacuum cleaners, to ensure optimal results.

In addition to these benefits, hiring a professional can save you time and effort, allowing you to focus on other tasks or simply enjoy your newly polished floor without the stress of DIY polishing. With a professional service, you can trust that your parquet floor will be polished to perfection and remain beautiful and durable for years to come.

Selecting a Reputable Floor Restoration Company

In choosing a company for parquet floor restoration, selecting a reputable and experienced provider is vital. Begin by researching and comparing different companies, paying close attention to their reputation, expertise, and customer feedback.

Seek references, read online reviews, and ask friends or family members for recommendations. By thoroughly evaluating potential providers, you’ll be able to make an informed decision and select a parquet floor restoration company that will deliver exceptional services, ensuring a stunning and durable result for your home.

Summary

Polishing your parquet floors is an essential aspect of maintaining their beauty, durability, and longevity. By following the comprehensive guide we’ve provided, you’ll be well-equipped to restore, protect, and preserve your parquet floors, ensuring they remain a stunning focal point in your home for years to come.

Whether you choose to tackle the project yourself or hire a professional, the knowledge and techniques shared in this guide will help you achieve beautifully polished parquet floors that you can be proud of. So, don’t wait any longer – get started on your wood floor polishing journey today and watch your floors shine like never before!

Frequently Asked Questions

Can you polish the parquet flooring?

Polishing parquet floors is possible with specialised polish. Make sure to read the care manual of your flooring material and only use products that are safe for wood floors. If the floor begins to look worn out, it may need to be sanded & re-sealed.

How do you repair parquet flooring?

To repair loose blocks on parquet flooring, use a specialist orbital sander to repair any damaged wood. After removing it from the floor, reapply the adhesive and fit it back in. It may require some additional sanding process with the edge sander and refinishing to match the rest of the flooring.

Is it worth restoring parquet flooring?

Restoring parquet floors is worth it as it not only increases the longevity of your flooring but also protects it from future damage and boosts the value of your home.

How often should I polish my parquet floor?

Depends on the traffic. Keep your eyes open and monitor the condition of the finish otherwise full parquet floor restoration may be required to restore the desired looks.

What type of polish is best for my parquet floor?

For your parquet floor, choose a polish that is suitable for the type of wood, offers the finish you desire, and provides the level of protection you need. Make sure it is compatible with your current finish on your wooden floors. If you apply the wrong kind a full parquet floor restoration might be needed with floor sanding and refinishing.

contat uș

Limestone polishing
Written by Silver Lining Floor Care

The Art of Vitrification of Your Limestone Floor

The Art of Vitrification of Your Limestone Floor

When it comes to creating a luxurious and durable flooring solution, limestone is a timeless choice. Its natural beauty and durability make it a popular option for both residential and commercial spaces. However, to truly unlock its full potential and achieve that coveted glossy finish, one must turn to the art of vitrification. In this blog post, we’ll take you through the intricate process of vitrification for limestone floors, a transformative technique that elevates the aesthetics and longevity of this exquisite natural stone.

The Foundation: Preparation

Before we delve into the fascinating world of vitrification, it’s essential to start with a clean canvas. Preparing the limestone floor is the foundation of the entire process. Begin by meticulously removing any loose dirt, dust, or debris from the surface. Sweeping or vacuuming will do the trick, but be thorough. A pristine starting point is crucial for the best results.

Step 1: Initial Grinding

The journey to a luminous limestone floor begins with the first step: initial grinding. Coarse diamond abrasive pads or discs are employed in this phase. Their purpose is to level the floor and eliminate any existing blemishes, coatings, or scratches. Through this grinding process, a smooth and uniform surface is achieved, setting the stage for the subsequent polishing steps.

Step 2: Progressive Polishing

As we move forward, it’s time to bring out the shine. Progressive polishing is the heart of the vitrification process. This involves using finer grits of diamond abrasive pads or discs to gradually refine the limestone’s surface. The progression ranges from coarse (30-100 grit) to fine (800-3000 grit), each pass taking the floor closer to its ultimate glossy glory. It’s an art form where patience and precision are key.

Step 3: Chemical Treatment

Once the desired level of shine is attained, the limestone receives a special treatment. A chemical densifier or hardener is applied, which penetrates the stone and reacts with its calcium carbonate content. This chemical transformation makes the limestone denser and more resistant to staining and wear. It also helps to lock in the shine achieved during the polishing process, ensuring longevity and durability.

Step 4: Final Polishing

Now, as we approach the zenith of luminosity, we continue with the final polishing. This stage involves additional passes with fine-grit diamond abrasive pads, bringing the floor to its highest shine potential. The surface becomes smooth as silk, and the reflections are akin to gazing into a crystal-clear pool. It’s the moment when the limestone truly dazzles.

Step 5: Buffing and Crystallization

But wait, we’re not finished yet! The vitrification process often includes a final flourish known as crystallization. Here, a specialized crystallization compound, typically containing oxalic acid, is applied. A machine fitted with a steel wool or synthetic pad is employed to gently buff the floor. This seemingly magical process triggers a chemical reaction that forms a protective crystalline layer on the limestone’s surface. The result is a glossy finish that not only shines but also guards against future wear and tear.

Step 6: Cleaning and Maintenance

With the vitrification process complete, it’s imperative to conduct a thorough cleaning to remove any residual compounds. This ensures that your limestone floor not only looks stunning but is also safe for use. Regular maintenance is equally crucial to preserve the shine and durability of your newly vitrified floor. Routine sweeping and mopping with a pH-neutral cleaner will keep it looking its best for years to come.

In conclusion, vitrification is a masterful process that transforms ordinary limestone floors into extraordinary works of art. This intricate and labour-intensive technique requires expertise and the use of specialized equipment and chemicals. It’s a job best entrusted to professionals trained in stone restoration and maintenance. When executed with precision, vitrification can breathe new life into a dull and worn limestone floor, turning it into a breathtaking and long-lasting surface with a high-gloss finish.

So, if you’re looking to elevate the elegance and durability of your space, consider the art of vitrification for your limestone floors. It’s a journey worth taking, one that will leave you with a floor that not only reflects light but also the timeless beauty of natural stone.

contat uș

water damage on wood oak floor
Written by Silver Lining Floor Care

Wood Flooring Water Damage

Dealing with Water Damage on Wood Floors: Prevention and Restoration

Introduction

Wood floors are a beautiful and timeless addition to any home, providing warmth and character. However, they are vulnerable to water damage, which can lead to costly repairs or even replacement if not addressed promptly. In this blog, we will explore the causes of water damage on wood floors, prevention tips, and steps to restore your flooring if damage occurs.

Understanding the Causes of Water Damage

Water damage on wood floors can result from various sources, each with its own set of challenges:

1. Plumbing Leaks: Leaking pipes, burst water heaters, or faulty appliances can release a significant amount of water onto your wood floors. This can lead to warping, cupping, or buckling of the wood.

2. Flooding: Natural disasters, such as floods or heavy rain, can cause water to infiltrate your home. Even small amounts of standing water can seep into the wood, causing swelling and damage.

3. Spills and Splashes: Everyday accidents like spilt drinks, pet bowl overflows, or wet shoes can introduce moisture to your wood floors, leading to stains and localized damage.

4. Humidity: High humidity levels, especially in poorly ventilated areas like basements, can cause wood to absorb excess moisture, resulting in expansion and warping.

Preventing Water Damage

Prevention is key to avoiding the headache and expense of repairing water-damaged wood floors. Here are some preventive measures to consider:

1. Regular Maintenance: Inspect your plumbing, appliances, and water-using fixtures regularly for leaks or issues. Address any concerns promptly.

2. Area Rugs and Mats: Place area rugs or mats in areas prone to spills, like the kitchen and near entryways. These can help absorb moisture and protect your wood floors.

3. Wipe Up Spills Immediately: Accidents happen, but swift action can prevent water from seeping into the wood. Always wipe up spills promptly to avoid staining or damage.

4. Control Humidity: Use a dehumidifier in areas with high humidity levels, like basements. Proper ventilation can also help regulate indoor humidity.

Restoring Water-Damaged Wood Floors

Despite your best efforts, accidents can still occur. If you notice water damage on your wood floors, here are the steps to restoration:

1. Assess the Damage: Determine the extent of the damage. Is it localized or widespread? Assess whether boards need to be replaced or if sanding and refinishing will suffice.

2. Remove Standing Water: If there is standing water, remove it immediately to prevent further absorption into the wood.

3. Dry Thoroughly: Use fans and dehumidifiers to dry the affected area completely. Ensure moisture levels in the wood return to normal.

4. Sand and Refinish: In cases of minor damage, sand the affected area to remove stains or imperfections. Then, apply a fresh finish to match the rest of the floor.

5. Replace Severely Damaged Boards: If cupping, warping, or buckling has occurred, you may need to replace damaged boards. This is a job best left to professionals to ensure a seamless blend with the existing floor.

6. Prevent Future Damage: Once your wood floors are restored, take extra precautions to prevent future water damage. Consider applying a water-resistant finish for added protection.

Our Work

Water Damage on an Oak Wood Floor

water damage to wood floor

Our client contacted us when water began seeping through the ceiling, affecting the oak wood floor in their hallway. The flooring in this flat consisted of oak throughout, creating a seamless, threshold-free design. While the floor had some age, it had become dry and was in need of maintenance.

Upon initial inspection, we presented our client with a choice: addressing only the affected area or opting for a full floor renovation. We stressed that if we only restored the damaged portion, it would likely stand out due to differences in colour and texture compared to the rest of the floor. After careful consideration, the client agreed to proceed with a comprehensive renovation.

Challenges and Solutions: Sanding, Underfloor Heating, and Board Replacement

We began the restoration process with sanding, a common technique for rejuvenating wood floors. However, we quickly realized that sanding alone would not be sufficient to fully recover the damaged wood. The age and dryness of the floor had made it particularly vulnerable to water penetration, resulting in extensive damage.


Complicating matters was the presence of underfloor heating beneath the wood. We faced the challenge of preserving the electric underfloor heating while addressing the water damage. To overcome this hurdle, we decided to carefully plank out the wood veneer to a depth that allowed us to introduce fresh wood on top. This approach ensured the preservation of the underfloor heating system.

Restoration and Client Satisfaction

Following the careful planking and drying process, we resumed sanding and refinishing the wood floor. Despite the initial setbacks, our team’s dedication and expertise paid off. We successfully restored the oak wood floor to its former glory, leaving the client delighted with the final result.

Conclusion

Water damage on wood floors can be a homeowner’s nightmare, but with proper prevention and swift action, you can mitigate its impact and restore your floors to their former glory. Regular maintenance, quick cleanup of spills, and humidity control are your allies in preserving the beauty and integrity of your wood flooring. In cases of severe damage, don’t hesitate to seek professional help to ensure a successful restoration. By being proactive, you can enjoy your wood floors for years to come, even in the face of potential water damage.

contat uș

restaurant floor sanding
Written by Silver Lining Floor Care

Sanding and Oiling Restaurant Floor

Restaurant Floor Sanding: Choosing the Right Finish for Long-Term Benefits

Introduction:

Restaurants, known for their bustling atmosphere and heavy foot traffic, require durable, low-maintenance flooring solutions. When it comes to wood floor restoration, the choice between sanding and oiling or lacquering can significantly impact the aesthetics, maintenance, and longevity of the floor. In this article, we will explore the benefits of sanding and oiling as a viable alternative to traditional lacquering for restaurant floors.

The Challenge of Lacquering:

Lacquering involves multiple coats and drying times, making it challenging to execute in a busy restaurant without interrupting business operations. The process typically requires one coat of primer and a minimum of two coats of lacquer, with drying times ranging from 4-12 hours before any foot traffic can resume. Additionally, it takes 7-10 days for the lacquer to fully cure, during which time the floor should not be covered or subjected to other renovation work.

Sanding and Oiling: A Viable Alternative:

To avoid disrupting business operations, restaurant floor sanding and oiling offer a quicker and more convenient solution. With sanding and oiling, there is no idle time between coats, allowing the floor to be ready for light foot traffic just 4 hours after the process begins. The complete curing process takes 12 hours, eliminating any loss of business during the restoration.

Staining for Aesthetic Appeal:

Restaurants often desire a specific colour or stain to match their overall ambience. While staining and lacquering require an extended process, staining and oiling can be done in a similar timeframe to simple oiling. Pallmann offers an excellent system where stain and oil can be applied simultaneously, making the process more efficient. Staining is considered a premium service and may incur additional costs.

The Benefits of Oiling:

Contrary to common misconceptions, oil finishes provide comparable durability to lacquer finishes. In the long run, oiled floors offer several advantages over lacquered floors. Oiled floors are easier to maintain, as localised damages can be fixed without re-sanding the entire floor. Additionally, the natural look of oiled floors ages gracefully and hides small scratches, while lacquered floors may develop a plastic appearance with multiple coats.

Long-Term Cost Comparison:

I have created a graph to illustrate the difference over time:

  • Day 1: Sanding is completed, and you have a beautifully restored floor.
  • After 6 months: Both floors have accumulated some dirt, but the oiled floor actually improves more than the lacquered floor. It’s not just about cleanliness but also the visual appeal and natural aesthetics of the oiled floor.
  • 6 months later: Both floors become dirty again, with the lacquered floor showing more obvious signs of wear and tear. The oiled floor, despite scratches and dirt, adds character and charm, while the lacquered floor simply appears unsightly.
  • Maintenance Time: Deep cleaning and re-coating the oiled floor will enhance its natural beauty, while the lacquered floor may start to look artificial with multiple layers of coating.

oiling restaurant floor

This cycle of getting dirty and cleaning repeats every 6 months. However, there comes a point where the lacquered floor requires a full sanding (costing £10,000), and eventually, it may need to be replaced altogether (£30,000). On the other hand, with proper maintenance, an oiled floor never needs to undergo sanding again, ensuring it retains its allure for a very long time. Moreover, this sustainable choice also contributes to environmental preservation by eliminating the need for new flooring.

Conclusion:

In conclusion, the oil finish offers not only long-term cost savings but also a more visually appealing and sustainable solution. While personal preference may play a role, the practical benefits of an oiled floor cannot be overlooked.

Remember, your flooring decision affects your business, your budget, and the environment. Choose wisely and enjoy the timeless beauty of a well-maintained floor.

Choosing the right finish for restaurant floors is crucial for long-term durability and aesthetics. While both lacquering and oiling have their advantages, the benefits of sanding and oiling, such as minimal downtime, easy maintenance, and cost-effectiveness, make it an attractive choice for restaurant owners. Regardless of the chosen finish, implementing a proper maintenance plan is essential to preserve the floor’s beauty and avoid expensive restoration projects. For more insights on the financial aspects of flooring decisions, you can refer to my article on the difference between price, value, cost, and profit.

Remember, your restaurant floor is an investment that impacts both your business and the environment. Choose wisely and enjoy the long-lasting beauty and functionality of a well-maintained floor.

For more information and assistance with your restaurant floor restoration project, feel free to reach out to us

contat uș

1 2
Free quote