carpets smell
Written by Silver Lining Floor Care

Why Do Carpets Smell After Cleaning

Why Do Carpets Smell After Cleaning? Find Answers Here

My carpets smell! Have you ever wondered why your carpets sometimes emit an unpleasant odour after cleaning? The answer to this question is not as simple as a one-sentence explanation, as there can be various reasons behind the lingering smell. To shed some light on this matter, let’s take a closer look at your carpet cleaning experience and explore possible causes for the odour.

Deep Cleaning Your Carpets

When it comes to professional carpet cleaning, the cleaner must be aware of the specific type of fibres in your carpet. Alternatively, as a homeowner, you may already know this information, considering that your carpet was a significant investment for your house. Generally, carpets can be categorized into two main types: wool-based carpets and synthetic carpets.

Wool carpets, in particular, have unique properties that resemble those of dogs. When wet, wool carpets can emit a distinct sulfur-like smell, which is a natural characteristic of wool fibres. Although this odour is always present to some extent, moisture acts as a medium that enhances its detectability. Find out more about what is so great about wool.

Methods of Carpet Cleaning

When it comes to deep cleaning your carpets, there are primarily two methods commonly used: dry cleaning and hot water extraction (HWE). Dry cleaning is typically employed for regular maintenance of office carpets, while hot water extraction is considered the most effective method for deep cleaning.

During the cleaning process, the initial step should involve dry soil extraction, as approximately 80% of carpet soiling is comprised of dry particles. This process, often referred to as dry soil extraction cleaning, essentially entails thorough vacuuming. It is important to note that even if you have vacuumed your carpets before the arrival of the carpet cleaner, a professional should repeat this step to meet industry standards.

Drying Time

The drying time of your carpets can vary depending on the fibre content and external conditions. In general, after deep cleaning, carpets should be touch-dry within 24 hours. Interestingly, wool carpets can feel dry to the touch while still containing up to 30% of their water content.

However, if your carpets remain wet for a considerably more extended period, such as close to a week, this can lead to issues. Prolonged moisture exposure can promote the growth of mould, which can cause a range of problems. If your carpets stay excessively wet, it suggests that they were over-saturated during the cleaning process, possibly affecting the carpet backing. A professional carpet cleaner should be knowledgeable about the appropriate moisture levels required for optimal cleaning results and should avoid crossing the threshold where over-saturation becomes a risk. This is precisely why it is essential to maintain your carpets properly, treating them with the same care as you would your teeth by cleaning them regularly and preventing excessive dirt buildup. Remember to follow the CHAT rules for effective cleaning.

Ventilation and Air Quality

It is normal for a mild smell to linger in the air for up to a week after deep cleaning. Proper ventilation can help alleviate this issue by promoting air exchange. Fresh, light air replaces the moist and heavy air, reducing the vapour pressure on various surfaces and facilitating quicker carpet drying. You can enhance the drying process by using air movers or even simple brushing techniques.

Insufficient Cleaning or Underlying Issues

Although rare, there is a possibility that your carpets were not cleaned thoroughly enough, which could contribute to the lingering smell. However, it is important to consider that there are instances where further cleaning may not be viable due to the risk of over-wetting and potential damage. In such cases, a professional carpet cleaner should be aware of the limitations and refrain from attempting additional cleaning that could potentially worsen the situation. Sometimes, replacement may be the only solution.

Additionally, it is worth noting that carpet cleaning can sometimes trigger underlying issues. For example, if there was a moisture problem beneath the floorboards, mould could have affected the boards. While everything may seem fine during daily life, the introduction of moisture can activate the smell, as the source of moisture is near the affected boards.

Underfloor and Overfloor Issues

In the previous paragraph, we discussed moisture coming from beneath the floor. To address this, a damp-proof membrane or the identification and repair of any existing leaks is crucial. A professional floor fitter should assess the moisture levels in the subfloor, whether it is concrete or floorboards. Ideally, moisture readings should be documented, but unfortunately, this practice is not always followed consistently nowadays.

Issues can also arise from above the floor. If you have or had pets that had accidents on the carpets, and the urine-soaked through to the underlying underlay and boards (which is more common with synthetic carpets), it can become trapped. Unlike water, urine contains elements that can promote the growth of black mould under ideal conditions. This type of mould thrives in warm, dark, and moist environments, and may not dry as quickly as water. Wet carpet cleaning can trigger this issue, resulting in a musty or mouldy smell. Once the carpets are fully dry and the house is well-ventilated, the smell should dissipate. However, it may remain dormant until conditions are suitable for its re-emergence.

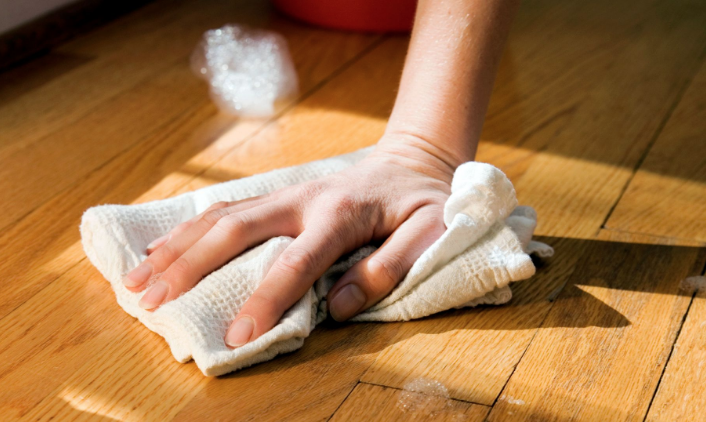
Here are some DIY tips to help remove odours from carpets:

  1. Baking Soda: Sprinkle baking soda liberally over the carpet and let it sit for a few hours or overnight. Vacuum it thoroughly to remove the baking soda along with the trapped odours.
  2. Vinegar Solution: Mix equal parts of white vinegar and water in a spray bottle. Lightly mist the carpet with the solution, allowing it to penetrate the fibres. Let it sit for a while, then blot the area with a clean cloth.
  3. Citrus Peel: Place fresh citrus peels, such as lemon or orange, on the affected areas of the carpet. Leave them overnight to absorb odours naturally. Remove the peels and vacuum the carpet the next day.
  4. Activated Charcoal: Place activated charcoal briquettes or charcoal sachets in a bowl or mesh bag and position them on the carpet. Charcoal is known for its odour-absorbing properties and can help eliminate unpleasant smells.
  5. Hydrogen Peroxide Solution: Mix 3% hydrogen peroxide with water in a spray bottle. Lightly spray the carpet and allow it to sit for a few hours. Blot the area with a clean cloth to remove any remaining solution. DO NOT USE ON WOOL!!! 

In Summary

While there may be additional reasons why carpets can emit unpleasant smells, the points mentioned earlier cover the most common factors. If your carpet smells after cleaning and you are still unsure of the underlying cause, I encourage you to give us a call. Together, we can brainstorm and investigate the issue further to identify the root cause. It is crucial not to take action without understanding the reason behind the problem, as this could potentially create more complications. Remember, it is always best to respond rather than react.

If you have any questions or require further clarification, please feel free to reach out to us. We are here to assist you.

oak floor unfinished
Written by Silver Lining Floor Care

Best Finish on Oak Floors

When it comes to oak floors, there is no universal solution that suits everyone. We understand that each individual is unique, with different preferences and requirements. As trusted professionals, our clients frequently seek our guidance on the best course of action. While we can’t offer a one-size-fits-all answer, we aim to equip you with comprehensive information, empowering you to make an informed decision that aligns with your specific needs.

Enhancing the Appearance of Your Oak Wooden Floors

The visual appeal of your floors is frequently a top priority. Just as individuals have their unique fashion preferences, the same applies to flooring aesthetics. Some may favour a casual combination of blue jeans and a shirt, while others may prefer a vibrant Hawaiian style. It’s important to note that there is no definitive “better” or “worse” choice in this matter. Ultimately, it boils down to personal preferences that only you can determine.

Choosing the Colour of Your Oak Floor

The initial decision revolves around whether you prefer to maintain the natural tone of your existing oak floor or opt for a darker or lighter shade. If you desire a natural look, we recommend a “clear” finish. However, it’s important to note that a clear finish tends to darken sanded wooden floors.

Choosing Primers for Oak Flooring

Clear/natural colour

When it comes to priming oak floors, you have various options to consider. Clear/natural colour primers are the basic choices available. Depending on your preference, you can select from oil-based, water-based, or alcohol-based primers, each with its distinct characteristics.

Oil-based primers emphasise the colour and structure of the wood, providing a rich appearance. Water-based primers offer a clean and subtle look, while alcohol-based primers are known for their fast drying time and good colour enhancement.

Eco-friendly choice.

For those seeking an eco-friendly finish, there is the option of a water-based Pall-X Zero Base primer, which is completely VOC-free. It provides a more environmentally conscious choice for your oak flooring. This primer finished with 2 coats of Pall-X Zero will give the most durable finish out of all.

It’s important to note that all of the above primers have different application methods and may result in slight visual differences. Additionally, they will darken the wood to some extent. To get an idea of the shade you can expect on your wood floor, you can perform a simple test by spilling some clean “clear” water on a freshly sanded area of the floor. This will give you a preview of the final colour outcome.

Pigmented Primers for Oak Flooring

If your preference is to maintain the appearance of a sanded floor, a pigmented primer such as Pall-X 330 can be used. To further enhance the natural look of the oak and achieve a more pronounced oak effect, you have the option of applying the OAK version of Pall-X 330.

Raw wood effect

For those seeking a raw wood effect, we recommend using Pall-X 330 PURE or, for a slightly whitened appearance, 330 WHITE. Typically, this type of finish is sealed with two coats of white pigmented lacquer, such as Pall-X PURE, to preserve the desired aesthetic.

Alternatively, you can achieve a “raw” wood effect using an oil finish, specifically Magic Oil PURE or WHITE. These oil finishes provide a similar appearance to raw wood while offering their unique benefits.

Staining Oak Floors

Oak floors are trendy and lend themselves beautifully to staining. Oak has large pores that readily absorb and distribute the stain evenly. Ash and chestnut, which also possess larger pores, can be stained with ease. However, woods with smaller pores like birch or maple do not stain as effectively.

When it comes to staining oak floors, we highly recommend the Pall-X 333 range, which consists of oil-based stains. These stains are specifically designed to enhance the natural beauty of oak flooring. The entire Pall-X 333 range can be finished with either lacquers or oil, providing you with flexibility in choosing the final protective coating for your stained oak floor.

The Durability of 2k Pall-X 333 Stains

The Pall-X 333 range stands out as a two-component stain, which offers enhanced durability compared to other oils or lacquers available in the market. The presence of a second component facilitates stronger and more connections between atoms, resulting in a denser and more resistant surface that is harder to penetrate. This characteristic contributes to the overall longevity and robustness of the Pall-X 333 range as a stain option for your oak floors.

Staining the Floor White

When it comes to staining the floor white, it’s important to note that white pigment is generally the least durable among pigments. Despite this, it remains a highly desired look for many. To preserve the white pigment, we typically recommend sealing it under two coats of lacquer to provide good protection.

To achieve a white finish on your floors, there are two options available. The first option is to use 330 WHITE, which provides a white finish with a certain level of subtlety. However, if you desire a more pronounced white effect, you can opt for an oil-based product Pall-X 333 WHITE. This particular variant delivers a stronger and more distinct white appearance.

For further information and details specifically about whitewashed wooden floors, we have a dedicated article that delves into this topic separately. This article provides comprehensive guidance and insights on achieving the desired whitewashed look for your wooden floors.

Protecting white pigment

To safeguard the white pigment, we suggest applying two coats of a two-component lacquer in high-traffic areas and commercial environments. However, in areas with less foot traffic, such as bedrooms or lightly used homes, a two-component oil can suffice. It’s worth noting that oiled floors require regular care and maintenance, but the benefits are well worth it as they can maintain their appearance for an extended period before requiring oak floor sanding again.

For further guidance on maintaining your wood floors that have been sanded, stained white, and lacquered, we recommend referring to our detailed instructions.

Finishing your oak wood floor

After you have determined the colour tone of your oak floors, the next step is to consider how to protect and finish them. As mentioned earlier, you have the option to safeguard your oak floor with either oil or lacquer.

Oiling Oak Flooring

oak floors oiled

An oil finish is an excellent choice for oak floors if you want to enhance the richness of the wood grain and achieve a natural matte appearance. We specifically use 2-component oils like Magic Oil Ergo, as I mentioned earlier, which offer enhanced durability and protection. It’s important to note that applying oil to floors requires careful preparation, and we highly recommend seeking professional assistance rather than attempting a do-it-yourself approach. Achieving flawless sanding is crucial, as the oil will accentuate any imperfections. If you’re determined to achieve an oil finish, it’s best to leave it in the hands of experienced professionals. For more information on how to maintain sanded and oiled wood floors, please refer to our detailed guidelines.


Lacquer Finish

oak floor lacquered

When it comes to a lacquer finish, it typically involves applying one coat of primer (as mentioned earlier) followed by two coats of lacquer. Sufficient drying time is necessary between each coat, but if you wait too long, a quick scuff with a mesh pad or multiple for better adhesion is recommended.

Gloss or Matte

You have various options regarding the sheen of the lacquer. You can choose from gloss, satin, matte, or ultra-matte finishes. It’s important to consider that the glossier the look, the more noticeable scratches will be on the floor. For more information on the differences between gloss and matte finishes, please refer to our detailed guide.

2 component or 1 component lacquer?

When it comes to lacquers, they can be either one-component (1k) or two-component (2k). As you probably know, the 2k lacquers tend to be more durable. For a domestic environment, a 1k lacquer like Pall-X 96 will suffice. While there are more budget-friendly options available for lacquers, we pride ourselves on providing a premium service that exclusively utilizes high-quality products.

In our wood floor refinishing projects, we typically work with the following lacquers:

  • Pall-X 96: This is a premium, domestic, and Blue Angel Certified water-based lacquer.
  • Pall-X 98: Designed for high-traffic areas, this commercial-grade, two-component water-based lacquer offers exceptional protection, durability, and a beautiful finish.
  • Pall-X Pure: If you’re aiming for a stunning bare-wood effect and a natural, nude look, this specialized two-component lacquer is ideal. It enhances the natural beauty of the wood while providing excellent protection and longevity.
  • Pall-X Zero: Offering an ultra-matte finish, Pall-X Zero is the most eco-friendly option. As a commercial-grade, two-component water-based lacquer, it prioritizes sustainability without compromising on performance. It is solvent-free and VOC-free, creating a healthier indoor environment. It is the most durable lacquer of all.

Feel free to explore more about our recommended lacquers and their specific features for your oak wood floor finishing needs.

Maintenance of sanded and finished oak floors

Principles of Cleaning

Maintenance is key when it comes to keeping your oak wood floor looking beautiful and performing well for years to come. By following some basic cleaning principles, you can ensure its longevity. It’s important to understand the distinction between maintenance cleaning and deep cleaning. Find out what CHAT stands for.

Maintenance vs Deep Cleaning

Daily maintenance of oak floors

Maintenance cleaning involves regular upkeep and consists of routine tasks such as sweeping or vacuuming to remove loose dirt and debris. Additionally, using a damp mop with a mild cleaning solution specifically formulated for wood floors can help maintain their shine and cleanliness. Be sure to follow the manufacturer’s instructions for any cleaning products you use.

For maintenance cleaning, floors can benefit from re-coating for additional protection.

On oiled floors, we recommend using Pallmann Magic Oil Care. This specialised product helps to nourish and rejuvenate the wood, maintaining its natural lustre and enhancing the protective oil finish.

On lacquered floors, we recommend using Pallmann Finish Care. This product is specifically formulated to clean and maintain lacquered surfaces, helping to remove dirt, grime, and smudges while leaving a streak-free finish.

By using these dedicated maintenance products, you can ensure that your oiled or lacquered floor stays in optimal condition, extending its lifespan and preserving its beauty.

Periodical deep cleaning

Deep cleaning, on the other hand, involves more thorough and occasional cleaning to tackle stubborn stains, ingrained dirt, or grime buildup. This may involve using specialised wood floor cleaners or engaging professional services for a deeper clean.

It is crucial to recognise when regular cleaning is no longer sufficient and more extensive measures are required. In such cases, sanding the floor down again becomes necessary. Deep cleaning periodically and reapplying a protective coating can help prolong the need for sanding.

For oiled floors, it is recommended to use a maintenance oil to replenish the protective layer and maintain the overall condition of the wood.

For lacquered floors, a bonding agent such as Pall-X 350 is often used during the maintenance process. This helps ensure proper adhesion of subsequent layers. Following the application of the bonding agent, one coat of any 2-component lacquer is typically applied to provide additional protection and enhance the floor’s appearance.

Summary

By incorporating these deep cleaning and maintenance practices, you can extend the life of your floors and minimise the frequency of full sanding and refinishing, ensuring their long-lasting beauty and performance. Love your floor, and it will love you back, providing you with a stunning and well-maintained surface for many years to come.

contact us


Some of Our Work on Oak Floors

Sanding and Oiling in Soho

Oak, Wood Restoration

Staining Oak Floor Grey in Kensington

Oak, staining, Wood Restoration

Oak Floor Sanding in Acton

Oak, Wood Restoration

Northwood Hard Floor Sanding

Oak, Wood Restoration


Services related to wooden floors we offer:

wood floor sanding in Radeltt
Written by Silver Lining Floor Care

Maintaining White-Stained Wood Floors

Maintaining the Elegance of White-Stained Wood Floors: A Comprehensive Guide

Preserving the exquisite allure of white-stained wood floors, particularly those graced with the timeless Pall-X Pure lacquer with white pigment, requires a dedicated approach. In this comprehensive guide, we will unveil the key steps to ensure your floors remain impeccably clean, reflecting their pristine beauty. Let’s delve into the essential techniques that will help you maintain the allure of your white-stained wood floors.

Banishing Dry Soil:

Safeguard your floors against potential scratches by diligently removing dry soil. Regular vacuuming or sweeping is instrumental in preserving their flawless appearance, keeping them in pristine condition.

Mastering Water-Soluble Soiling:

Maintaining White-Stained Wood FloorsMaintain the captivating finish of your Pallmann lacquered floors by utilizing a neutral floor cleaner, such as the highly recommended Pallmann Clean or Pallmann Clean Strong Wood Cleaner. This essential product will help you effectively address water-soluble soiling, ensuring your floors retain their radiant sheen.

Spot Cleaning:

Tackling Stubborn Stains:

Combat unsightly stains with confidence and finesse. Employ spot-cleaning techniques, armed with appropriate cleaning solutions and a touch of expertise. Refer to the cleaning solution instructions for optimal stain removal as they may have different dilution rates for different situations, allowing your floors to reclaim their spotless charm.

Extra Protection with Emulsion Finish:

Maintaining lacquered wood floors

Enhance the durability of your floors by applying an emulsion finish using a flat mop. Choose from our distinguished collection of protective finishes:

  • Pallmann Finish Care: A satin-clad guardian suitable for any lacquered finish, including Pall-X 96, Pall-X 98, Pall-X Zero and Pall-X Pure. Experience the perfect blend of elegance and protection.
  • Pallmann Finish Care Stop: Fortify your floors with an anti-slip agent, making it an ideal choice for commercial spaces prioritizing safety without compromising style.

When to Apply Additional Lacquer:

Vigilance is paramount when safeguarding the beauty of your floors. Regularly monitor their condition, acting promptly when it’s time for additional lacquer. Engage professionals for a thorough deep cleaning using specialized rotary machines. Subsequently, apply a fresh coat of lacquer and bonding agent, extending the lifespan of your floors. Timely preventive measures can spare you from the need for a full sanding process.

Conclusion:

By adhering to these essential steps, you can ensure the long-lasting beauty of your white-stained wood floors. Embrace a meticulous maintenance routine, allowing their timeless elegance to shine through. Let the lustrous appeal of your white-stained wood floors captivate all who set foot upon them, creating an ambience of refined sophistication.

contact us


Services related to wooden floors we offer:

can I clean my wood floors without sanding
Written by Silver Lining Floor Care

Can I Clean My Wooden Floors Without Sanding

Cleaning your wooden floors without sanding? Absolutely! It all depends on what you’re aiming for. Cleaning is a crucial part of maintenance, and sometimes adding extra protective layers can buy you more time before sanding becomes necessary. Think of it as a little secret to extend the lifespan of your floors and keep them looking fabulous for years to come.

But hold on! There comes a point when cleaning alone won’t cut it anymore. When the protective layer wears off, and your floors start absorbing moisture, things can get dark and gloomy. No amount of cleaning can reverse that. It’s like trying to fight a losing battle with bare wood exposed to the elements. Sanding then becomes the superhero you need to restore the floor’s natural beauty. Just watch out for potential splinters, unless you’re into that kind of rustic charm.

Taking care of your wooden floors is essential to maintain their beauty and longevity. While regular cleaning plays a crucial role in maintenance, you may wonder if it’s possible to clean your wooden floors without the need for sanding. In this blog post, we will explore the options and considerations for cleaning and maintaining wooden floors, helping you make informed decisions to preserve the natural beauty of your flooring.

Cleaning for Maintenance:

Cleaning your wooden floors regularly is a key factor in their maintenance. By removing dirt, dust, and other debris, you can prevent them from scratching or damaging the floor’s surface. Simple cleaning techniques, such as sweeping or vacuuming with a soft brush attachment, can effectively remove loose particles. Additionally, using a damp mop with a gentle wood floor cleaner specifically designed for your floor type can help remove stains and maintain a clean appearance.

Additional Coats for Extended Protection: In some cases, adding additional coats of the protective layer to your wooden floors can help extend the time before sanding becomes necessary. These protective coatings act as a barrier, shielding the wood from wear and tear. By applying these coatings at regular intervals, you can prolong the lifespan of your floor and maintain its aesthetic appeal. It is advisable to consult with flooring professionals or follow manufacturer guidelines to ensure you choose the appropriate product and application method for your specific flooring type.

Knowing When Sanding is Required:

While regular cleaning and additional coatings can significantly enhance the longevity of your wooden floors, there comes a point where cleaning alone may no longer be sufficient. As the protective layer wears off over time, the exposed wood can absorb moisture from the air, causing it to darken. This darkening is not a result of dirt but rather a sign that the bare wood is exposed to external conditions. At this stage, no amount of cleaning will restore the floor’s original appearance, and sanding becomes the only viable option to improve its looks.

Benefits and Risks of Sanding:

Sanding your wooden floors can offer a fresh start, removing imperfections, scratches, and stains. It can rejuvenate the wood and bring back its natural beauty. However, it’s important to note that sanding is a process that removes a thin layer of the wood’s surface. While many people prefer the unique look of sanded floors, it’s crucial to consider potential risks, such as splinters or uneven surfaces. Professional expertise is recommended to ensure the sanding process is done correctly and safely.

Proactive Maintenance:

To avoid the need for extensive sanding, it is crucial to proactively maintain your wooden floors. Regular cleaning, protective coatings, and monitoring the condition of the protective layer are all essential aspects of proactive maintenance. By staying attentive to your floor’s needs and addressing

contact us

any issues promptly, you can prolong its lifespan and avoid the need for costly repairs or replacements.

Conclusion:

Don’t wait too long to give your wooden floors the TLC they deserve. Whether you want to keep them squeaky clean or go the extra mile with sanding, Silver Lining Floor Care is here to guide you. Our team of floor whisperers will provide the best advice and techniques to make your floors shine like never before. Trust us to deliver top-notch service and help you maintain the timeless allure of your wooden floors.

Remember, when in doubt, seek the wisdom of the floor care gurus at Silver Lining Floor Care. We’ll assess your floors, crack the code, and unveil the best strategy to keep them in tip-top shape. Get ready to embrace the witty wonders of wooden floor care with a touch of Silver Lining charm.

Services related to wooden floors we offer:

maintenance of lacquered wood floors
Written by Silver Lining Floor Care

How to Maintain Wooden Floors with a Lacquer Finish Using Pallmann Products

Wooden floors are not just a part of your home; they are a reflection of your style and taste. A well-maintained wooden floor with a lacquer finish can elevate the look of any room, but it does require some care and attention. In this blog, we’ll guide you through maintaining your lacquered wooden floors using Pallmann products, ensuring they remain as beautiful as the day they were installed.


Regular Cleaning: The Key to Luster

Daily Maintenance

The secret to keeping your wooden floors in top condition is regular cleaning. For daily maintenance, use a flat mop and Pallmann’s Neutral Cleaner. This gentle yet effective cleaner is perfect for removing everyday dust and dirt without harming the lacquer finish.

Dealing with Stubborn Stains

Sometimes, you may encounter stubborn stains that need a bit more attention. For these, turn to Pallmann Clean Strong. It’s specially formulated to tackle tougher stains without damaging the wood or the lacquer coating.

Periodic Rejuvenation: Bringing Back the Shine

Emulsion Polish Application

Over time, your floors might lose some of their shine and lustre. This is where Pallmann Finish Care or Finish Care Stop come into play. These emulsion polish products are easy to apply and help restore the shine to your floors, giving them a refreshed and revitalized look.

Recoating with Lacquer

Every so often, your floors will benefit from an extra coat of lacquer. This process involves applying a bonding agent such as Pall-X 350, followed by a two-component lacquer like Pall-X 98. This additional layer not only enhances the appearance of your floors but also provides an extra layer of protection.

When to Recoat?

Deciding when to recoat your floors with lacquer depends on the level of traffic and wear they experience. High-traffic areas might need recoating more frequently. A good rule of thumb is to check the floor’s appearance and feel – if it starts to look dull or feels rough to the touch, it’s time for a recoat.

DIY or Professional Help?

While daily cleaning and applying acrylic polish are straightforward and can be done by anyone, recoating with lacquer is a more complex process. For the best results, it might be worth considering professional wood cleaning, especially if you are not experienced in floor finishing.

Conclusion

Maintaining a wooden floor with a lacquer finish is not as daunting as it may seem, especially when you have the right products at hand. Regular cleaning with Pallmann’s Neutral Cleaner, dealing with stubborn stains using Clean Strong, and periodic application of polish like Finish Care or Finish Stop will keep your floors looking pristine. And, when it’s time for that extra bit of care, consider a fresh coat of lacquer to keep your floors looking as good as new.

Remember, your wooden floors are an investment, and with the right care and maintenance, they can remain a beautiful part of your home for years to come.


contat uș

1 2
Free quote