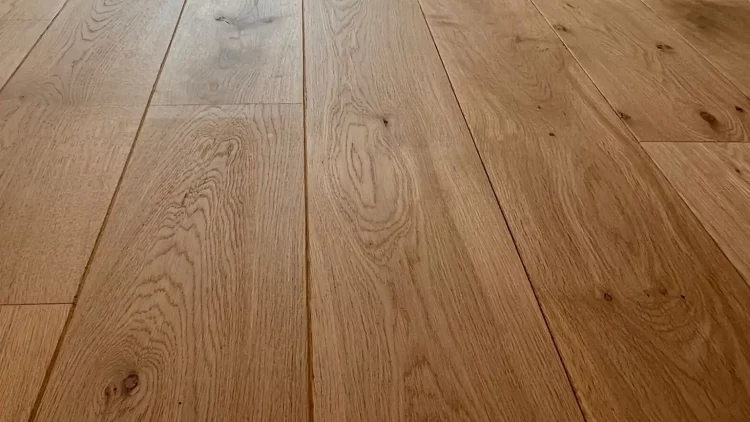
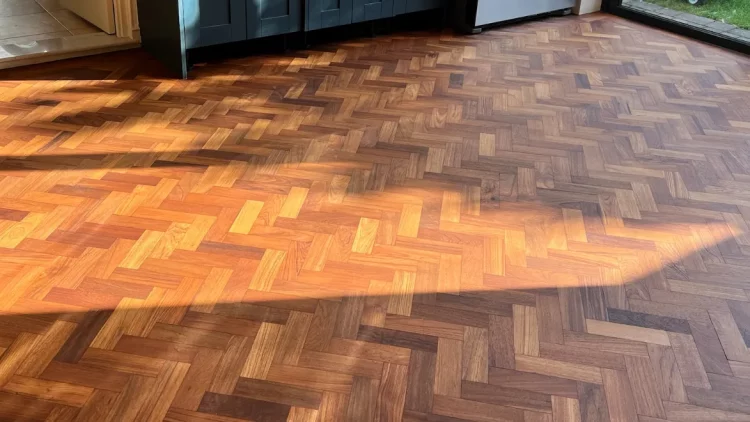
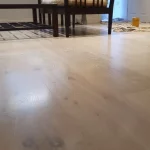
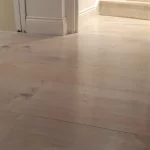
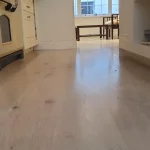
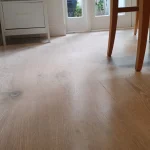
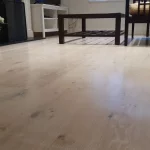
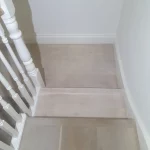
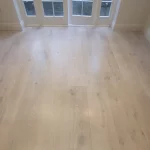
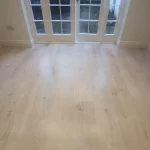
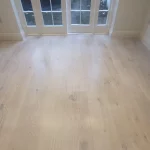
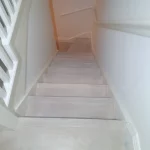
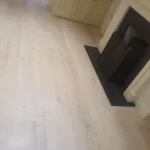
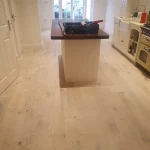
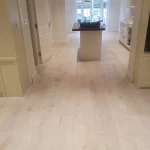
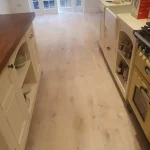
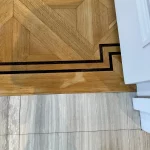
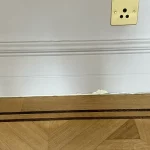
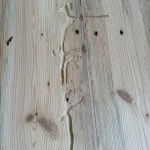
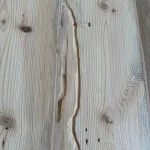
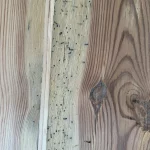
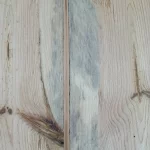
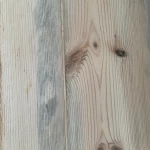
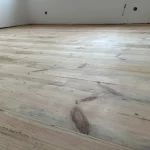
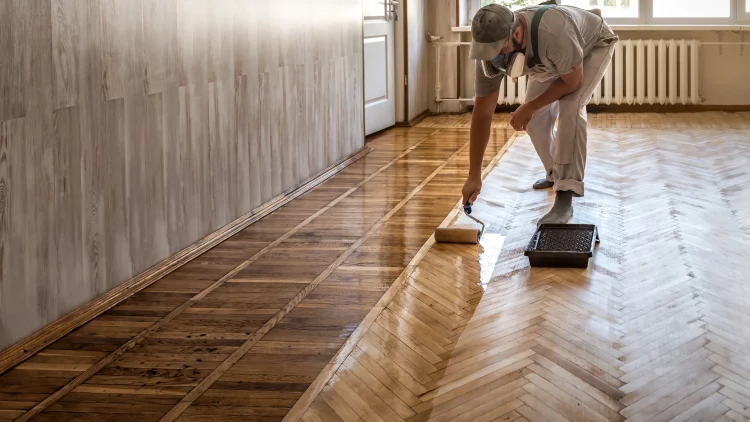
A beautifully restored wooden floor with a natural bare wood effect achieved using Pall-X Pure lacquer in a matte finish.
Written by Silver Lining Floor Care

Pall-X Pure Lacquer: The Bare Wood Effect for a Timeless Look

The Pall-X Pure system from Pallmann is designed for those who love freshly sanded wood’s natural, untouched appearance. This finish often called the “bare wood effect,” “raw wood effect,” or “naked wood effect,” is made possible through the addition of white pigment to the lacquer. Unlike clear lacquers, which tend to darken the wood and give it an orange hue over time, Pall-X Pure preserves the light, fresh tones of newly sanded wood, delivering a clean, modern aesthetic.

Why Do Clear Lacquers Darken Wood?

To understand the value of Pall-X Pure, it’s important to recognise why traditional clear lacquers change the wood’s appearance. Imagine the bright, fresh look of a newly cut tree—light and vibrant. Now, imagine rain soaking into the wood, intensifying its colours and causing it to take on a darker, orange tone. Over time, this effect becomes more pronounced, particularly with exposure to UV light. Pall-X Pure counters this natural process, maintaining the wood’s original brightness for years.

How Does the Pall-X Pure System Work?

The system consists of a coat of Pall-X 330 primer and two coats of Pall-X Pure lacquer, available exclusively in a matte finish.

  • Primer Options: Pall-X 330 comes in two variants:
    • Pure Primer: Enhances the natural brightness of wood and prevents yellowing.
    • White Primer: Specifically designed for older pine floorboards, this variant counteracts the tendency of these floors to darken under clear finishes, creating a consistent, ‘pure’ aesthetic.

This combination ensures a highly durable, beautiful finish that protects your floors while preserving their natural appearance.

Why Choose Pall-X Pure?

  • Aesthetic Excellence: The matte finish maintains the wood’s natural look and hides minor imperfections, making it ideal for well-loved floors.
  • Durability: As a two-component water-based lacquer, Pall-X Pure offers exceptional wear resistance, perfect for both residential and commercial settings.
  • Eco-Friendly Solution: Pall-X Pure is low in VOCs, aligning with modern sustainability goals while delivering outstanding performance.
  • Tailored Results: The option to combine Pure or White primer with the lacquer allows you to customise the finish to suit different types of wood, especially older or more challenging surfaces.

Transform Your Floors with Pall-X Pure

If you’re looking to preserve the natural beauty of your wood floors while adding a protective layer that lasts, Pall-X Pure is the perfect choice. Its ability to maintain a freshly sanded look, combined with its durability and eco-friendliness, makes it a standout option for modern interiors.

Reach out to us today to learn more about this innovative finish and how it can transform your wood floors. Whether you’re restoring older pine boards or updating a contemporary space, Pall-X Pure delivers flawless results every time.

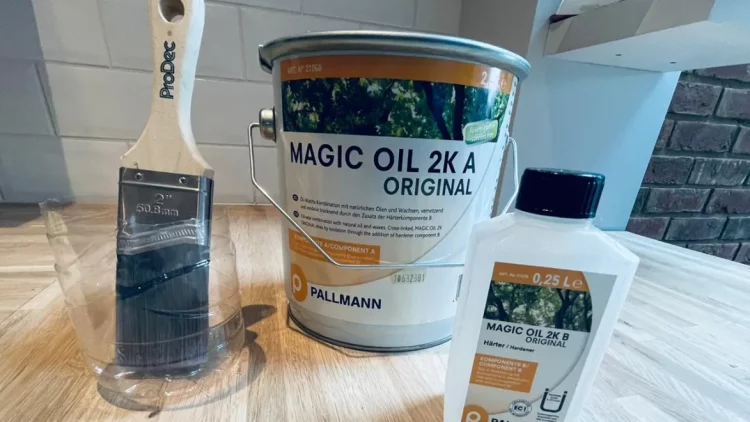
Magic Oil 2K Original Finish by Pallmann with brush and hardener for wood flooring
Written by Silver Lining Floor Care

Magic Oil 2K from Pallmann

The Natural, Durable Choice for Wood Floors

Magic Oil 2K is an ideal finish for clients seeking a warm, natural look that enhances the wood’s character. This two-component oil deeply penetrates the wood, enriching its grain while creating a resilient surface for high-traffic areas.

Here’s what makes Magic Oil 2K stand out:

  • Natural Beauty: Magic Oil 2K brings out the wood’s grain, adding depth and warmth, creating a beautifully natural appearance that lacquer finishes cannot replicate.
  • Breathability: Unlike lacquer, which forms a hard top layer, 2K oils allow the wood to breathe, accommodating natural expansion and contraction, which helps prevent cracking.
  • Spot Maintenance: Magic Oil 2K can be refreshed with spot treatments, allowing for easy touch-ups in specific areas rather than a full refinish, which is both time-saving and cost-effective.
  • Durability in High-Traffic Areas: Formulated for tough environments, Magic Oil 2K is resilient, handling daily use with ease and providing a high level of protection.

Disadvantages of Oil Finishes (With Minimal Impact for 2K Oil)

  • Maintenance Needs: While 2K oils require less frequent maintenance than 1K oils, they still benefit from periodic re-oiling to keep the wood protected and looking its best. High-traffic areas may dull over time, so occasional reapplication is advised.
  • Softer Surface Compared to Lacquer: Even with its durability, an oil finish doesn’t provide the same surface hardness as a lacquer. Magic Oil 2K offers impressive resilience, but minor marks or signs of wear may appear sooner in very busy areas.
  • Lower Sheen Options: Like other oils, Magic Oil 2K offers a matte or low-sheen look rather than a high gloss, making it perfect for those seeking a natural aesthetic but less ideal for clients wanting a glossy finish.

Adding an Extra Coat for Enhanced Protection

Applying a second coat of Magic Oil 2K the day after the first application boosts both durability and richness. This approach builds up a thicker, wax-like layer that feels soft to the touch, offering enhanced resilience without sacrificing the natural look. For clients who want added protection with a smooth, low-sheen finish, this two-coat method is an ideal solution.

How 2K Oil Compares to Lacquer

Oil finishes like Magic Oil 2K penetrate the wood to create a “within-the-wood” effect, highlighting the grain and preserving the wood’s texture. In contrast, lacquer forms a hard, top-layer barrier. While lacquered floors require less frequent maintenance, they need full sanding for repairs, unlike oil, which allows spot reapplication.

In Summary

Magic Oil 2K offers the depth, warmth, and flexibility of an oil finish with the added durability of a 2K formula, making it ideal for high-traffic areas. It’s a low-maintenance option compared to traditional oils but may need periodic refreshing to maintain its look and protection. For clients who appreciate the natural, breathable qualities of oil and want enhanced durability, Magic Oil 2K is a practical, beautiful choice.

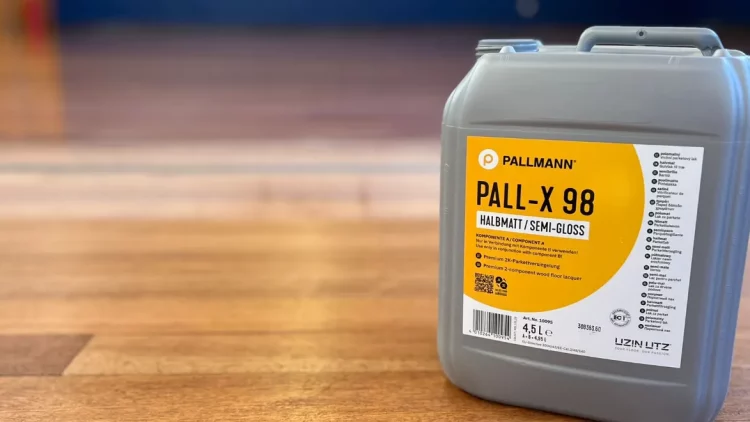
Pall-X 98 2k lacquer from Pallmann
Written by Silver Lining Floor Care

Clear Lacquer System with Pall-X 98 for Superior Protection

Pall-X 98: The Clear Lacquer System for Long-Lasting Floor Protection

When achieving a durable, refined finish, Pall-X 98 delivers exceptional protection with a premium look. Applied over a single coat of Pall-X 325 or Allbase primer, this 2K lacquer system is ideal for those seeking a hardwearing, easy-care surface that keeps wood floors looking their best. Here’s a quick overview:

  • Durability: Forms a hard, resilient layer, ideal for high-traffic areas
  • Surface Protection: Shields against scratches, spills, and wear
  • Maintenance: Requires only basic upkeep but benefits from periodic attention
  • Aesthetic: Provides a smooth, clear finish without altering the wood’s natural beauty

Benefits of Lacquer

Pall-X 98 creates a strong, scratch-resistant barrier over your wood floor, which protects it from the impact of foot traffic, pets, and everyday spills. Unlike oil finishes, which penetrate deeply into the wood grain, lacquer sits on the surface. This creates a sealed, smooth layer that requires minimal re-coating, which makes it a practical option for busy spaces.

Lacquered floors have the advantage of a single, protective coat that withstands wear well in the short term. Because it doesn’t penetrate like oil, it also resists staining more effectively, keeping the finish clear and even. For those interested in comparing oil and lacquer, you can check out our blog on finish differences here.

Downsides of Lacquer

While lacquer is incredibly resilient, it does have some limitations. If left unmaintained, soil, grit, and scratches can become ingrained in the lacquer over time. This can dull the finish and, if neglected for an extended period, may require complete sanding and reapplication to restore its original appearance. Unlike oil finishes, which allow for spot touch-ups, lacquer typically requires sanding across the entire surface for a full refresh.

Maintenance for Lasting Results

Regular cleaning and periodic maintenance are key to keeping your lacquered floors in prime condition. Routine dusting and gentle cleaning help remove abrasive particles that could otherwise scratch the surface. However, periodic maintenance is also essential for long-term durability. Over time, reapplying a protective layer can help prevent ingrained soil and scratching, keeping your floor looking polished and well-kept. For more on maintenance specifics, explore our maintenance and restoration guide and our basic floor cleaning rules.

Ongoing Support and DIY Reminders

We’re committed to helping our clients get the most out of their floors, which is why we send out regular reminders with DIY maintenance tips. These quick check-ins are designed to prompt you to give your floor the attention it needs to ensure it lasts beautifully over time. Think of these as gentle reminders to maintain your investment and prolong the life and look of your floors.

In Summary

Pall-X 98 offers a high-quality, durable finish that combines protection with a clean, natural look. With routine care and periodic professional maintenance, this lacquer can serve as a long-term solution for preserving the beauty of your wood floors.

Beautiful wooden floor with a natural matte finish achieved using Pall-X 333 primer and Pall-X Zero lacquer in a London home
Written by Silver Lining Floor Care

Pall-X 333 and Pall-X Zero

Pallmann Pall-X 333 oil-based primer for wood floorsPallmann Pall-X Zero 2K matte lacquer for wood floors

The Perfect Combination for Eco-Friendly, Durable, and Natural-Looking Floors

For those looking for a wood floor finish that combines a natural, grain-enhancing aesthetic with lasting durability, the Pall-X 333 oil-based primer paired with Pall-X Zero lacquer is the ideal system. This combination brings together the best of both finishes, highlighting the wood’s natural beauty while offering a robust, eco-friendly protective layer.

Key Benefits of the Pall-X 333 and Pall-X Zero System:

  • Enhanced Natural Look: Pall-X 333, an oil-based primer, penetrates the wood to enrich its natural grain, creating a warm and inviting foundation.
  • Durable, Eco-Friendly Protection: The VOC-free, solvent-free Pall-X Zero lacquer is applied over the primer, providing a hard-wearing, ultra-matte finish that’s both eco-friendly and long-lasting.
  • Forgiving Ultra-Matte Finish: This low-sheen lacquer helps mask minor scratches and marks, maintaining a clean look in high-traffic areas.

Maintenance Considerations

While this system is highly durable, periodic maintenance is still essential to ensure its longevity. Routine cleaning prevents soil and grit from dulling the surface, while periodic maintenance applications help sustain its protective qualities. If neglected, ingrained soil may eventually dull the lacquer, necessitating a full sanding to restore the finish. To keep your floor looking its best, refer to our maintenance and restoration guide and our basic floor cleaning rules.

Ongoing Support and Reminders

We support our clients with regular reminders and DIY maintenance tips to help keep floors in top condition. These simple prompts are designed to encourage proactive care, ensuring that your floor remains beautiful and well-protected over time.

In Summary

The combination of Pall-X 333 oil-based primer with Pall-X Zero lacquer offers a uniquely durable, eco-friendly solution that enhances wood’s natural grain with a matte, minimalistic look. This system is ideal for those wanting a long-lasting finish that looks beautiful and requires minimal maintenance, with a little help from our ongoing care tips.

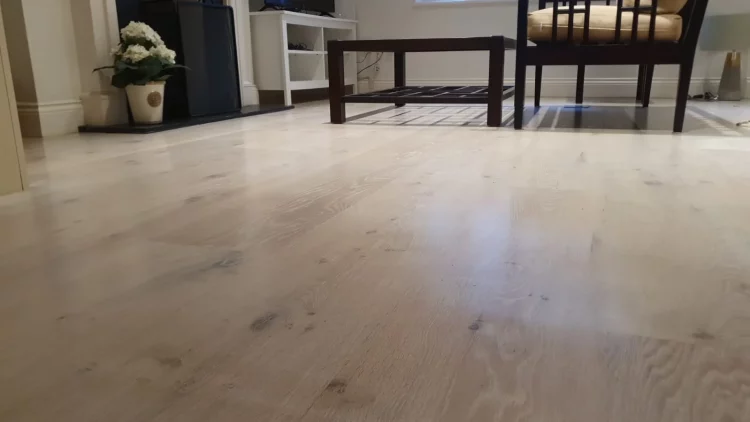
whitewashed wooden floor scandinavian effect in London
Written by Silver Lining Floor Care

Scandinavian Whitewashed Wooden Flooring

Achieving the Perfect Scandinavian Effect for London Homes

Whitewashed wooden floors have become increasingly popular among homeowners in London, and it’s easy to see why. They offer a sleek, modern look that brightens up any space, giving it that sought-after Scandinavian effect. The natural, minimalist aesthetic associated with Scandinavian interiors has made its mark on many design trends, particularly when it comes to flooring. In this blog, we will dive into the history of whitewash wooden flooring, discuss modern techniques, and provide solutions to achieve a long-lasting, beautiful white wood floor that fits perfectly into London homes.

Why Choose Whitewashed Wooden Floors?

Whitewashed wooden floors are favoured for their ability to create a light, airy atmosphere. The white tones reflect natural light, making spaces feel larger, brighter, and more welcoming. For homeowners looking to transform their interiors into modern, minimalist spaces, white wood floors are an ideal choice. The neutral palette also works beautifully in combination with a wide range of furniture styles and colour schemes, offering versatility and timeless elegance.

Benefits of Whitewashed Wooden Floors:

Aesthetic Appeal: Whitewashed floors contribute to the clean, modern Scandinavian look.

Space Amplification: Lighter floors help reflect natural light, making rooms appear larger.

Timeless Design: The neutral colour works well with any interior style, from modern to rustic.

Calming Atmosphere: White floors evoke a sense of calm, perfect for creating a peaceful home environment.

The Scandinavian Effect: What Makes It So Popular?

The Scandinavian effect is all about simplicity, functionality, and natural beauty. It stems from a lifestyle that embraces minimalism, focusing on the essentials while creating warmth and comfort in every aspect of the home. One of the key elements of Scandinavian design is white wood floors, which help to open up spaces and make them feel uncluttered and tranquil.

In London, where homes often face gloomy weather, the Scandinavian effect has become particularly appealing. Whitewashed wooden floors brighten up interiors and make them feel more welcoming. Whether it’s a contemporary apartment or a classic Victorian townhouse, white wood floors can fit seamlessly into any London home.

The Traditional Whitewashing Technique: Lye and Soap

Historically, Scandinavian whitewashed floors were achieved using lye and soap. This method, while effective at creating that coveted Scandinavian look, is extremely labour-intensive and high-maintenance. The floors need to be re-soaped frequently to maintain their pristine appearance—sometimes as often as every month or week!

Why the Traditional Method Isn’t Practical:

High Maintenance: Lye and soap require constant upkeep to maintain the floor’s white colour.

Fragility: The finish is not durable and can easily be worn down in high-traffic areas.

Time-Consuming: Modern families and busy Londoners simply don’t have the time to constantly maintain their floors.

While the traditional method may have worked for Scandinavian homes centuries ago, today’s homeowners are looking for more durable and low-maintenance solutions. Modern life, particularly in a bustling city like London, requires a finish that offers both beauty and practicality.

Modern Techniques for Whitewashed Wooden Floors

Luckily, there are modern alternatives to the traditional lye and soap method that are much more durable and easier to maintain. At Silver Lining Floor Care, we recommend using a two-component oil-based white stain like Pall-X 333 White. This product is specially formulated to deliver the Scandinavian effect without the hassle of constant maintenance.

However, it’s important to note that Pall-X 333 White cannot be left unfinished. It requires an additional protective layer to ensure the white pigment holds up over time. For low-traffic areas like bedrooms, we recommend applying at least one coat of Magic Oil to seal and protect the finish. In high-traffic areas such as kitchens, hallways, or stairs, a stronger protective layer is necessary. We recommend using a two-component lacquer, such as Pall-X Pure, to ensure maximum durability and protection for the white pigment.

Why Pall-X 333 White Is the Best Choice:

Durability: The two-component system includes a hardener, making the finish much more resilient.

Deep Penetration: The oil penetrates the wood, enhancing the grain and creating a luxurious finish.

Requires a Protective Topcoat: Always seal with Magic Oil for low-traffic areas or Pall-X Pure for high-traffic areas.

Low Maintenance: Unlike traditional finishes, Pall-X 333 White, when properly sealed, requires minimal upkeep.

The oil not only adds a beautiful white tint but also enhances the natural beauty of the wood grain. With the right protective topcoat, it’s the perfect way to achieve a Scandinavian whitewash effect that’s both elegant and practical for London homes.

The Durability of White Pigment: Consider the Room

As previously mentioned, white pigment is the least durable of all pigments, so protecting it with the appropriate finish is essential to ensure its longevity. The level of traffic in the room will dictate which topcoat to use.

Bedrooms and Low-Traffic Areas: In spaces like bedrooms, where there’s little foot traffic, Pall-X 333 White can be sealed with Magic Oil for sufficient protection. This will maintain the elegant whitewash look while providing adequate durability.

High-Traffic Areas (Kitchens, Hallways, Stairs): In areas with high foot traffic, an oil finish alone won’t offer enough protection. For these spaces, we recommend applying two coats of Pall-X Pure, a two-component lacquer, which provides robust, long-lasting protection for the white pigment. If you prefer a bit of sheen, you can opt for Pall-X 98 in satin.

Why Choose Pall-X Pure or Pall-X 98 for High-Traffic Areas:

Essential for Protecting White Pigment: White floors in high-traffic areas need the extra protection provided by lacquer.

Matte or Satin Finish Options: Choose between a matte or satin finish depending on your aesthetic preferences.

Long-Lasting Protection: Lacquers like Pall-X Pure and Pall-X 98 are designed to keep your whitewashed floors looking beautiful for years, even in the busiest areas of your home.

Achieving the Brushed Effect for a Textured Finish

If you’re looking to take your Scandinavian whitewashed floors to the next level, consider incorporating a brushed effect. This technique adds texture to the wood, giving it a more natural and rustic appearance, which perfectly complements the minimalist Scandinavian design. It can only be done as part of the wood floor sanding process.

Benefits of the Brushed Effect:

Adds Texture and Depth: The brushing process enhances the natural grain of the wood, creating a more dynamic appearance.

Increased Durability: The brushed effect can help hide small scratches and wear, making it a practical choice for busy London homes.

Unique Look: No two brushed floors are alike, giving your home a distinctive and custom feel.

At Silver Lining Floor Care, our Premium Plus package includes the brushed effect as part of the refinishing process. This is perfect for clients who want a floor that’s not only beautiful but also has a unique texture and finish.

Whitewashed Wooden Floors in London: Why It Works

Whitewashed floors are a particularly good choice for London homes. The city’s often-overcast skies mean that natural light can be scarce, especially in the winter months. By installing white wood floors, homeowners can maximize the light that enters the home, creating a brighter, more uplifting environment.

Why Londoners Love Whitewashed Floors:

Brightens Interiors: The reflective quality of white floors makes rooms feel lighter and more spacious.

Perfect for Small Spaces: Many London homes are on the smaller side, and white floors help create the illusion of more space.

Matches London’s Minimalist Aesthetic: As urban living shifts toward minimalism, Scandinavian design and whitewashed floors have become increasingly popular.

How to Maintain Your Whitewashed Wooden Floor

While modern finishes are far less maintenance-intensive than traditional methods, it’s still important to properly care for your whitewood

floors. Here are a few tips for keeping them looking their best:

Daily Care:

Sweep or vacuum regularly to remove dust and debris.

•Use a microfiber mop for light cleaning.

Monthly Care:

•Consider using a refresher product specifically designed for white floors to keep them looking vibrant.

Annual Care:

•Depending on wear, you may need to apply a maintenance coat to protect the finish.

Choosing the Right Finish for Your Home

When deciding on the best finish for your home, consider factors such as room usage, traffic levels, and your personal design preferences. Whether you prefer a natural matte finish or a satin sheen, or whether your floors are in a low-traffic bedroom or a busy kitchen, there’s a whitewashed flooring solution that will suit your needs.

Conclusion

Incorporating the Scandinavian effect into your London home with whitewashed wooden floors is a fantastic way to modernize your space while maintaining a timeless elegance. With modern finishes like Pall-X 333 White, Pall-X Pure, and Pall-X 98, you can achieve the beauty of white wood floors without the headache of constant maintenance. Plus, by opting for additional features like the brushed effect, you can create a truly unique, luxurious floor that will stand the test of time.

If you’re based in London and looking to transform your home with a whitewashed floor, contact us at Silver Lining Floor Care to discuss the best options for your space. We’ll help you achieve the Scandinavian look you’ve been dreaming of with a finish that’s built to last.

 

contat uș

Floorboards repairs in London
Written by Silver Lining Floor Care

What Lies Beneath Wooden Floorboards?

Hidden Elements Under Floorboards

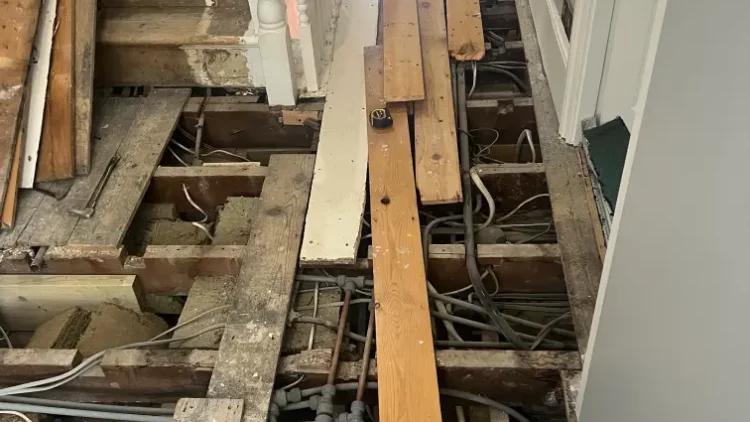
Underneath wooden floorboards, you can find:

  • Joists
  • Water pipes
  • Electrical cables
  • Soil (if it’s the ground floor)
  • The ceiling of the room below (if it’s an upper floor)
  • A lot of empty space (and perhaps even a bit of “dark matter”)

under floorboards

Hidden Elements Under Floorboards

Underneath wooden floorboards, you can find:

  • Joists
  • Water pipes
  • Electrical cables
  • Soil (if it’s the ground floor)
  • The ceiling of the room below (if it’s an upper floor)
  • A lot of empty space (and perhaps even a bit of “dark matter” humorously speaking)

The Reality of Restoring Floorboards

We often receive requests to restore floorboards. A common part of these inquiries is, “There are a few loose boards that JUST need securing.” However, it’s never just a simple fix.

The Risks Involved

There’s a significant risk of damaging something underneath if you blindly screw or nail the boards down. If you’ve done it yourself at home without incident, consider yourself lucky. This is a rare task for most homeowners, but it’s our daily routine, and we cannot afford to take those risks. The math doesn’t lie.

Proper Procedure for Floorboard Restoration

To properly address this issue, we need to:

  1. Lift the floorboards
  2. Ensure there’s support underneath
  3. Verify there’s enough space for a screw or nail

Remember, we’re often dealing with boards that are 50, 70, or even 100 years old, and there’s a high chance they will break during the lifting process. What seems like a 5-second job can quickly turn into a more complex task that involves buying a new board, cutting it to size, and securing it properly.

A Word of Caution

Next time you ask for a quick fix, please keep in mind it might not be as simple as it seems. If you want to do it yourself, either take a chance or inspect it properly first. Typically, landing areas are junctions for these concerns, but this issue can also occur in other rooms.
 

contat uș

wavy floorboards
Written by Silver Lining Floor Care

Common Wood Floor Sanding Challenges

Understanding the Challenges of Wood Floor Sanding

Restoring wood floors is an art that balances preservation with improvement, but some challenges lie beyond the control of even the most skilled professionals. Here are several issues that homeowners should be aware of before starting a restoration project:


Stains and Contamination

contamination on wooden floors

contamination that appeared after applying a coat of primer

Deeply embedded stains in wood floors often present significant restoration challenges. While superficial stains can sometimes be sanded away, those that penetrate deeper into the wood may not be completely removable. Continuous sanding in an attempt to remove such stains could risk damaging the wood veneer, leading to an uneven or shallow surface.

Unexpected stains might also emerge after applying the first coat of finish, potentially caused by residues such as primer or other chemicals used in prior treatments. These areas might initially appear lighter but can sometimes fade as the finish fully dries.

Urine Damage

Particularly for pet owners, urine stains pose a unique problem. A single accident on the floor might be cleaned effectively, but repeated incidents in the same area can saturate the wood, embedding the odour and contamination deep within. While the smell can often be neutralized, the underlying damage to the wood might be irreversible.

Risks of Sanding Through Wood Veneer

Engineered wood floors feature a thin layer of wood veneer which varies in thickness and can pose a significant challenge during restoration. If your floor has been sanded previously, it can be difficult to determine the remaining thickness of the veneer. During the sanding process, there’s always a risk of accidentally sanding through this layer, which may result in an uneven or aesthetically displeasing appearance.

As professional floor sanders, we always aim to remove only the minimal amount of wood necessary to strip old finishes and smooth the surface. We take great care to assess the condition of the wood and avoid deeper sanding that could compromise the veneer. It’s important to note that wood veneers can range from as thick as 8mm to as thin as 1mm, making each restoration project unique in its approach and potential risks.

Paint Touch-Ups to Skirting Boards

skirting damage during sanding

skirting damage during sanding

During the floor sanding process, achieving a completely restored look often involves getting close to the edges of your room. This requires the use of heavy-duty sanding equipment, which can sometimes damage skirting boards. To ensure a seamless finish, these areas might need subsequent paint touch-ups.

If you’re planning a full house renovation, we highly recommend scheduling paint touch-ups for your skirting boards after the sanding is completed. This allows for any accidental damage from the sanding equipment to be corrected effectively. Additionally, if there is silicone sealant between your skirting boards and the floor, it’s almost certain that adjustments will be needed post-sanding to maintain a clean and polished appearance

Woodworm Damage in Old Pine Floors

wood worm damage

woodworm damage

wood worm damage

woodworm damage

When restoring old pine floors, the sanding process may reveal damage caused by woodworms. Unfortunately, it’s impossible to predict the extent of woodworm damage beneath the surface until the floor is sanded. If extensive damage is uncovered, the affected planks might need to be replaced entirely, which can add to the overall scope and cost of the project.
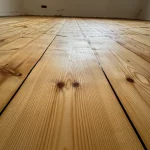
For less severe cases, we have the option to fill the damaged areas with wood filler, which can help stabilize and smooth the surface. Alternatively, some clients choose to leave minor woodworm damage visible, as it can contribute to the rustic charm and character of the floor. This choice depends on the desired aesthetic and the structural integrity required for your space.
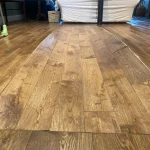
Managing Expectations with Green or Patchy Wet-Looking Floorboards

green stains on old floorboards

green stains on old floorboards

green stains on old floorboards

green stains on old floorboards

green stains on old floorboards

green stains on old floorboards

green stains on old floorboards

green stains on old floorboards

Restoring century-old floorboards often brings unexpected surprises, such as patchy or greenish appearances that become evident after sanding or finishing. It’s important to remember that these are historic floors with inherent imperfections, which are part of their charm and history. Achieving the look of a brand-new floor is not always possible with such aged materials.

Rearranging floorboards to conceal discoloured areas under furniture is a time-consuming and delicate process, with the risk of damaging the boards during removal. Adding extra days to accommodate these changes isn’t always feasible, given the tight schedules of professional restoration teams.

For those seeking perfection, it’s advisable to discuss potential issues and solutions after the initial sanding reveals the floor’s condition. Planning for additional repair and finishing sessions might be necessary, though this can extend the duration of the project significantly. Understanding and accepting these aspects of historic floor restoration upfront can help set realistic expectations and ensure satisfaction with the end result.

Patchy and Wet-Looking Boards

When dealing with century-old floorboards, inconsistencies like patchy colouring or a wet look after sanding are common. These are often inherent to the age and history of the wood, adding character but also presenting restoration challenges.

Addressing Post-Restoration Board Breakage

floorboard with no support

floorboard with no support

Despite meticulous attention during restoration, boards may sometimes crack afterwards due to insufficient underlying support, an issue not always visible during initial restoration efforts. It’s important to understand that floor restoration specialists can only address visible issues. We thoroughly inspect and work on every inch of the floor with heavy sanding equipment, but hidden problems beneath the boards, such as joist conditions, typically remain unchecked unless specifically included in the service agreement.

Board breakage post-restoration is relatively rare and often unforeseen. Should such an issue occur, the repair process is intricate and time-consuming. It involves removing the damaged filler and planks, installing new ones, re-sanding these areas, and then refilling the gaps—usually with slivers or Sikaflex, which require 24-48 hours of drying time. Additionally, applying finishing products like a primer and multiple coats of lacquer, each necessitating further drying time can extend the repair over several days.

Understanding the Odd Wavy Floorboards

wavy floorboards

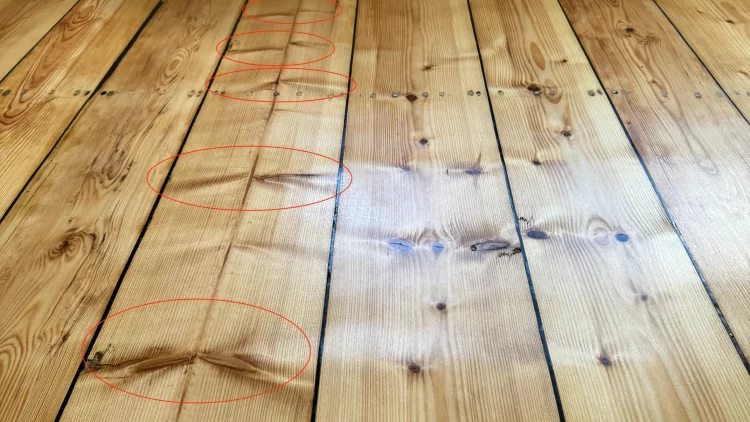
photo 1. See the pattern of knots on this plank – circled in red

wavy floorboards

wavy floorboards

When restoring pine floorboards, it’s helpful to see the difference between regular planks and those with knotted patterns that can appear wavy after sanding. To better understand the visual impact of knotted wood on your floor’s appearance, please refer to Photo 1. Focus on the areas circled in red to see how the knot patterns contribute to the unique texture and character of the restored floor.

These images illustrate how the sanding process accentuates the knots, creating a textured effect that can be visually distinct from other planks with random knot patterns.

By referring to these photos, you can appreciate the unique beauty and rustic charm that knotted planks bring to a restored wood floor, as well as make more informed decisions about the aesthetic you desire for your home. This approach ensures that the natural features of the wood are both understood and appreciated, aligning expectations with the intrinsic properties of pine flooring.

Floor Delamination Explained

Delamination of flooring can occur due to several reasons, such as manufacturing defects or exposure to water damage. While relatively rare, these issues often become apparent only during the sanding stage of floor restoration. This discovery underscores the intricate challenges involved in bringing a floor back to its best condition.

Crowning and Bowing in Restored Floors

massive moisture issue

massive moisture issue

Crowning and bowing of floorboards can occur if there is an issue in the basement, such as moisture seeping up through the subfloor. This is particularly likely if there is no moisture barrier, like a damp proof membrane (DPM), installed. While minor moisture problems may resolve naturally as the boards dry and potentially regain their original shape, severe cases might lead to permanent damage that is not reversible.

Soil and Bitumen Challenges in Floor Gaps

When filling the gaps in old floors using sawdust and special resin, bitumen used as an old adhesive can pose a challenge. Over time, bitumen may rise to the surface, interacting with the moisture in the filler. This issue is often unforeseen by floor sanding specialists, as the bitumen’s behaviour under new conditions can be unpredictable.

Additionally, these gaps often harbour significant amounts of soil. While most of the soil is dry and can be removed with a vacuum cleaner, some of it becomes sticky and attracts water-soluble soils that are harder to manage. These residues can rise to the surface along with the gap filler. In cases where the gaps are particularly thin, completely removing this embedded soiling can be impractical. This highlights the complexities of dealing with legacy materials and contaminants during floor restoration.

Conclusion

Wood floor restoration can significantly enhance the beauty of a home, but it comes with its own set of challenges. While these situations are rare, understanding potential issues like deep stains, veneer damage, and moisture effects is essential for setting realistic expectations. This knowledge facilitates a smoother process for both homeowners and professionals. Remember, some imperfections can add unique character to your floors, embodying the history and natural beauty of the wood. It’s important to note that as floor sanding specialists, we mention these potential complications not because they are common, but because they can manifest unexpectedly and are beyond our control.


contat uș

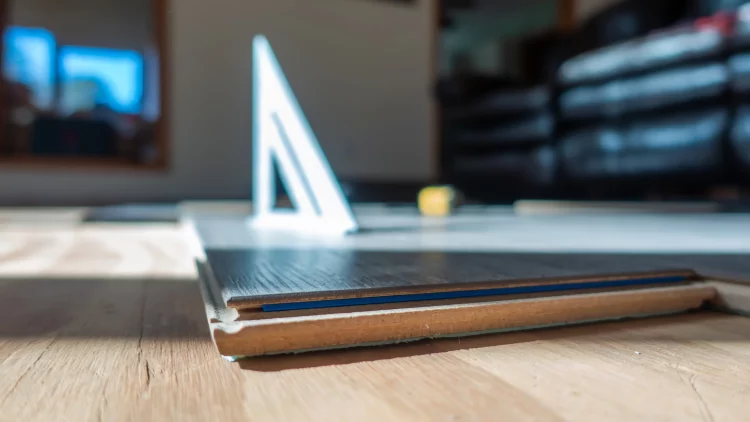
Can You Sand Engineered Wood Flooring
Written by Silver Lining Floor Care

Can You Sand Engineered Wood Flooring?

Understanding Engineered Wood Flooring

Before diving into the intricacies of sanding engineered wood flooring, it’s crucial to understand what sets it apart from traditional hardwood. Engineered wood floors comprise multiple layers, with a veneer of real wood on the top. This construction enhances stability and resistance to environmental changes, making it a popular choice for many homeowners.


The Possibility of Sanding Engineered Wood Floors

Evaluating the Thickness of the Top Layer

The key factor in determining whether you can sand engineered wood flooring is the thickness of the top hardwood layer. Floors with a thicker veneer can often be sanded and refinished multiple times, much like solid hardwood. However, if the veneer is too thin, sanding is not advisable as it could damage the flooring beyond repair.

The Role of Professional Assessment

Given the complexity of this task, seeking professional advice is paramount. Experts at Silver Lining Floor Care can assess your engineered flooring to determine if sanding is a viable option. Our team has the expertise to evaluate the condition of your floor and recommend the best course of action.

The Sanding Process: What to Expect

If your engineered wood flooring is deemed suitable for sanding, here’s what the process entails:

Preparation and Sanding

Our team begins with a thorough assessment, ensuring the floor is clean and free of any fixtures that might impede the sanding process. Using specialized equipment, we carefully sand the top layer of the wood, removing scratches, dents, and old finish.

Refinishing for a New Look

After sanding, you have the opportunity to refinish your floor. This step not only enhances the floor’s appearance but also provides an added layer of protection. From natural looks to darker stains, refinishing can transform your space entirely.

The Benefits of Sanding Engineered Wood Flooring

Sanding engineered wood floors can revive your space, making floors look brand new. It’s an eco-friendly alternative to complete floor replacement, reducing waste and extending the life of your flooring. Additionally, it’s a cost-effective solution to improve your home’s aesthetics and value. Above all we recommend maintaining your floors so they can last much longer.

Final Thoughts: Is Sanding Right for Your Engineered Wood Flooring?

“Sanding engineered wood flooring” is a question with a nuanced answer. It depends on several factors, including the thickness of the veneer and the floor’s overall condition. At Silver Lining Floor Care, we’re committed to providing you with the information and services needed to make informed decisions about your flooring.

For more insights and professional flooring solutions, visit our home page. Our experts are here to guide you through every step of the process, ensuring your engineered wood flooring remains a lasting and beautiful component of your home.

contat uș

Floor Sanding and Polishing. Knowing the Right Time
Written by Silver Lining Floor Care

Floor Sanding and Polishing: Knowing the Right Time

Welcome to our latest blog post where we delve into the essential process of floor sanding and polishing, and importantly, when it’s time to undertake this task for your wooden floors. At Silver Lining Floor Care, we understand the importance of maintaining the beauty and durability of your wooden floors, which is why we’re here to guide you through understanding when and why floor sanding and polishing are necessary.


Understanding Floor Sanding and Polishing

Floor sanding is the process of removing the old finish and any imperfections from your wooden floor using specialized machinery, such as belt sanders. This process is crucial for preparing the wood for a new finish, ensuring it’s perfectly smooth and ready to be treated.

Polishing, or buffing, often follows sanding. It involves using higher grades of sandpaper to achieve a smooth surface. However, polishing can also refer to a maintenance cleaning process for floors that don’t necessarily need full sanding. This approach, known as ‘buff and coat,’ can enhance the appearance of your floor, although it won’t remove deep scratches.

The Importance of Timely Maintenance

One common misconception is that polishing is only a deep cleaning process. While it’s true that floors can appear dull after deep cleaning and might require an extra coat of lacquer or oil, timely maintenance is critical. Just like dental hygiene, where you wouldn’t wait for your teeth to show signs of neglect before cleaning them, your wooden floors shouldn’t be left until they’re visibly worn or damaged. Postponing maintenance can lead to irreversible damage, making more intensive and costly procedures like full sanding inevitable.

Why You Shouldn’t Delay Floor Care

The protective layer on your wooden floors is there to prevent moisture absorption. Without it, wood can darken and deteriorate quickly. Moreover, with the prevalence of engineered wood planks, there’s a limit to how many times your floor can be sanded before needing replacement. Regular maintenance is key to extending the life of your floors and keeping them looking their best.

Silver Lining Floor Care: Your Partner in Floor Maintenance

Choosing us for your floor care needs means you’ll never have to worry about remembering to maintain your floors. Once we’ve completed a job, we’ll add you to our 6-month reminder list for DIY maintenance, ensuring your floors remain in top condition year-round.

In conclusion, understanding the importance of timely floor sanding and polishing is crucial for maintaining the beauty and longevity of your wooden floors. Whether it’s full sand and polish or a simple buff and coat, these procedures protect your floors from damage and keep them looking their best. Remember, regular maintenance is far less costly than delaying care until problems become apparent. Trust Silver Lining Floor Care to keep your floors shining bright, and feel free to reach out for any advice or services you might need to keep your wooden floors in pristine condition.

contat uș

Free quote